Stages of the Textile Coloration/wet Process
Pre‑Treatment
Think of pre-treatment like getting a wall ready to be painted. If you skip this step or do a poor job, all the good dye and careful technique in the world won’t save you downstream—the color will be patchy, dull, or prone to washing out. Pre-treatment is there to solve one big problem: raw textile fibre, straight off the loom or knitting machine, is covered in waxes, oils, natural pigments and processing residues that stop dye getting in evenly. Each of the stages below is meant to peel off another layer of that interference.
Pre‑treatment prepares the textile material to receive dye evenly and permanently.
a) Sizing (mainly for woven warp yarns)
- Temporary protective coating (starch, PVA, CMC)
- Prevents yarn breakage during weaving
b) Desizing
- Removes sizing materials
- Essential for uniform wet processing
- Methods: Enzymatic, oxidative, hot washing
c) Scouring
Desizing takes off the size, but the fibre is still carrying its natural baggage of waxes, oils, pectin (a natural plant gum found in cotton) and general dirt picked up during processing. Scouring is the deep clean stage that takes it all off. For cellulosic fibres such as cotton this is generally carried out by treating the fabric with caustic soda and wetting and chelating agents at high temperatures - usually in the range of 95-105 C. Synthetic fibres need a softer touch. The reward for doing this right is a fabric that is truly hydrophilic (water-loving), meaning even dye uptake and virtually no "barré" — the technical term for those ugly, unwanted stripes that appear when dye is absorbed unevenly across the width of the fabric.
- Removes natural and added impurities:
- Wax, oil, pectin, dirt
- Improves absorbency and dye penetration
- Usually done with alkali + surfactants
d) Bleaching
- Removes natural color from fibres
- Produces required whiteness
- Common agent: Hydrogen peroxide (H₂O₂)
e) Mercerizing (optional – cotton)
- Treatment with strong caustic soda under tension
- Improves:
- Dye uptake
- Color brightness
- Fabric strength and lustre
- Dimensional stability
Core Dyeing Flow
Sizing → Desizing → Scouring → Bleaching → (Mercerizing for cotton) → Dyeing → Finishing → Finished Product
Parallel lines: Wastewater collection → Equalization/Neutralization → ETP (biological/chemical polishing as required).

Sizing (mostly for warp yarns)
Purpose: Add a protective film (starch/synthetic polymers) to reduce breakage during weaving.
Controls: Size add‑on %, viscosity, penetration; use low‑formaldehyde or formaldehyde‑free agents.
Desizing
Goal: Remove size to restore absorbency before wet processing.
Methods: Enzymatic (amylase for starch), oxidative (for PVA blends), hot wash.
KPIs: Desizing efficiency (%), wetting time, absorbency <3 s (drop test).
Scouring
Goal: Remove natural impurities (waxes, pectins) and processing oils.
Chemistry: Caustic soda + wetting/chelating agents at 95–105 °C (cellulosics); milder for synthetics.
Outcomes: Hydrophilicity, uniform dye uptake, minimal barre.
Bleaching
Goal: Achieve target whiteness and remove color bodies.
Agents: Hydrogen peroxide (most common), alternatives like peracetic acid; stabilizers to control decomposition.
KPIs: Whiteness index (CIE), residual peroxide (must be neutralized to avoid dye shade loss).
Mercerizing (cotton/viscose, optional but valuable)
Effect: Caustic treatment under tension causing fibre swelling → higher lustre, strength, dye affinity, dimensional stability.
Windows: 18–22 °Bé NaOH, room temperature, controlled dwell + immediate washing/neutralization.
Dyeing
Select dye class by fibre, end‑use fastness, cost and compliance.
Choose exhaust, pad‑batch, pad‑steam, thermofix or garment dye based on product/machine.
Finishing
Mechanical: Stenter, compacting, sueding/raising, calendaring.
Chemical: Softener (cationic/non‑ionic), resin/anti‑crease, moisture‑management finishes, antimicrobial (compliance‑checked), flame retardant (where applicable).
QA: Hand feel, GSM, shrinkage, skew/spirality, fastness panel.
Wastewater, Equalization & Neutralization
Equalization tank: Buffers pH/temperature/flow, avoiding shock loading of the ETP.
Neutralization: Acid/alkali dosing to pH 6.5–8.5 before biological treatment.
ETP: Primary (coagulation/flocculation), secondary (biological), tertiary (filtration/RO) per local discharge norms and buyer standards (e.g., ZDHC).
Standard Dyeing Curves & Operating Windows
Important: Always align with the dyestuff supplier’s TDS. The curves below reflect typical industrial practice for controlling levelness, fixation and fastness.
Reactive Dyeing on Cellulosics (Exhaust route)
Typical recipe levers:
Electrolyte (NaCl/Na₂SO₄) → promotes exhaustion.
Alkali (Na₂CO₃/NaOH) → triggers fixation.
Temperature: 40–95 °C depending on dye reactivity.
Curve (simplified):
- Wet‑out at 25–30 °C with wetting/levelling, 10–15 min.
- Salt addition in steps (2–3 portions, 10–15 min apart).
- Temperature ramp 1.5–2 °C/min to the chosen shade temp (40/60/90 °C—per dye brand). Hold 30–45 min.
- Alkali addition in steps, hold 30–45 min for fixation.
- Cooling to 60 °C, drain, then wash‑off sequence: rinse → soaping at 95 °C (anionic detergent/chelants) → multiple rinses until conductivity/colour in effluent stabilizes.
- Neutralize (if needed) and finish.

Critical controls: pH 10–12 during fixation, salt profile, full soaping (removes hydrolyzed dye), water quality (hardness).
Disperse Dyeing on Polyester (HT Jet/Winch)
Why: Disperse dyes diffuse into PET at high temperature (≈130 °C).
Curve (typical):
- Start at 45 °C, add dyes (dispersed slurry), dispersant/leveller; run 10–15 min.
- Ramp to 130 °C at ~1–2 °C/min; hold 30–60 min (depth dependent).
- Cool to 70 °C, drain.
- Reduction clearing at 70–80 °C: NaOH + sodium hydrosulfite (or eco alternatives); 15–20 min.
- Rinse, acid wash (pH ~5) if needed → softener and unload.

Critical controls: Temperature profile, dispersant level, oligomer management (filtering/cleaning), sublimation risk (downstream heat).
Acid Dyeing (Wool/Silk/Nylon)
Mechanism: Anionic dyes on cationic fibre sites at pH 2–5.
Curve (leveling‑type):
- Charge bath at 30–40 °C with water, wetting, acetic/formic acid (pH 4–5) and leveller/retarder.
- Add dye; convert to circulation for 10–15 min.
- Ramp to 95–100 °C, hold 20–40 min.
- Bath drop; rinse; adjust pH to neutral; softener as needed.
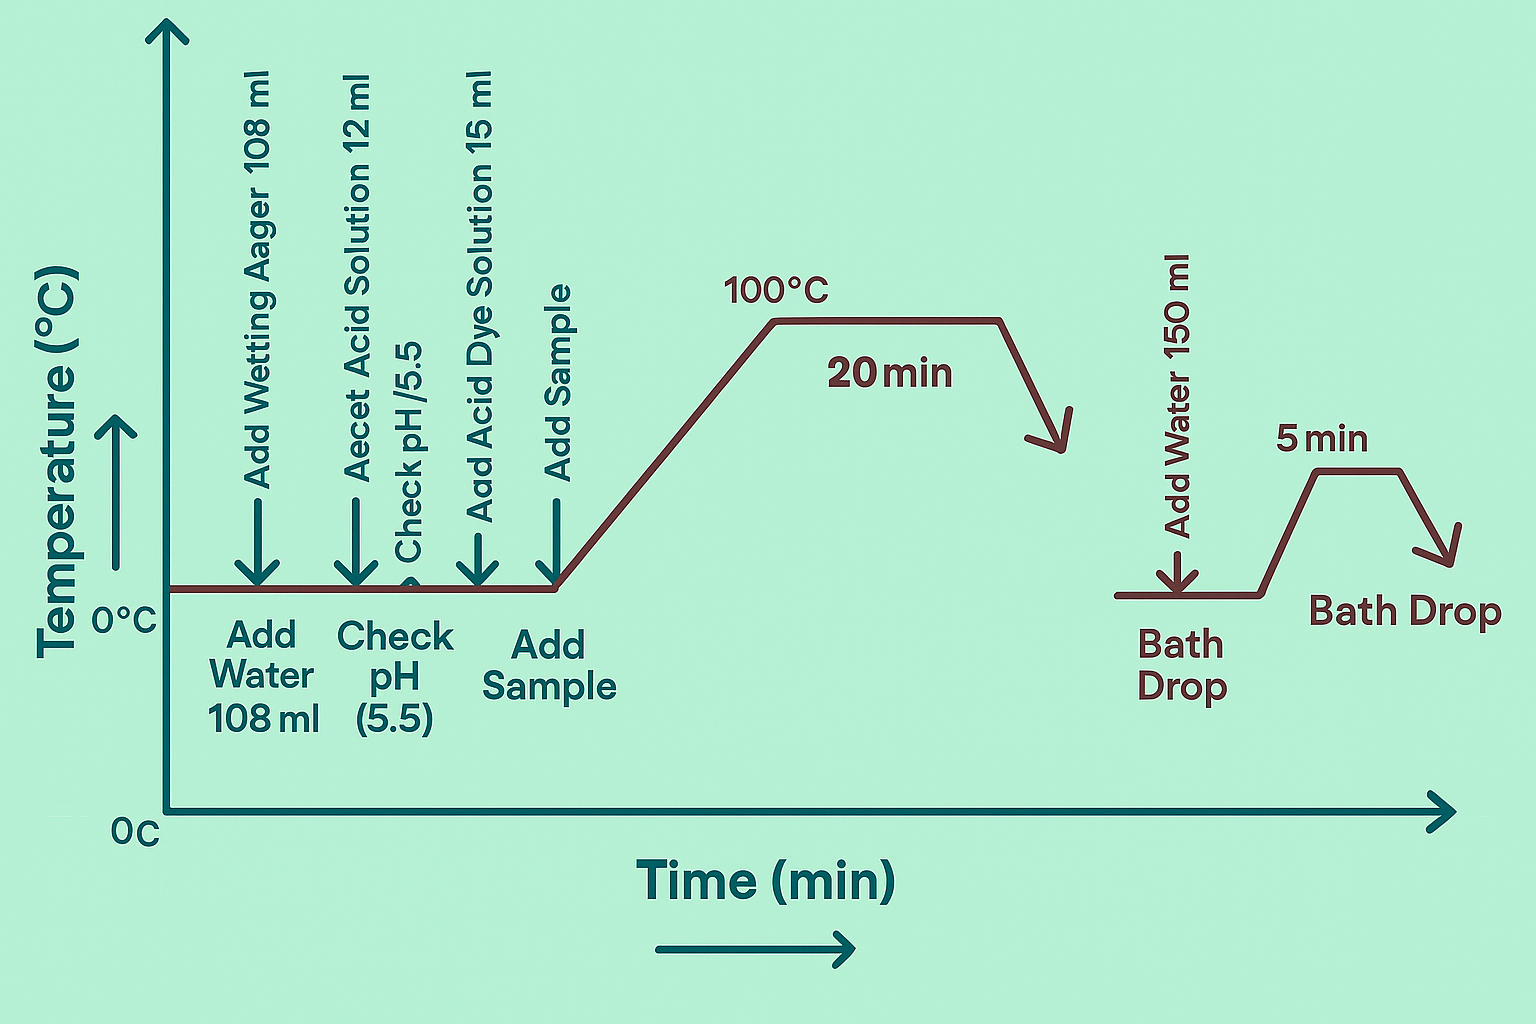
Critical controls: pH profile, gradual temperature rise, gas‑fading‑sensitive shades on nylon, avoid excessive exhaustion that harms levelness.
Vat Dyeing (Pad‑Steam/Continuous)
Mechanism: Dye is reduced to a leuco form, padded onto fibre, oxidized back to insoluble state inside fibre.
Continuous pad‑steam route (typical):
- Padder: Apply reduced vat dye liquor (NaOH + sodium dithionite), target pick‑up 70–80%.
- Drying chamber (moderate temp to avoid re‑oxidation before diffusion).
- Steamer at 101–105 °C for 30–60 s (diffusion).
- Oxidation (air/ H₂O₂ / sodium bromate systems).
- Soaping at 95–98 °C to develop brightness and remove unfixed dye.
- Rinsing/neutralizing, then finishing.
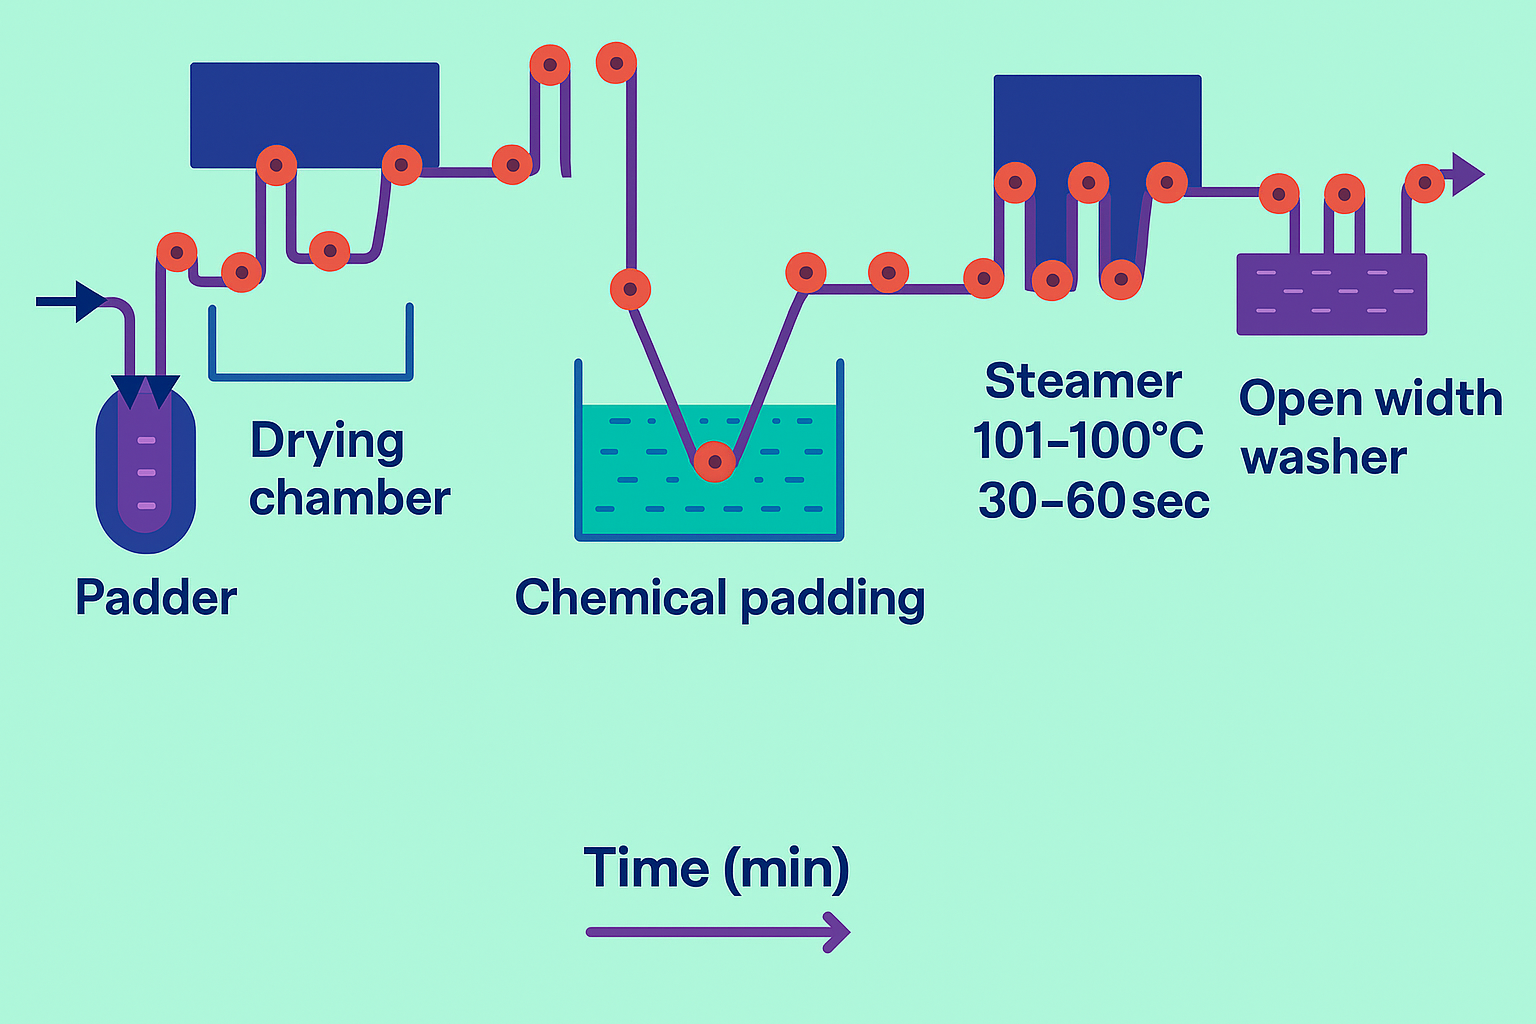
Critical controls: ORP (redox), rapid but controlled oxidation, thorough soaping, anti‑backstain agents for darks.
Stages of Dye Application
Color can be added at multiple product stages:
Fibre stage (solution/mass dyeing, dope dyeing) – pigments dispersed in polymer melt (PET/nylon) or tops dyeing for wool.
- Pros: Exceptional batch‐to‐batch shade consistency, excellent light/wet fastness, lowest water use in downstream.
- Cons: High MOQs, less shade flexibility.
Pros: Exceptional batch‐to‐batch shade consistency, excellent light/wet fastness, lowest water use in downstream.
Cons: High MOQs, less shade flexibility.
Yarn stage – hank, package, beam, space dyeing (see Section 4).
- Pros: Stripes, melanges, checks; excellent penetration.
- Cons: Extra process step before fabric; inventory complexity.
Pros: Stripes, melanges, checks; excellent penetration.
Cons: Extra process step before fabric; inventory complexity.
Fabric stage – winch, jet, jigger, pad‑batch/pad‑steam, foam dyeing (see Section 5).
- Pros: Highest flexibility and breadth of methods.
- Cons: Risk of barre/shade variation if greige variations exist.
Pros: Highest flexibility and breadth of methods.
Cons: Risk of barre/shade variation if greige variations exist.
Garment stage – garment dye, pigment overdye, denim garment processes.
- Pros: Fashion effects, small lots, quick response.
- Cons: Dimensional change control, trims compatibility.
Pros: Fashion effects, small lots, quick response.
Cons: Dimensional change control, trims compatibility.
Yarn Dyeing — Types & Best UsesThere are a number of machines and techniques involved in this, depending on the end product. When the color is applied at the yarn stage, there are several distinct types of machines to consider.
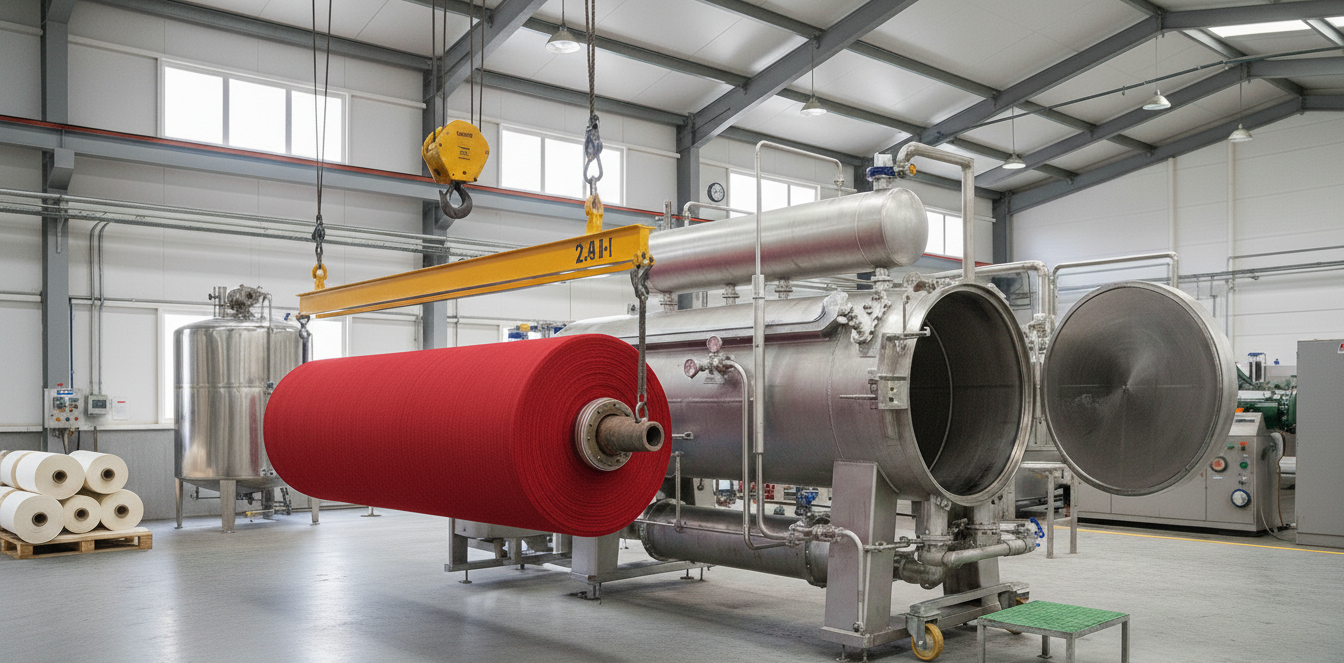
Hank Dyeing
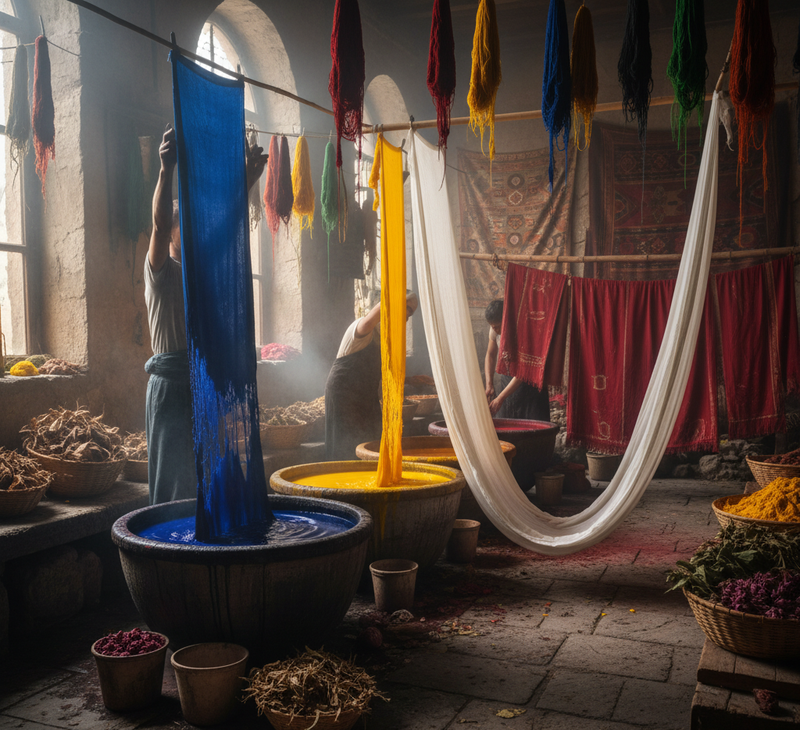
Hank dyeing is hanging loose hanks of yarn on sticks and circulating through the dye liquor. It gives excellent bulk and hand-feel and deep even penetration. This is the preferred choice for acrylic, wool and cotton yarns for sweaters and scarfs. The trade-off is lower productivity and the need for careful handling to avoid getting tangled up.
What: Loose hanks hang on sticks and circulate in liquor.
Advantages: Superior bulk/hand, deep and uniform penetration; ideal for acrylic/wool/cotton yarns for sweaters and scarves.
Considerations: Lower productivity; careful material handling to avoid tangling.
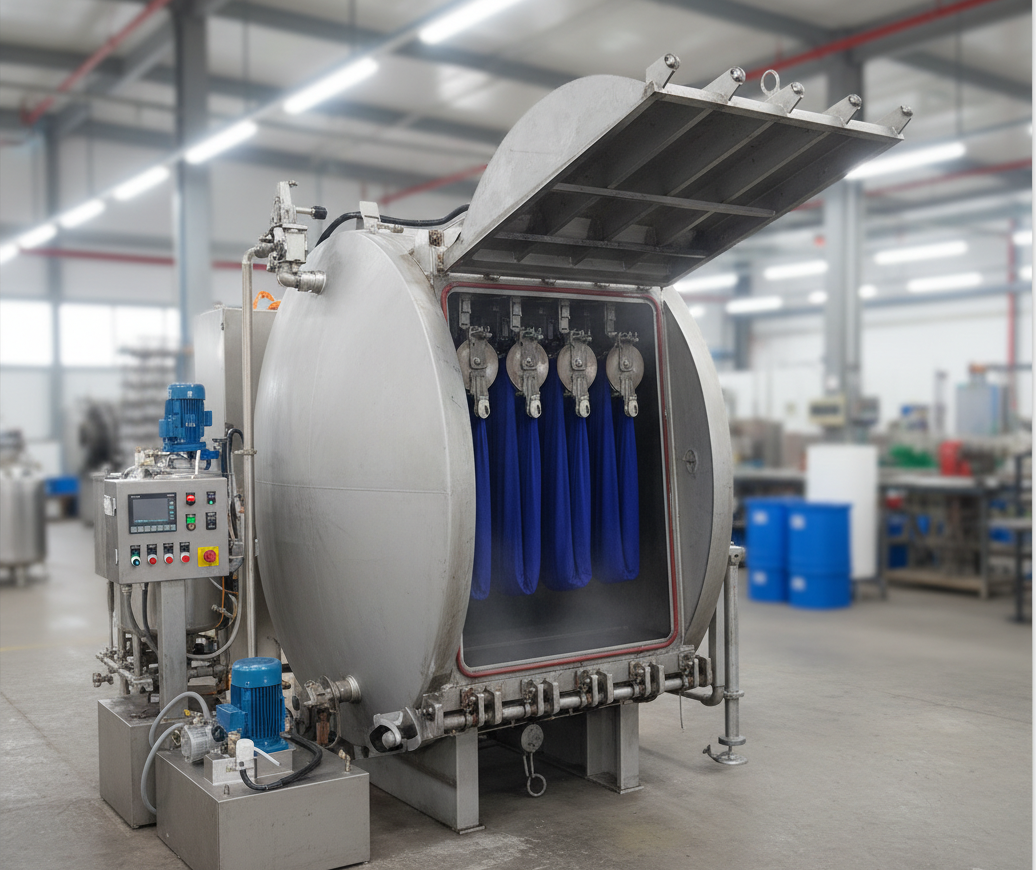
Package Dyeing
Package dyeing winds yarn onto perforated tubes and forces dye liquor through, inside out or outside in, under pressure. It is scalable, flexible and performs well on cotton, polyester and nylon with less labor and highly reproducible results. Success requires control of the winding density, periodic reversal of the direction of flow, management of the differential pressure and the ability to doff the finished packages without collapse.

What: Yarn wound on perforated tubes; liquor flows inside→out or outside→in under pressure.
Advantages: Scalable and versatile; good for cotton/polyester/nylon; lower labor; reproducible.
Controls: Winding density (cP), flow direction reversals, differential pressure, doffing without collapse.
Beam Dyeing (Warp Beam)
In beam dyeing a number of ends of yarn are wound on a large perforated beam and liquor is again forced through under pressure. This process is good for large production lots with good levelness and especially efficient for denim, shirting and jacquard or dobby woven fabrics. It is essential to maintain a uniform winding tension and the method has really been designed for woven warp yarns.
What: Many ends wound on a perforated beam; liquor flows through under pressure.
Advantages: Large lots, good levelness, efficient for denim, shirting, jacquard, dobby warps.
Considerations: Uniform winding tension critical; designed mainly for woven warps.
Space Dyeing
Space dyeing involves the application of color at intervals along the length of the yarn rather than uniformly, thereby creating a multicolor or sectional effect by means of spraying, jet application, printing or knit-deknit techniques. We see this in fashion yarns, athleisure accents and novelty sock designs.
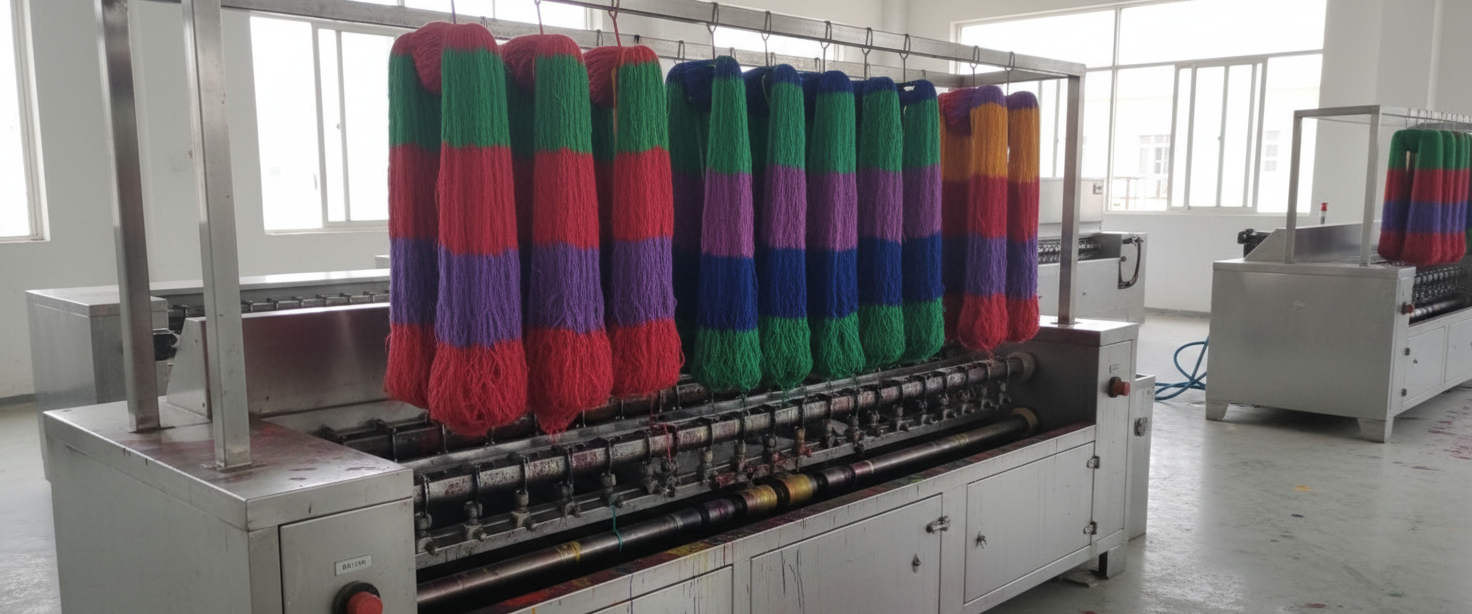
What: Intermittent application along yarn length to create multicolor/sectional effects.
Methods: Spray/jet, printing or knit‑deknit techniques.
Uses: Fashion yarns, athleisure accents, socks.
Fabric (Piece) Dyeing
Winch Dyeing
Winch dyeing passes the fabric in the form of rope over a rotating reel through the dye bath. The ratio of liquor to material is fairly generous, generally about 1:5 to 1:10. It is a gentle, low-tension method which is very suitable for knits and delicate fabrics. It works well on open structures but there is a real risk of permanent crease marks if the rope length and machine loading are not optimized.
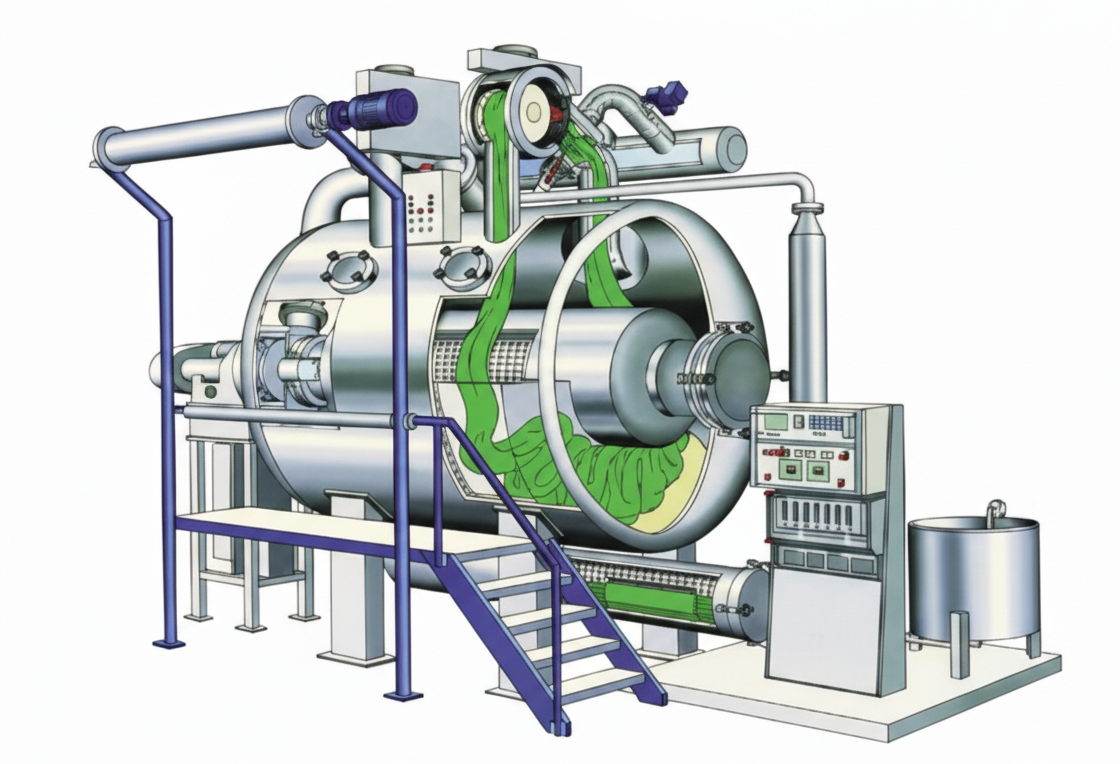
How it works: Fabric in rope form circulates over a winch reel through the dye liquor.
Best for: Knits and delicate fabrics (low tension).
Typical M:L: ~1:5 to 1:10 depending on machine.
Pros: Gentle handling, good for open structures.
Cons: Potential creases if loading/rope lengths are not optimized.
Jigger Dyeing
Jigger dyeing involves passing open width fabric back and forth between two rollers over a stationary dye bath. It is the preferred choice for open-width processing of woven fabrics such as satin and poplin, creating even tension and excellent levelness – especially for direct, reactive and vat dyes. Its main weakness is that if tension and edge control are not carefully controlled then there is a possibility of shade variation between the centre and the selvedge (fabric edge).
How it works: Open‑width fabric passes back and forth between two rollers over a stationary bath.
Best for: Wovens (e.g., satin, poplin) where open‑width is required.
Pros: Even tension, high levelness; good for Direct, Reactive, Vat.
Cons: Risk of center‑to‑selvedge variation; requires precise tension/edge control.
Foam Dyeing (Low‑liquor application)
Foam dyeing is a totally different process, whereby the dye liquor is converted into foam with a foaming agent and applied with a knife or slot coater, followed by a nip roller and then dried or steam cured. The major attraction is the dramatic reduction in water and energy consumption and effluent generation, making it ideal for pigment dyeing and some continuous reactive or vat processes. The key to success is controlling the stability of the foam, the size of the cells, the uniformity of pick-up of the foam on the fabric and the curing conditions thereafter.
How it works: Convert dye liquor to foam with a foaming agent; apply via knife/slot; pass through nip; then dry/cure or fix by steam.
Benefits: Lower water and energy, reduced effluent; suitable for pigment, some reactive/vat continuous processes.
Controls: Foam stability, cell size, pickup uniformity, cure conditions.
QA, Testing & Acceptance (What to Check)
Once the fabric is dyed and finished, it’s not just shipped on faith – it’s subjected to a battery of checks to ensure that it actually meets the standard it was supposed to.
Shade accuracy is determined against a physical or digital standard, usually under D65 light at 10 degrees observer angle (or whatever the buyer has specified) and the color difference is reported as a ΔE value. A full fastness panel tests color wash fastness (dry and wet rubbing, or crocking), perspiration fastness, light fastness, fastness to chlorinated water (important for swimwear and activewear) and resistance to sublimation (for polyester and disperse-dyed goods). In addition to colour, the physical characteristics of the fabric are also checked: weight (GSM), thickness, tensile and bursting strength, shrinkage, skew or spirality (the grain of the fabric has twisted out of true). Chemical residue screening is also conducted including pH, residual peroxide, free formaldehyde (if a resin finish was used) and APEO/NPEO surfactant residues (which should test non-detectable due to environmental restrictions). Finally, the fabric is manually inspected for levelness, barré, crease marks, staining and any spotting from softener application.
- Shade & ΔE vs standard (D65/10° or buyer‑specified).
- Color fastness panel: Washing, rubbing (dry/wet), perspiration, light, chlorinated water, sublimation (for PET/disperse).
- Physicals after dyeing: GSM, thickness, bursting/tensile, shrinkage and skew/spirality.
- Chemical residues: pH, residual peroxide, free formaldehyde (if resin used), APEO/NPEO (should be ND).
- Appearance: Levelness, barre, crease marks, stains, softener spots.
Troubleshooting Matrix (Quick Wins)
- Uneven shade (knits): Rope length balance, liquor flow, leveller dosage; re‑level at lower temp with additions.
- Back‑staining (vat/sulfur/disperse): Increase anti‑backstain/dispersant; optimize soaping or reduction clearing.
- Low rub fastness (pigment/reactive): Under‑cure or low binder; incomplete wash‑off; add crosslinker/softener balance.
- High shrinkage/spirality: Improve compacting/overfeed; control relaxation drying; yarn twist balance.
- Shade drift post‑heat (PET): Choose high‑sublimation disperse range; manage stenter/transfer parameters.
The Big Picture
Textile coloration is really based on one concept, every stage is quietly setting up the next one for success or failure. Skip a careful scour and you'll see it as barré two steps later. Run a temperature ramp on polyester and the color fails the first time you iron the shirt. None of the individual steps are exotic, it's mostly heat, water, salt, acid and alkali, but the sequencing and control discipline is where the real craft lives.
The second thing to sit with is that "where" color gets added is as much a business decision as a technical one. Dyeing at the fibre stage gives you rock solid consistency but ties you to huge minimums. Dyeing at the garment stage offers you speed and fashion flexibility but costs you control. There is no “best” way, only trade-offs suited to what a particular product really needs.