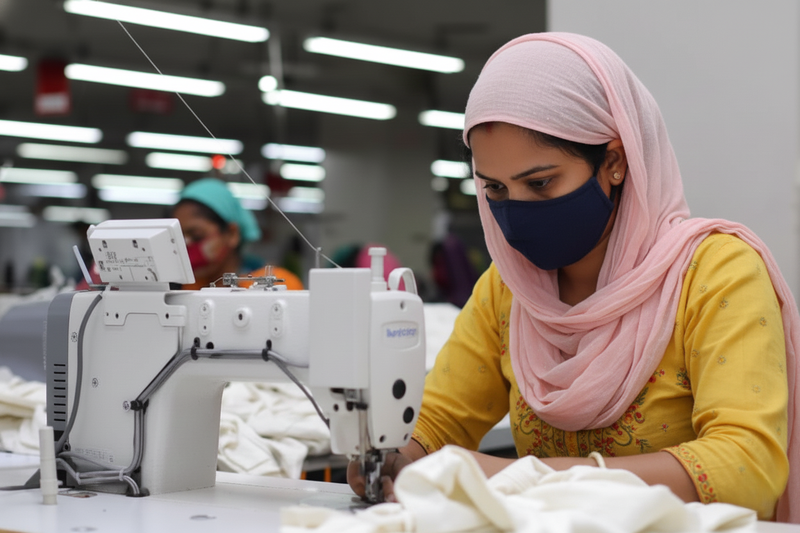
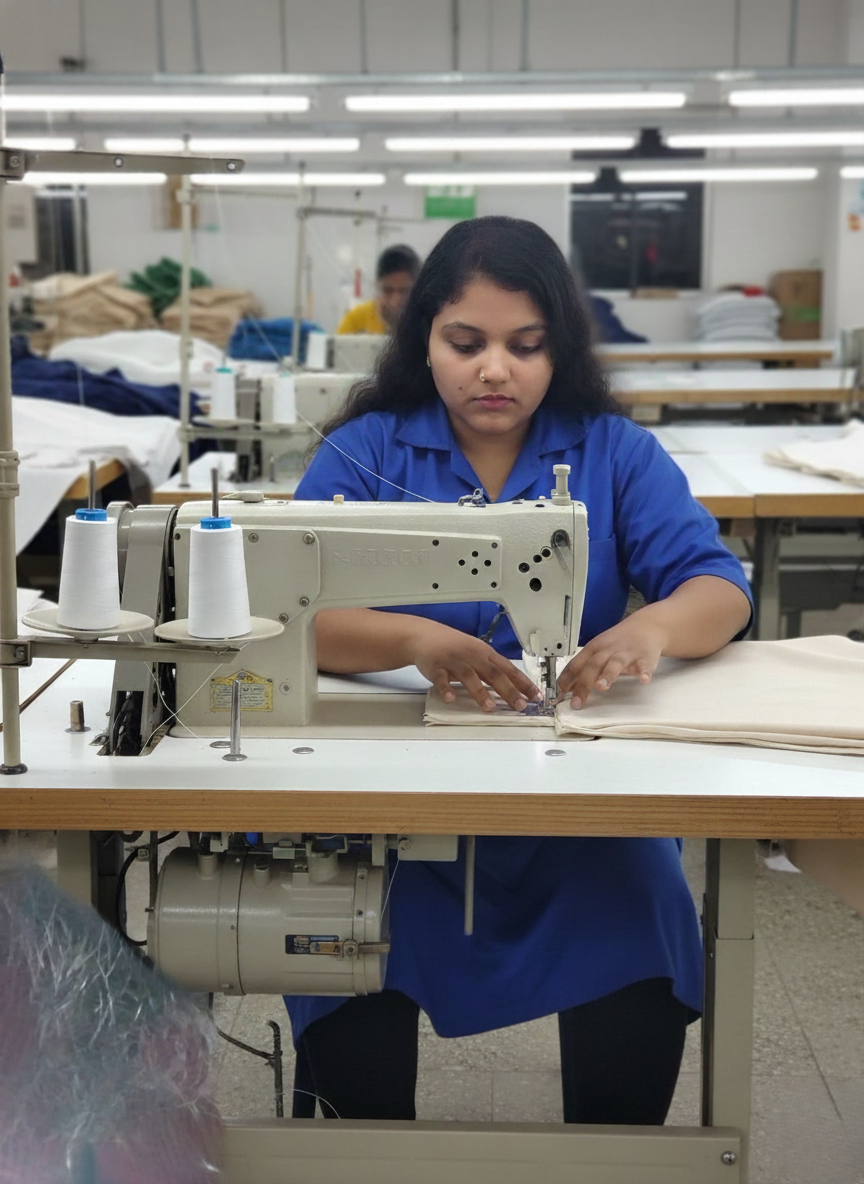
Everything comes together in the sewing department. Once the fabric has been cut into the various components, this is the stage at which those pieces are meticulously sewn together to form a finished garment. It’s not just about assembling parts, it’s about doing it with the right skill, the right quality and the right standards so the end product looks good, fits well and lasts.This section blends the expertise of operators, the use of specialized machines and supporting tools to make each operation smoother and more efficient. A good workflow keeps the work flowing smoothly from one process to the next and in-line quality checks catch issues early. At the same time, the right line balancing ensures that the workload is evenly distributed. This prevents delays and the smooth flow in production.
What Makes Up the Sewing Section
- Skilled operators who bring experience and accuracy to each task
- Specialized sewing machines designed for different operations
- Work aids and attachments that improve speed and consistency
- A clear, step-by-step workflow to keep production organized
- In-line quality checks to maintain standards at every stage
- Balanced production lines to avoid bottlenecks
Why Sewing Floor Performance Matters
The efficiency of the sewing floor has a direct impact on overall production success:
Productivity: Higher efficiency means more output in less time
Quality: Careful stitching ensures garments meet required standards
Lead Time: Smooth operations help deliver orders faster
Cost per Garment: Better efficiency reduces production costs
Delivery: Consistent performance ensures on-time shipment
In simple terms, a well-managed sewing department doesn’t just stitch garments—it drives the entire factory’s performance, balancing speed, quality and cost all at once.
Sewing Department Process Flow
- Receive cut bundles from cutting QC
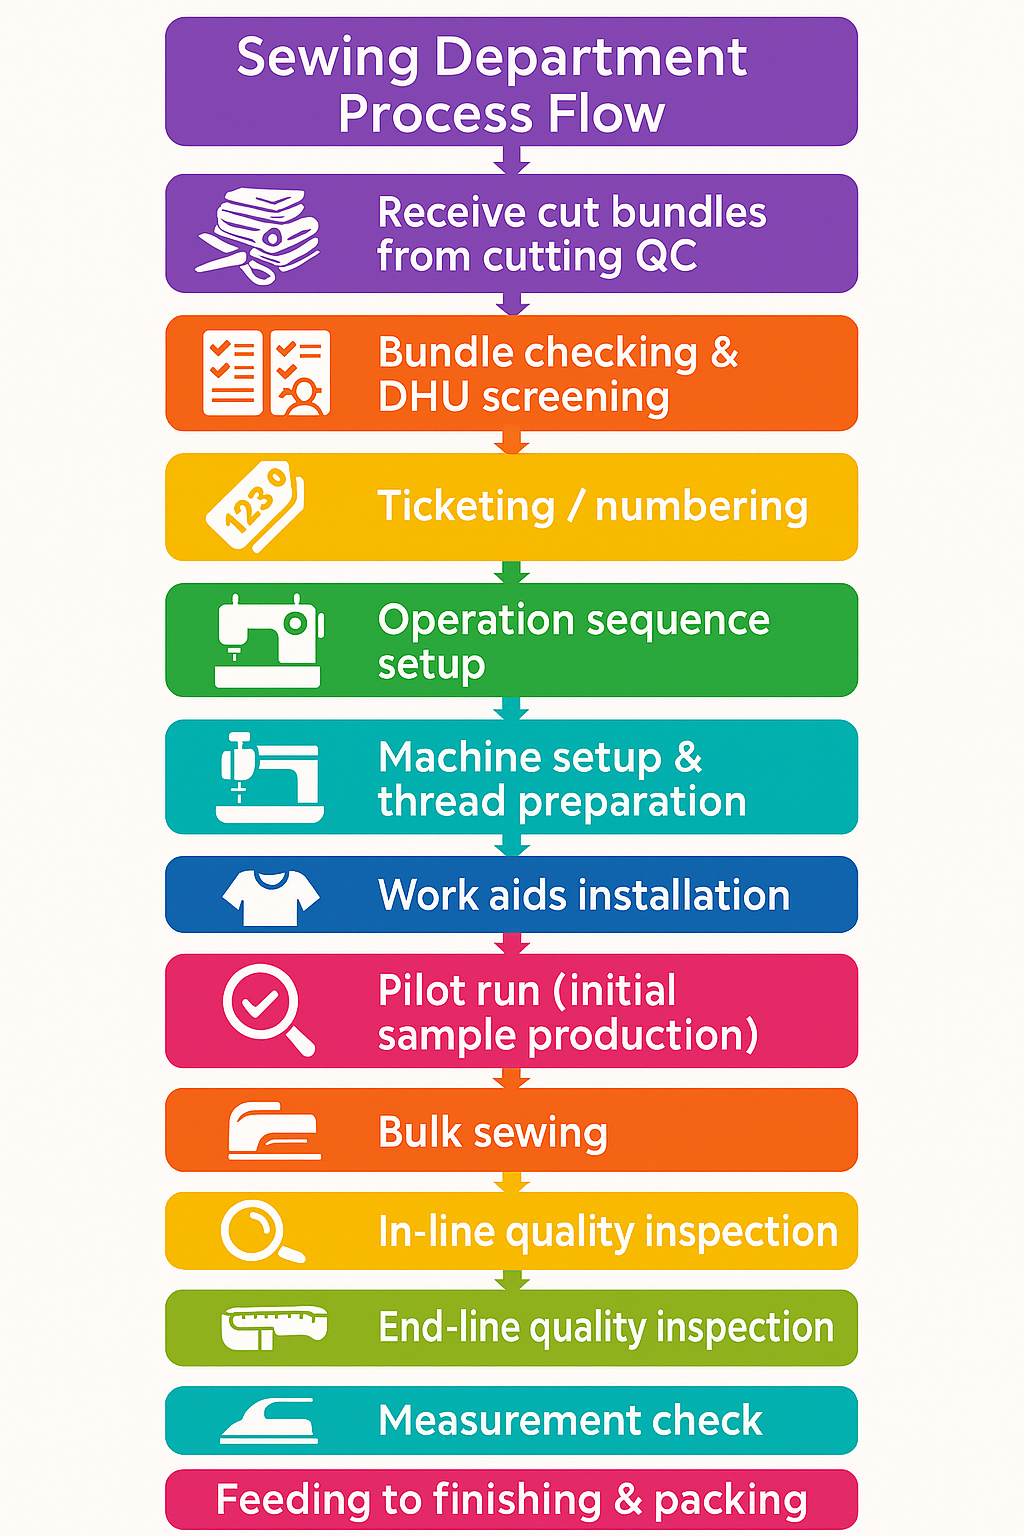
Sewing Department Process Flow - Bundle checking & DHU screening
- Ticketing / numbering
- Operation sequence setup
- Machine setup & thread preparation
- Work aids installation
- Pilot run (initial sample production)
- Bulk sewing
- In-line quality inspection
- End-line quality inspection
- Measurement check
- Pressing / ironing
- Final inspection
- Feeding to finishing & packing
Line Layout in Sewing Section
The smooth running of production is greatly influenced by a well-thought-out line layout in the sewing section. It helps to ensure that the materials flow smoothly from one operation to the next operation, it reduces unnecessary work in progress (WIP) and it balances the workload among the operators. The right layout not only improves efficiency, but also makes supervision, communication and quality control much easier on the production floor.
Common Types of Line Layouts in Sewing
Straight Line Layout
- Machines are arranged in a straight sequence
- Simple and easy to manage
- Best suited for high-volume and basic garments
- Allows clear supervision and smooth workflow
U-Shaped Layout
- Operators are positioned facing inward
- Encourages faster communication and teamwork
- Reduces movement time between operations
- Ideal for flexible and modular production systems
Modular Layout
- Small teams of 6–12 operators working together
- Operators are multi-skilled and can handle multiple tasks
- Suitable for fashion garments, short runs and quick style changes
- Promotes flexibility and better team coordination
Unit Production System (UPS)
- Uses an automated overhead rail system
- Follows single-piece flow instead of batch production
- Reduces handling time and WIP significantly
- Ensures high productivity and better tracking
Side-by-Side Layout
- Operators or machines placed next to each other for parallel tasks
- Useful for operations that need synchronization
- Helps maintain consistent workflow in paired processes
In simple terms, choosing the right line layout depends on the type of product, production volume and factory setup. A good layout supports faster production, better quality and more efficient use of resources.
Machines in Sewing Section
Machines in the sewing section are carefully selected to suit the product, type of fabric and quality required. Every machine has its own function and they work together to make production run smoothly. Stitching tight and a good finish. In general, sewing machines can be classified according to the scope of application and the level of technology: universal, specialized and automated.
Machines in Sewing Section
Universal Machines
These are the most commonly used machines in any sewing line. They handle standard stitching operations and are essential for almost every garment.
- Single needle lockstitch (basic joining)
- Overlock (3/4/5 thread) for edge finishing
- Flatlock for stretch garments
- Coverstitch for hemming knitwear
- Chainstitch for flexible seams
Specialized Machines
These machines are designed for specific operations that require precision or added strength.
- Feed-off-arm (for sleeves and tubular parts)
- Button attaching machines
- Buttonhole machines
- Bartack for reinforcement at stress points
- Snap attaching machines
- Elastic attaching machines
- Hemming machines for clean finishing
Automated Machines
Modern production increasingly uses automated machines to improve speed, consistency and quality.
- Pocket hemming machines
- Collar turning and band attaching machines
- Seam sealing machines (especially for technical garments)
Work Aids, Folders & Attachments
Work aids, folders and attachments are very important to increase the efficiency of the sewing section. Rather than depending solely on operator skill, these tools assist in guiding the fabric, ensuring uniform stitching and minimising manual effort. This means the operations are faster, more consistent and less tiring to the operator. This helps directly in reducing the SMV (Standard Minute Value).
Work Aids, Folders & Attachments
Commonly used tools include:
- Binding folders for neat edge finishing
- Hemming folders to maintain consistent hem width
- Elastic guides for smooth and even elastic application
- Tape feeding attachments for accurate tape placement
- Jigs & templates to guide specific operations
- Guide rails to keep stitching lines straight
Why They Matter
These tools may seem simple, but their impact on production is significant:
- Higher speed: Operators can perform tasks faster with less adjustment
- Better accuracy: Reduces human error and variation
- Consistent stitch quality: Ensures uniform output across all garments
- Reduced operator fatigue: Less manual handling makes work easier and more comfortable
In practice, investing in the right work aids and attachments is one of the easiest and most effective ways to improve sewing line performance without major changes to machines or manpower.
Line Balancing in Sewing
Line balancing is the key to smooth steady flow of production in sewing. It makes sure the work is shared equally among operators so no one is overloaded or standing idle. A well balanced line has each operation flowing at a similar speed and this helps the whole line to have a steady output with no delays or bottlenecks.
Line Balancing in Sewing
Steps in Line Balancing
To create a balanced line, a few practical steps are followed:
- Break down the garment into all individual operations (Operation Breakdown – OB)
- Calculate the SMV (Standard Minute Value) for each operation
- Identify bottlenecks where work is slower or piling up
- Adjust the workload by:
- Combining smaller operations
- Adding extra machines where needed
- Assigning more skilled operators to critical tasks
- Improving working methods through IE support
- Using folders and work aids to reduce handling time
- Finally, match the total line capacity with the production target
Techniques for Effective Line Balancing
Parallel machines: Heavy or time-consuming operations are supported with multiple machines
Multi-skilled operators: Flexible workers can shift between tasks when needed
Pitch-time alignment: Ensures each operation meets a standard time rhythm
Motion study & method improvement: Eliminates unnecessary movements and improves efficiency
Operator Skill Management
Maintaining a smooth and efficient sewing line depends heavily on operator skill management. The skill level of operators is the main factor that determines the overall performance of production as their efficiency directly affects productivity, quality and line balance. Skills development and management can generate a more flexible and stable workforce for factories.
Operator Skill Levels
Operators are generally categorized based on their experience and capability:
- Beginner: New operators with limited experience, requiring close supervision
- Semi-skilled: Can handle specific operations with moderate efficiency
- Skilled: Experienced operators capable of maintaining speed and quality
- Multi-skilled: Highly flexible operators who can perform multiple operations across the line
Skill Management Methods
To develop and maintain operator efficiency, factories follow several structured approaches:
- Skill matrix maintenance: Tracks each operator’s capability and proficiency level
- Pre-production training: Prepares operators for new styles before bulk production
- On-job training: Continuous learning while working on the line
- Operator rotation: Helps workers gain multi-skill ability and reduces monotony
Benefits of Proper Skill Management
Well-trained and properly allocated operators bring significant improvements:
- Reduced defects: Better handling leads to fewer quality issues
- Less time loss: Improved efficiency reduces idle time and rework
- Balanced production lines: Skilled operators help maintain smooth workflow
SEWING PROCESS FLOW FOR KNIT GARMENTS (T‑Shirt / Polo / Tops)
Major Construction Operations
| SL | Operation Name | Process Description | Machine Used | Quality Checkpoints |
|---|---|---|---|---|
| 1 | Shoulder Join (Left & Right) | Join front & back body at shoulder seams; apply tape if required | 4T Overlock / Feed-Off-Arm | Seam alignment, no puckering, even tape |
| 2 | Shoulder Tape Attach | Insert tape to reinforce shoulder seam | Feed-Off-Arm / Flatlock | Tape inside seam, no stretching |
| 3 | Neck Rib Join | Join rib ends to form a loop | Overlock | Even join, no twisting |
| 4 | Neck Rib Attach | Attach rib to neckline with controlled stretching | Overlock / Flatlock | Balanced stretch, even neck opening |
| 5 | Neck Topstitch | Secure neck seam with topstitch | Lockstitch / Coverstitch | Straight stitch line, no waviness |
| 6 | Placket Make (Polo) | Placket attach, box formation, topstitching | Lockstitch | Symmetry, clean corner finish |
| 7 | Collar Make | Collar folding, edge stitching, shaping | Lockstitch / Flatlock | Sharp edges, no bubbles |
| 8 | Collar Attach | Attach collar to neckline and topstitch | Lockstitch | Collar height equal, no seam mismatch |
| 9 | Sleeve Hem (Pre‑Attach) | Hem sleeve openings before attaching sleeves | Coverstitch | Even hem allowance |
| 10 | Sleeve Attach (Open Body) | Attach sleeve to armhole while body is flat | Overlock | Notch matching, smooth curve |
| 11 | Side Seam + Underarm Join | Join sleeve + body side seam in single run | Overlock | Continuous seam, no twisting |
| 12 | Bottom Hem | Hem garment bottom edge | Coverstitch | Even fold, no waviness |
| 13 | Shoulder Topstitch (Optional) | Decorative shoulder seam stitch | Lockstitch | Symmetry, straight line |
| 14 | Label Attach (Neck) | Attach brand/size/care label | Lockstitch | Straight position, correct label |
| 15 | Care Label Attach (Side seam) | Attach wash-care label | Overlock / Lockstitch | Correct position & orientation |
| 16 | Bartack (Reinforcement) | Strengthen stress points (placket, pocket area) | Bartack Machine | Accurate placement |
| 17 | Buttonhole Making (Polo) | Create buttonholes in placket | Buttonhole Machine | Correct spacing & size |
| 18 | Button Attach | Attach buttons as per spec | Button Attach Machine | Secure stitching, alignment |
| 19 | Panel Cleaning / Trimming | Remove excess threads | Trimmer / Manual | No loose threads |
| 20 | In-line QC Inspection | Inspect garment at multiple stages | QC Station | DHU monitoring |
| 21 | Final Sewing QC | Ensure garment is defect-free before finishing | QC Station | No defects, correct measurement |
Sewing Operation Breakdown for Basic T-Shirt
| Operation | Machine | Work Aid / Folder | Remarks |
|---|---|---|---|
| Join Shoulder | Overlock | Tape guide (optional) | Stabilize shoulder |
| Join Neck Rib | Overlock | Rib folder | Stretch evenly |
| Neck Topstitch | Lockstitch | Guide foot | For durability |
| Sleeve Attach | Overlock | Notch matching | Smooth sleeve curve |
| Close Side Seam | Overlock | NA | Sleeve + body join |
| Bottom Hem | Coverstitch | Hem folder | Avoid waviness |
| Sleeve Hem | Coverstitch | Folding attachment | Consistent hem |
| Label Attach | Lockstitch | NA | Must be centered |
Sewing Operation breakdown for Polo Shirt
| Section | Operation | Machine |
|---|---|---|
| Placket | Placket attach, box placket, topstitch | Lockstitch |
| Collar | Collar make, collar attach, collar topstitch | Lockstitch / Flatlock |
| Front Panel | Placket construction + reinforcement | Bartack / Lockstitch |
| Body Join | Shoulder join, side seam | Overlock |
| Sleeves | Attach sleeve, sleeve hem | Overlock / Coverstitch |
| Finishing | Buttonhole, button attach | Buttonhole + Button machine |
Sewing Operations (Trousers / Joggers)
SL Operation Name Process Description Machine Used Quality Checkpoints 1 Front Panel Preparation Attach pockets, pocket bags, fly piping, mock fly Lockstitch / Overlock Symmetry, pocket opening shape 2 Side Pocket Make Join pocket bag, secure pocket mouth Overlock + Bartack Pocket opening strength 3 Back Pocket Make Attach patch pocket or welt pocket Lockstitch Equal spacing, shape 4 Join Front Rise Join front crotch seam from zipper area to inseam Overlock Smooth curve, no puckering 5 Join Back Rise Join back crotch seam Overlock Even seam allowance 6 Front + Back Rise Reinforcement Apply bartack at stress points Bartack Machine Correct placement 7 Inseam Join Join from crotch to hem Overlock Straight seam, no twisting 8 Outseam Join Attach side seams Overlock Match knee & hip points 9 Waistband Making Prepare waistband, attach elastic, close waistband loop Overlock / Flatlock Elastic tension control 10 Waistband Attach Attach waistband to trouser top opening Overlock / Coverstitch Even gather & tension 11 Elastic Insert (If Separate) Insert elastic using casing Safety Stitch / Manual Insert Correct length, secure join 12 Drawstring Hole / Eyelet Create hole for rope Eyelet Machine Clean hole, strong reinforcement 13 Drawcord Insert Insert rope into waistband casing Manual / Tool Even length both sides 14 Bottom Hem Hem trouser legs Coverstitch Even hem width 15 Ankle Rib Attach (Jogger) Attach rib cuff to bottom Overlock + Coverstitch Rib symmetry 16 Side Panel Attach (If design) Join contrast panels Overlock Proper alignment 17 Decorative Stitching Coverstitch details, mock fly stitch Coverstitch / Lockstitch Straight & clean lines 18 Label Attach Size label, brand label, care label Lockstitch Correct placement 19 Bartack at Stress Points Bartack pocket ends, fly corners Bartack Strength 20 Final Thread Trimming Clean loose threads Manual Trimmer No visible excess threads 21 In-line QC Inspect after major operations QC Team DHU tracking 22 Final Sewing QC Measurement & final assembly check QC Team Within tolerance
| SL | Operation Name | Process Description | Machine Used | Quality Checkpoints |
|---|---|---|---|---|
| 1 | Front Panel Preparation | Attach pockets, pocket bags, fly piping, mock fly | Lockstitch / Overlock | Symmetry, pocket opening shape |
| 2 | Side Pocket Make | Join pocket bag, secure pocket mouth | Overlock + Bartack | Pocket opening strength |
| 3 | Back Pocket Make | Attach patch pocket or welt pocket | Lockstitch | Equal spacing, shape |
| 4 | Join Front Rise | Join front crotch seam from zipper area to inseam | Overlock | Smooth curve, no puckering |
| 5 | Join Back Rise | Join back crotch seam | Overlock | Even seam allowance |
| 6 | Front + Back Rise Reinforcement | Apply bartack at stress points | Bartack Machine | Correct placement |
| 7 | Inseam Join | Join from crotch to hem | Overlock | Straight seam, no twisting |
| 8 | Outseam Join | Attach side seams | Overlock | Match knee & hip points |
| 9 | Waistband Making | Prepare waistband, attach elastic, close waistband loop | Overlock / Flatlock | Elastic tension control |
| 10 | Waistband Attach | Attach waistband to trouser top opening | Overlock / Coverstitch | Even gather & tension |
| 11 | Elastic Insert (If Separate) | Insert elastic using casing | Safety Stitch / Manual Insert | Correct length, secure join |
| 12 | Drawstring Hole / Eyelet | Create hole for rope | Eyelet Machine | Clean hole, strong reinforcement |
| 13 | Drawcord Insert | Insert rope into waistband casing | Manual / Tool | Even length both sides |
| 14 | Bottom Hem | Hem trouser legs | Coverstitch | Even hem width |
| 15 | Ankle Rib Attach (Jogger) | Attach rib cuff to bottom | Overlock + Coverstitch | Rib symmetry |
| 16 | Side Panel Attach (If design) | Join contrast panels | Overlock | Proper alignment |
| 17 | Decorative Stitching | Coverstitch details, mock fly stitch | Coverstitch / Lockstitch | Straight & clean lines |
| 18 | Label Attach | Size label, brand label, care label | Lockstitch | Correct placement |
| 19 | Bartack at Stress Points | Bartack pocket ends, fly corners | Bartack | Strength |
| 20 | Final Thread Trimming | Clean loose threads | Manual Trimmer | No visible excess threads |
| 21 | In-line QC | Inspect after major operations | QC Team | DHU tracking |
| 22 | Final Sewing QC | Measurement & final assembly check | QC Team | Within tolerance |
Sewing Operations breakdown for LEGGINGS (Knit Bottoms)
SL Operation Description Machine Used Quality Checkpoints 1 Front Rise Join Join front crotch Overlock Smooth curve 2 Back Rise Join Join back crotch Overlock No twisting 3 Rise Reinforcement Bartack Bartack Machine Secure 4 Inseam Join Join legs Overlock Continuous seam 5 Outseam Join side seam Overlock Match knee points 6 Waistband Elastic Join Attach elastic to waist Flatlock / Overlock Even tension 7 Waistband Folding Fold to create waistband Coverstitch Clean finish 8 Bottom Hem Hem leg opening Coverstitch Non-wavy seam 9 Gusset Attach (If required) Insert gusset for stretch Overlock Proper alignment 10 Label Attach Size/care label Lockstitch Must match size 11 Bartack Reinforce points Bartack Proper position 12 Final QC Trim & inspect QC Station Measurement match
| SL | Operation | Description | Machine Used | Quality Checkpoints |
|---|---|---|---|---|
| 1 | Front Rise Join | Join front crotch | Overlock | Smooth curve |
| 2 | Back Rise Join | Join back crotch | Overlock | No twisting |
| 3 | Rise Reinforcement | Bartack | Bartack Machine | Secure |
| 4 | Inseam Join | Join legs | Overlock | Continuous seam |
| 5 | Outseam | Join side seam | Overlock | Match knee points |
| 6 | Waistband Elastic Join | Attach elastic to waist | Flatlock / Overlock | Even tension |
| 7 | Waistband Folding | Fold to create waistband | Coverstitch | Clean finish |
| 8 | Bottom Hem | Hem leg opening | Coverstitch | Non-wavy seam |
| 9 | Gusset Attach (If required) | Insert gusset for stretch | Overlock | Proper alignment |
| 10 | Label Attach | Size/care label | Lockstitch | Must match size |
| 11 | Bartack | Reinforce points | Bartack | Proper position |
| 12 | Final QC | Trim & inspect | QC Station | Measurement match |
Sewing Operations breakdown for Polo Track Pants (Sports Bottom)
Section Operation Description Machine Upper Body Waistband attach Elastic attach + coverstitch Coverstitch Side Panels Side stripe attach Attach contrast stripe Overlock/Flatlock Crotch Join front & back rise Overlock crotch Overlock Legs Inseam join Overlock Overlock Hem Bottom hem Coverstitch Coverstitch Finishing Rope insert, bartack Eyelet + Bartack Eyelet / Bartack
| Section | Operation | Description | Machine |
|---|---|---|---|
| Upper Body | Waistband attach | Elastic attach + coverstitch | Coverstitch |
| Side Panels | Side stripe attach | Attach contrast stripe | Overlock/Flatlock |
| Crotch | Join front & back rise | Overlock crotch | Overlock |
| Legs | Inseam join | Overlock | Overlock |
| Hem | Bottom hem | Coverstitch | Coverstitch |
| Finishing | Rope insert, bartack | Eyelet + Bartack | Eyelet / Bartack |
Quality Control in Sewing Section
The quality control in the sewing section is important to make sure that the article of clothing meets the required standards before it goes to the customer. Modern sewing floors emphasise on checking quality at every stage of production, instead of checking quality at the end only. This helps find problems early, cuts rework and maintains consistency across the line.
Quality Control in Sewing Section
In-line Quality Check
Inspection is done during the sewing process itself. This helps identify defects at an early stage, so corrections can be made immediately without affecting the entire batch.
End-line Quality Check
Finished garments from each bundle are checked at the end of the sewing line to ensure they meet required specifications before moving to the next stage.
Final Audit
A final inspection is carried out before finishing and packing to confirm that the garments are ready for shipment and meet buyer expectations.
Common Sewing Defects
Some of the commonly observed issues include:
- Skip stitch
- Broken stitch
- Puckering
- Seam twisting
- Uneven stitches
- Shade variation
- Wrong alignment
- Needle damage
DHU% (Defects per Hundred Units)
This is a key performance indicator used to measure the quality level of the sewing line. Lower DHU% means better quality performance.
WIP Management (Work in Progress)
The right level of WIP is critical to smooth production flow.
Too much WIP leads to:
- Congestion on the line
- Longer lead time
- Increased quality problems
- Difficult line control
Too little WIP leads to:
- Idle machines
- Operator waiting time
- Reduced efficiency
The goal is to maintain an optimal level of WIP based on pitch time, ensuring a balanced and continuous workflow.
Work Study & SMV Optimization
Industrial Engineering (IE) plays a vital role in improving sewing efficiency through:
- Time study to measure operation duration
- Motion analysis to remove unnecessary movements
- SMV optimization to set accurate operation times
- Method improvement for better workflow
- Skill balancing across operators
Better SMV results in:
- Higher efficiency
- Lower production cost
- More accurate planning
Sewing Efficiency Measurement
Where:
- Minutes produced = Output × SMV
- Minutes attended = Workforce × Working minutes
High efficiency indicates:
- Balanced line
- Good quality
- Stable operator performance
Sewing KPIs
- Line Efficiency %
- Production Output / Hour
- SMV adherence
- DHU %
- Operator Productivity %
- Machine Utilization %
- On-Time Feeding to Finishing
- Repair & Rework Rate
Sewing Floor Layout & Infrastructure
Includes:
- Adequate spacing between machines for easy movement
- Proper lighting for visibility and precision
- Needle guards for operator safety
- Air blowers and vacuum tables for cleanliness
- In-line quality checkpoints
- Pegboard system for storing trims and tools
- Skill training corner for operator development
Safety Practices in Sewing Section
Maintaining safety on the sewing floor is equally important for both productivity and worker well-being:
- Use of needle guards to prevent injuries
- Proper seating and posture support for operators
- Anti-fatigue mats to reduce physical strain
- Eye protection where necessary
- Clean floors to avoid thread waste and slipping hazards
- Clear fire safety access and emergency exits
Importance of Sewing Section
The sewing section is the most critical part of garment production because it:
- Utilizes the highest number of workers
- Involves the maximum number of machines
- Takes up the largest portion of production time
- Has a direct impact on garment costing
- Plays a key role in maintaining product quality