Garment Finishing Techniques: Processes for Quality, Appearance and Fashion Effects
12 min read
Garment finishing is the final stage of the apparel manufacturing process, where the focus shifts from sewing to appearance, quality, feel and readiness for shipment. Effective finishing enhances the garment’s aesthetic appeal, dimensional stability, comfort and market value. It also ensures that the product meets buyer quality standards before shipping.
Garment Finishing
Garment finishing is the last stop before a product leaves the factory. Sewing is done. Panels are joined. Now the attention shifts—less about construction, more about how the garment looks, feels and shows up in front of the buyer.
This stage fixes the small things. The visible things.
A well-finished garment feels clean, looks sharp, holds its shape better… and honestly, sells better. Poor finishing? It doesn’t matter how well it was stitched earlier—first impression is gone.
What the Finishing Department Is Trying to Do
At a basic level, the goals are pretty clear:
Make sure garments are clean and presentable
Hit the right measurements and fit
Remove wrinkles, loose threads, random marks
Follow packaging standards (buyers are strict here)
Run final checks before shipment
Pack everything neatly, consistently
Get it ready for export without surprises
And reduce rework—because fixing after dispatch is… expensive
Simple list. Hard execution.
Garment Finishing Process Flow
Receive sewn garmentsGarment Finishing Process Flow
Garments pick up all sorts of marks during production:
Oil stains
Dust
Ink or pen marks
Dye spots
Spot cleaning clears these using:
Spot guns
Steam guns
Fabric-safe chemicals
But here’s the tricky part—overdoing it can cause burn marks, yellowing, even water rings. So it’s controlled, not aggressive.
Spot Cleaning / Stain Removal
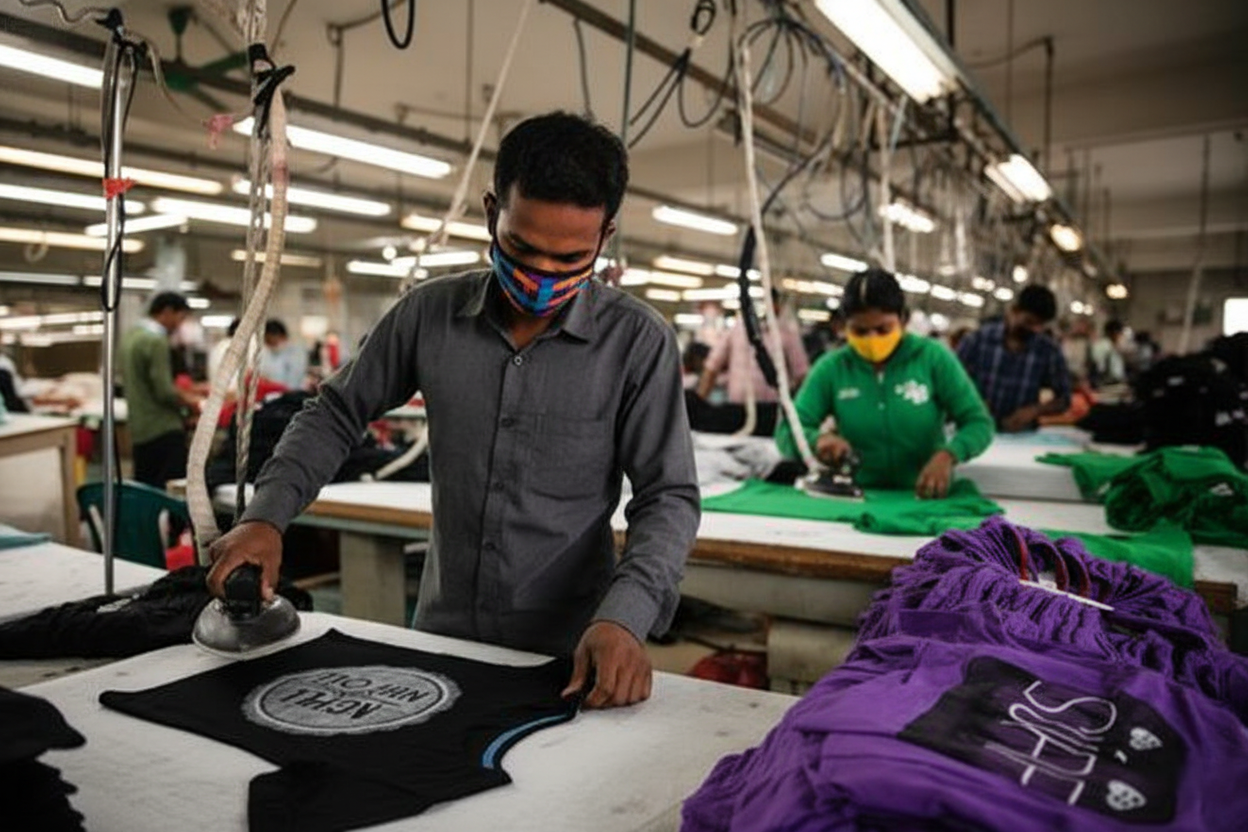
Ironing / Pressing
This is where garments start looking “finished.”
Pressing improves:
Shape
Structure
Fall (drape)
Overall smoothness
Common setups:
Steam iron tables
Vacuum tables
Steam tunnels
But it’s easy to mess up:
Too much heat → scorching or shine
Too much pressure → uneven look
Poor control → water stains
So yeah, ironing is not just ironing.
Ironing / Pressing
Measurement Checking
Numbers matter here.
Garments are checked against:
Buyer size specs
Tolerance levels
Fit standards
Typical checks:
Chest
Length
Sleeves
Waist
Neck
Even small deviations can cause rejection.
Final Quality Inspection
This is the last serious check before packing.
Inspectors look for:
Open seams
Puckering
Shading differences
Wrong trims or accessories
Faulty prints/embroidery
Inspections happen at different stages, but final finishing inspection is critical. Usually based on AQL 2.5 or 4.0.
Metal Detection (Buyer Requirement)
Not always required—but when it is, it’s strict.
Used to detect:
Broken needles
Metal fragments
Mostly mandatory for:
Kidswear
Baby garments
High-end brands
Machines used:
Conveyor metal detectors
Handheld scanners
No compromise here.
Metal Detection
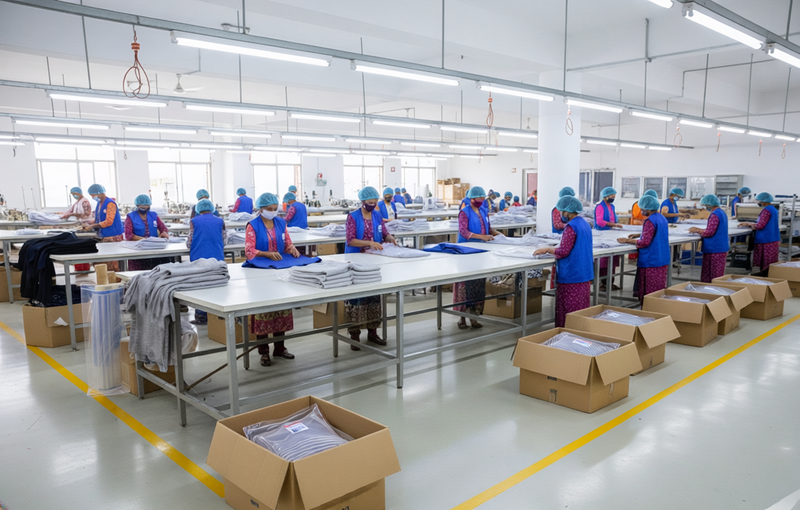
Garment Packing
Packing Process flow
Tagging & Labeling
Includes:
Brand tag
Price tag
Barcode tag
Size label
Wash-care label
Country-of-origin label
Everything has to match buyer instructions. Even a small mismatch = rejection risk.
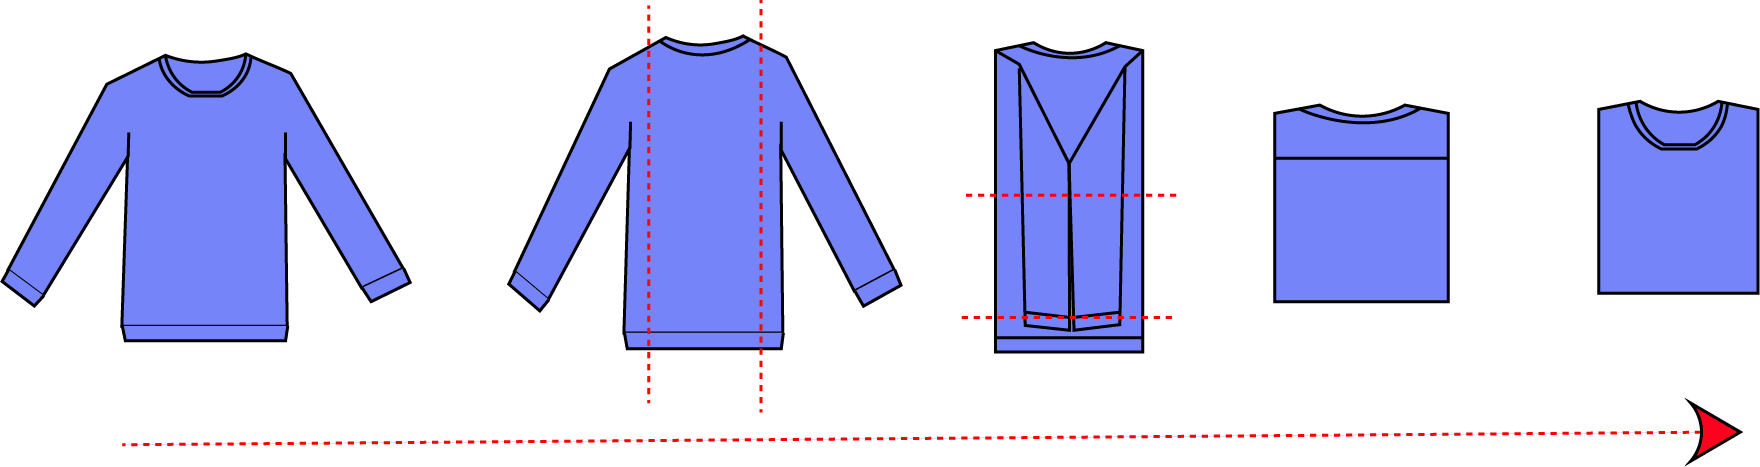
Folding
Folding Techniques in Packing
Proper sweater folding is
essential in apparel production and logistics to maintain garment quality,
optimize packing efficiency and ensure a neat presentation for customers and
buyers. Since sweaters are bulkier and more sensitive to stretching than
lightweight knitwear, specific folding techniques help maintain shape, minimize
creasing and save carton space
Standard Flat Fold (Factory‑Preferred Method)
This is the go-to method. You’ll see it everywhere in bulk production.
Basically, the garment is folded into a clean rectangle so it fits easily into polybags, retail packaging and cartons.
Steps
Lay the sweater face down on a flat table
Gently smooth it out—no pulling or stretching
Fold both sleeves inward so they slightly overlap
Bring in the sides to form a rectangle
Fold the bottom hem upward (toward shoulder area)
Insert board if required
Slide into polybag, keeping the front visible
Standard Flat Fold
Why factories prefer it
Uniform size—easy stacking
Fits standard packaging without adjustment
Minimizes wrinkles (most of the time)
Works well with automated lines
Simple. Reliable. That’s why it sticks.
Half Fold or "Book Fold" (For Gift Packs or Multi‑Pack)
This one’s a bit more about presentation.
You fold it like closing a book—so the front of the garment still shows nicely. Common in gift packs or sets.
Steps
Lay the garment face down
Fold one side toward the center
Fold the other side over it
Adjust the bottom fold if needed
Add board or tissue (optional)
Pack into polybag
Half Fold or "Book Fold"
Where it works best
Gift packaging
Multi-pack retail sets
It keeps the garment compact and stops it from shifting around too much inside the box.
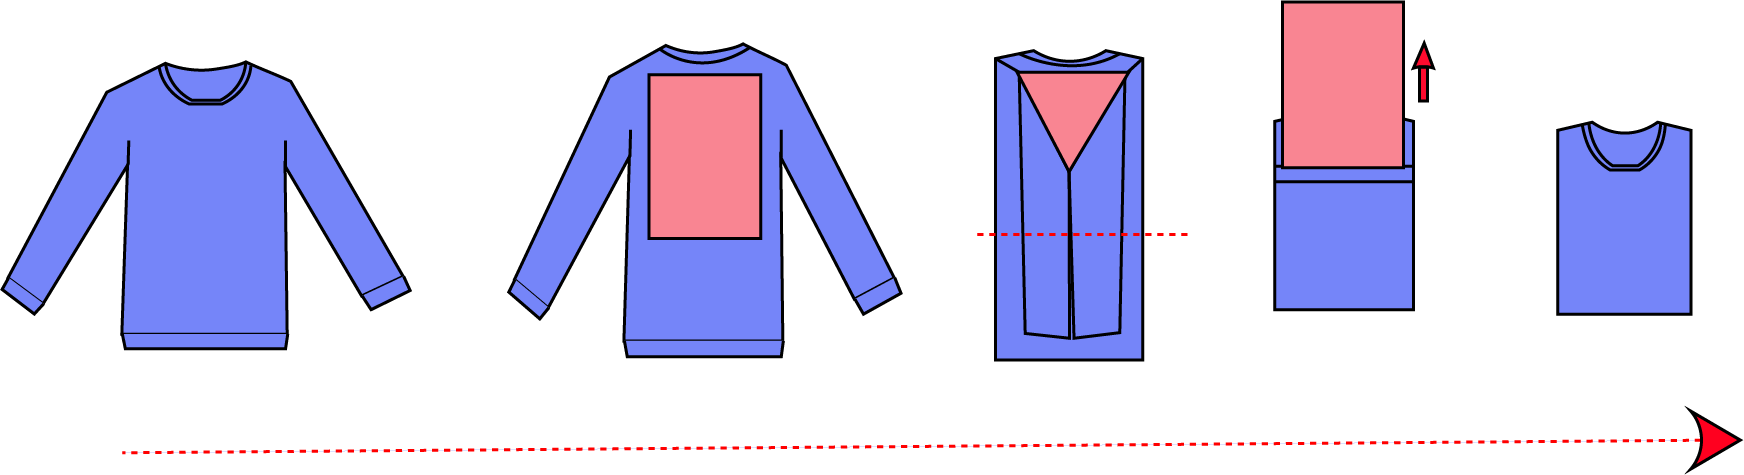
Tri Fold
A practical one. Mostly about saving space.
Here, both sides come in first, then the bottom folds upward. You end up with a neat, flat package.
Steps
Lay sweater face down
Fold left side inward (with sleeve)
Fold right side inward
Fold bottom up toward neckline
Tri Fold
Why use it
Better carton space use
Clean retail appearance
Easy to do—manual or machine
You’ll see this a lot in standard retail packing.
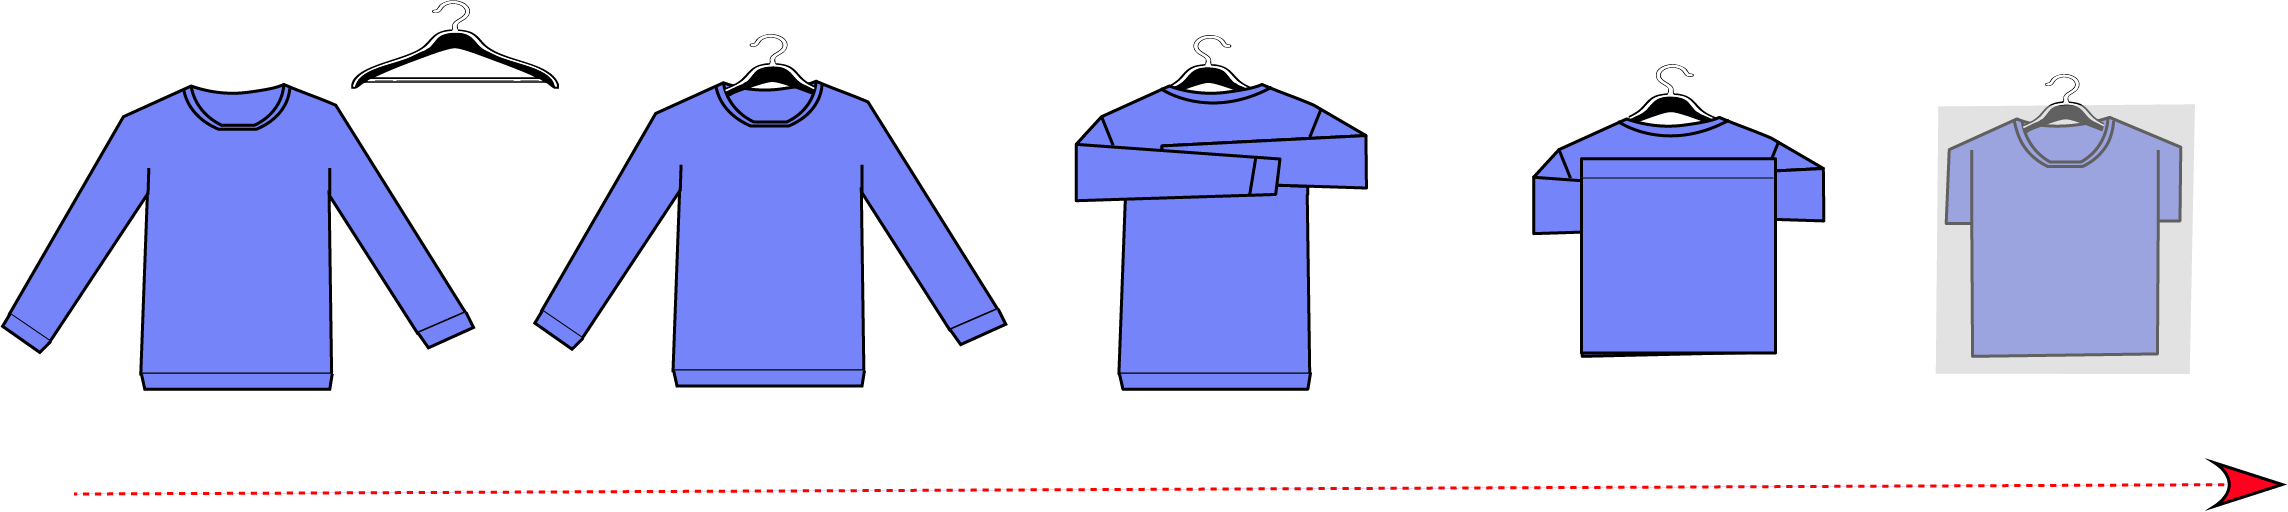
Hanger Fold
More premium feel here.
The garment stays on a hanger but is slightly folded so it fits inside a polybag or carton.
Steps
Place sweater properly on hanger
Button/zip if needed
Fold sleeves inward
Sometimes fold bottom upward
Add tissue if required
Insert into polybag (hanger hook visible or covered)
Hanger Fold
Advantages
Fewer wrinkles
Ready for store display
Maintains garment shape
Usually used by brands that want minimal handling at the store level.
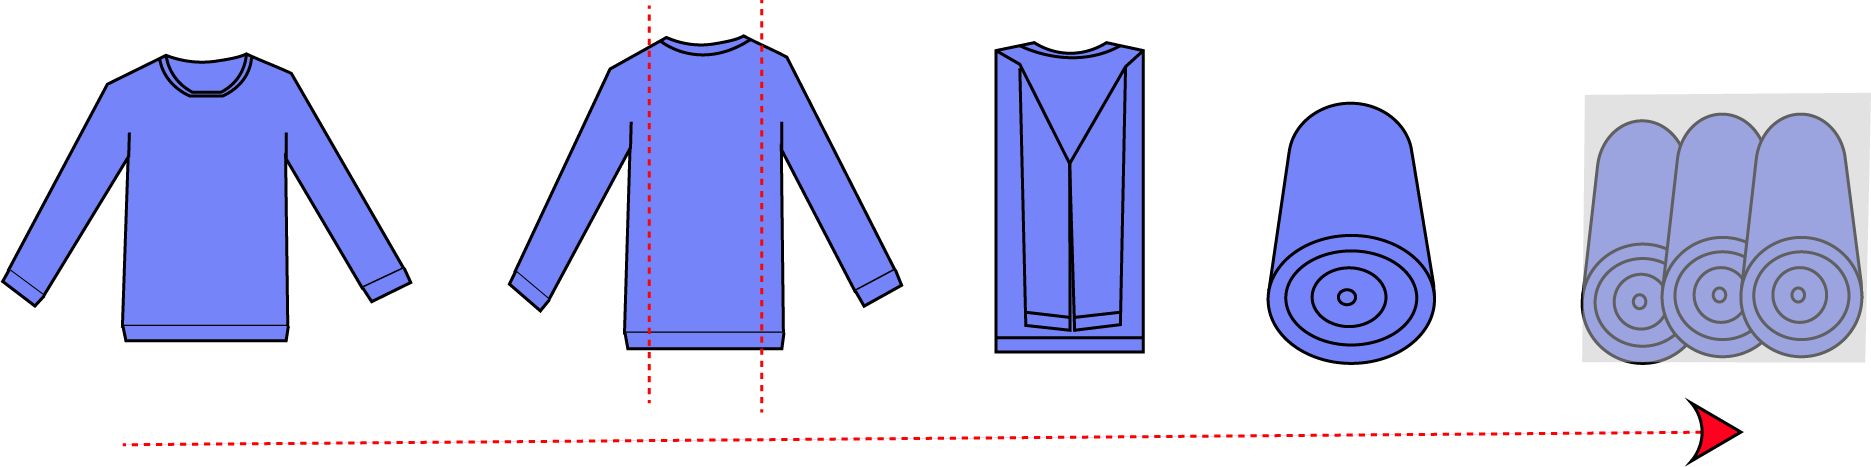
Rolling Fold (E‑commerce Friendly)
This one’s different—more practical than visual.
Instead of folding flat, you roll the sweater tightly. Works well when space is tight.
Used when small parcel size is key (e.g., online orders).
Steps
Lay sweater face up
Fold sleeves inward
Fold sides toward center
Roll from hem to neckline
Pack into polybag (remove excess air)
Rolling Fold
Why it works
Saves a lot of space
Fewer harsh crease lines
Fits small parcels easily
Great for e-commerce shipments. Especially when packaging size matters.
Board Folding
This method uses a folding board to keep everything consistent.
Not just for sweaters—you’ll see it more with shirts—but still useful when uniformity is important.
Steps
Lay sweater face down
Place board near neckline
Fold left side over board
Fold right side over board
Fold bottom upward
Remove board carefully
Board Folding
Benefits
Same size every time
Cleaner look for retail
Faster folding in bulk
It’s more controlled. Less guesswork.
Packing Materials Used
Once the garment is folded, it’s not done yet. Not even close.
A few small things come in next—but they matter more than they seem:
Polybags – basic protection, keeps the garment clean
Tissue paper – helps hold shape, avoids hard creases
Silica gel – absorbs moisture (quietly doing its job)
Size stickers – quick identification
Barcode labels – for tracking, scanning, all the backend stuff
Individually, they feel minor. Together, they finish the presentation.
Carton Packing
After all that, garments finally move into cartons.
But packing isn’t random. There’s a system:
Size ratio-wise
Color ratio-wise
Style-wise
Everything needs to match the packing list exactly. One mismatch—and problems start downstream.
Carton Selection
Not every carton works. You have to consider:
Ply strength (for load and stacking)
Carton size
Moisture resistance
Shipping conditions (sea, air… makes a difference)
Then comes sealing:
BOPP tape
Strap bands
Sometimes humidity protection film
Once sealed, that carton shouldn’t need reopening.
Layout of the Finishing Section
A good finishing floor… you can almost feel the difference the moment you walk in. Things flow. People aren’t bumping into each other. Bundles move without getting stuck in corners.
And when it’s not right?
You’ll notice that too. Delays, piles, confusion.
A typical layout isn’t complicated, but it needs to be thought through:
Sorting zone
Defect correction area
Ironing section
Measurement area
QC section
Metal detection room
Tagging zone
Packing tables
Carton filling area
Final audit room
Finished goods warehouse
Looks standard on paper. But the way these areas connect—that’s what really matters.
When the layout works:
Movement is quicker, almost natural
Less handling, fewer unnecessary touches
Operators know exactly where things go
Mistakes quietly reduce
When it doesn’t:
Extra walking (a lot of it)
Pile-ups at random points
Miscommunication between sections
Small delays turning into bigger ones
It’s not dramatic at first. But over a shift… it adds up.
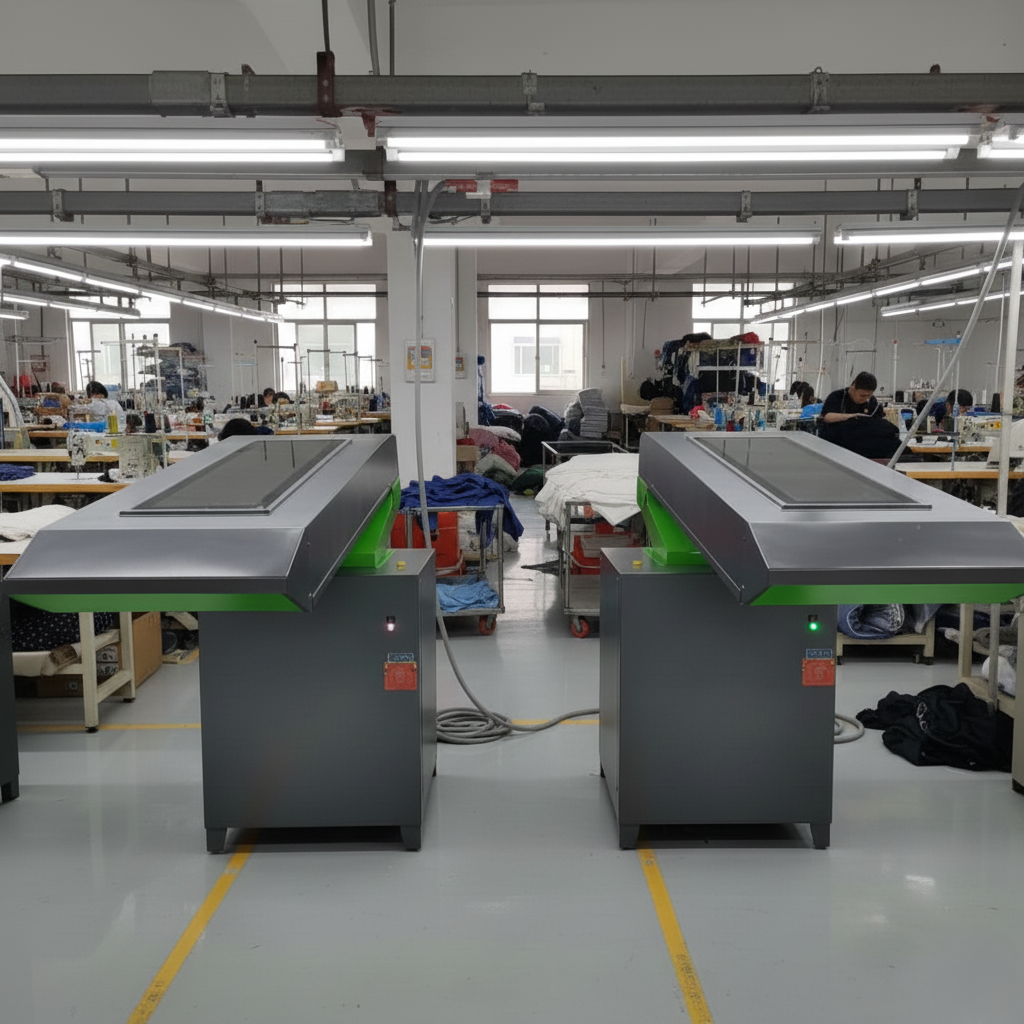
Equipment Used in Finishing
Nothing overly high-tech here. No flashy machines.
But every single piece plays a role.
Common things you’ll see:
Steam irons
Vacuum ironing tables
Steam tunnels
Thread trimming machines
Spot cleaning guns
Fusing machines
Heat press (for prints/labels)
Needle detectors
Label guns
Barcode printers
Folding boards
Polybag sealing machines
Individually? Simple tools.
Together? They carry the whole finishing process.
If even one isn’t working properly—say, steam pressure drops or the detector malfunctions—you’ll feel the slowdown almost immediately.
100% inspection for stains, oil marks, loose threads
Measurement verification (against spec, not guesswork)
Fit and shape checks
Packaging conformity
Carton weight accuracy
Label and sticker correctness
Nothing should slip through.
At least—that’s the goal.
KPIs That Actually Matter
These numbers tell you the truth. Not the reports. Not opinions.
DHU% (Defects per Hundred Units)
Rework rate
Audit pass rate
Packing accuracy
On-time shipment rate
You can have a busy floor—but if these numbers don’t look right, something’s off.
Common Finishing Defects
Some issues just keep repeating. Almost predictable.
Watermarks
Stains not properly removed
Incorrect folding
Wrong hangtags
Size mix-ups
Carton assortment errors
Shine marks from over-ironing
Barcode mistakes
Poor pressing quality
What’s frustrating?
Most of these aren’t complex problems.
They’re basic. And preventable.
How to Control Them
No magic solution here. Just doing the fundamentals properly.
Clear SOPs (and actually following them)
Skilled, trained operators
Multiple QC checkpoints—not just one final look
Miss any one of these and defects start slipping through. Quietly at first. Then in batches.
They’re basic. And preventable.
Importance of Finishing in Knitted Apparel
This is the last stop before the product leaves the factory.
No second chances. No “we’ll fix it later.”
If finishing is done right:
Garments look clean, sharp and premium
Buyers accept shipments with fewer issues
Returns and claims stay low
Brand image holds strong
If not:
Rejections increase
Complaints start coming in
Extra cost—rework, air shipments, discounts
And worse… trust starts slipping
Final Thought
Finishing isn’t just the last step.
It’s the last filter.
Everything passes through here.
Good fabric, perfect stitching, nice wash effect—all of that can still lose impact if finishing is careless.
Wrinkles, stains, wrong tags… that’s what people notice first.
And honestly?
That’s what they remember.
So yeah—quiet department, no big machines.
But the impact? Huge.