Textile printing today is a mix of traditional craftsmanship and the latest digital innovations, offering designers unlimited creative possibilities, and meeting demands for sustainability. From block printing to AI-assisted workflows, these techniques are impacting fashion, home décor and technical textiles globally. Before starting you must know how printing paste is made of?
Printing Paste Composition
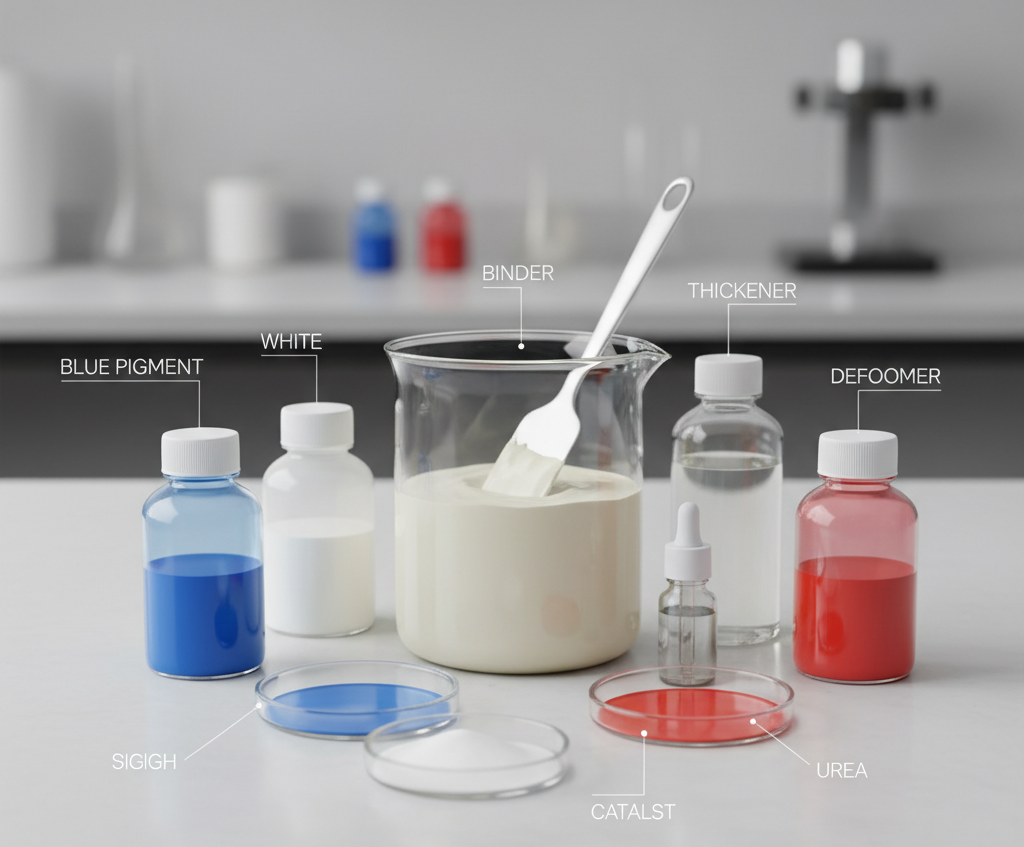
In textile printing, color is not applied directly in a liquid form but through a specially prepared mixture known as a printing paste. This paste is designed to be thick and controlled, so that the color stays exactly where it is applied without spreading on the fabric. The right composition of the paste ensures sharp design definition, proper color fixation and consistent final results.
A printing paste is made by combining colorants, thickening agents and various chemicals that support the printing and fixation process. Each component plays an important role in achieving the desired print quality.
Additives (Chemicals) Used in Textile Printing Paste
| Chemical Function | Chemical Name | Chemical Formula / Symbol | Purpose |
|---|---|---|---|
| Moisture Retainer | Urea | CO(NH₂)₂ | Improves dye penetration and keeps the print moist during fixation. |
| Alkali (Reactive Printing) | Sodium Carbonate (Soda Ash) | Na₂CO₃ | Activates reactive dyes and promotes fixation on cotton. |
| Alkali | Sodium Bicarbonate | NaHCO₃ | Mild alkali used in some printing formulations. |
| Thickener | Sodium Alginate | (C₆H₇NaO₆)n | Common thickener for reactive dye printing. |
| Thickener | Starch | (C₆H₁₀O₅)n | Provides viscosity and controls paste flow. |
| Binder (Pigment Printing) | Acrylic Binder | (Polymer-based, no fixed formula) | Bonds pigment particles to fabric surface. |
| Fixing Agent | Ammonium Sulfate | (NH₄)₂SO₄ | Promotes dye fixation in certain printing systems. |
| Fixing Agent | Diammonium Phosphate | (NH₄)₂HPO₄ | Used in pigment and reactive printing. |
| Softener | Silicone Softener | (Polydimethylsiloxane - PDMS) | Improves fabric softness and handle. |
| Wetting Agent | Nonionic Surfactant | Various | Improves penetration and uniformity. |
| Oxidizing Agent (Vat Printing) | Hydrogen Peroxide | H₂O₂ | Oxidizes vat dyes after printing. |
| Reducing Agent (Vat Printing) | Sodium Hydrosulfite | Na₂S₂O₄ | Reduces vat dyes into soluble form. |
Printing Paste Composition with Chemical Names
Printing Paste = Dye/Pigment + Thickener + Additives
Example: Reactive Printing Paste for Cotton
| Component | Chemical Name | Formula |
|---|---|---|
| Colorant | Reactive Dye | Depends on dye type |
| Thickener | Sodium Alginate | (C₆H₇NaO₆)n |
| Moisture Retainer | Urea | CO(NH₂)₂ |
| Alkali | Sodium Carbonate | Na₂CO₃ |
| Water | Water | H₂O |
Example: Pigment Printing Paste
| Component | Chemical Name | Formula |
|---|---|---|
| Colorant | Pigment | Insoluble color particles |
| Thickener | Acrylic Thickener | Polymer |
| Binder | Acrylic Binder | Polymer |
| Softener | Silicone Softener (PDMS) | (C₂H₆OSi)n |
| Water | Water | H₂O |
Common Textile Printing Chemicals and Symbols
- Urea → CO(NH₂)₂
- Soda Ash (Sodium Carbonate) → Na₂CO₃
- Caustic Soda (Sodium Hydroxide) → NaOH
- Hydrogen Peroxide → H₂O₂
- Ammonium Sulfate → (NH₄)₂SO₄
- Diammonium Phosphate → (NH₄)₂HPO₄
- Sodium Hydrosulfite → Na₂S₂O₄
- Acetic Acid → CH₃COOH
- Sodium Chloride (Salt) → NaCl
- Water → H₂O
Revised Statement
Additives (Chemicals) are added to enhance the performance of the printing paste. Common chemicals include Urea [CO(NH₂)₂], Sodium Carbonate [Na₂CO₃], Ammonium Sulfate [(NH₄)₂SO₄], Silicone Softener (PDMS), and Acrylic Binders. These chemicals improve dye fixation, penetration, moisture retention, softness, and color fastness, resulting in durable and high-quality textile prints.
Components of Printing Paste
Dye or Pigment
The dye or pigment is the main coloring agent in the printing paste. It provides the shade and visual effect required on the fabric. The type of dye used depends on the fabric material and application method.
- Can include reactive, disperse, acid, or vat dyes
- Pigments are used for surface printing on all fabric types
- Determines color depth, brightness and fastness
Thickener
The thickener controls the viscosity (thickness) of the printing paste. It ensures that the paste does not spread or bleed beyond the design area during application.
- Maintains sharp edges and pattern clarity
- Prevents color migration on fabric
- Common types: starch, alginate and synthetic polymers
Additives (Chemicals)
Additives are added to enhance the performance of the printing paste. They help improve fixation, penetration, softness and overall durability of the print.
- Binders improve adhesion (especially for pigments)
- Urea helps dye penetration and moisture retention
- Fixing agents enhance color fastness
- Softeners improve hand feel of the finished fabric
Formula Representation
The basic composition of printing paste can be simplified as:
Dye or Pigment + Thickener + Additives = Printing Paste
Each component must be carefully balanced to achieve the right print quality and performance.
General Textile Printing Process Flow
Textile printing follows a systematic process to ensure that the design is transferred accurately and fixed properly onto the fabric.
1. Design Creation
The process starts with developing the design, which can be created manually or digitally depending on the printing method.
- Includes pattern development and color planning
- Adjusted for fabric type and production method
2. Preparation of Printing Paste
The printing paste is prepared according to the specific requirements of the fabric, dye type and design.
- Accurate formulation is critical
- Controls color consistency and print quality
3. Printing Application
The prepared paste is applied to the fabric using the selected printing technique such as screen printing, rotary printing, or digital printing.
- Ensures proper placement of design
- Requires controlled pressure and alignment
4. Drying
After printing, the fabric is dried to remove excess moisture before fixation.
- Stabilizes the printed design
- Prepares fabric for the next stage
5. Fixation
Fixation is the process where the dye or pigment is permanently bonded to the fabric using heat or chemical treatment.
- Ensures color durability and wash fastness
- Critical for long-lasting prints
6. Washing & Finishing
Finally, the fabric is washed to remove unfixed color and residual chemicals, followed by finishing to improve feel and appearance.
- Removes excess dye and chemicals
- Enhances softness and fabric quality
- Finalizes the printed product
Methods of Textile PrintingTextile printing involves applying color to fabric in specific patterns or designs using different techniques. Each printing method has its own process, advantages and limitations, depending on factors such as production scale, design complexity and cost. From traditional handcrafted styles to modern industrial techniques, these methods offer flexibility in both creativity and production efficiency.
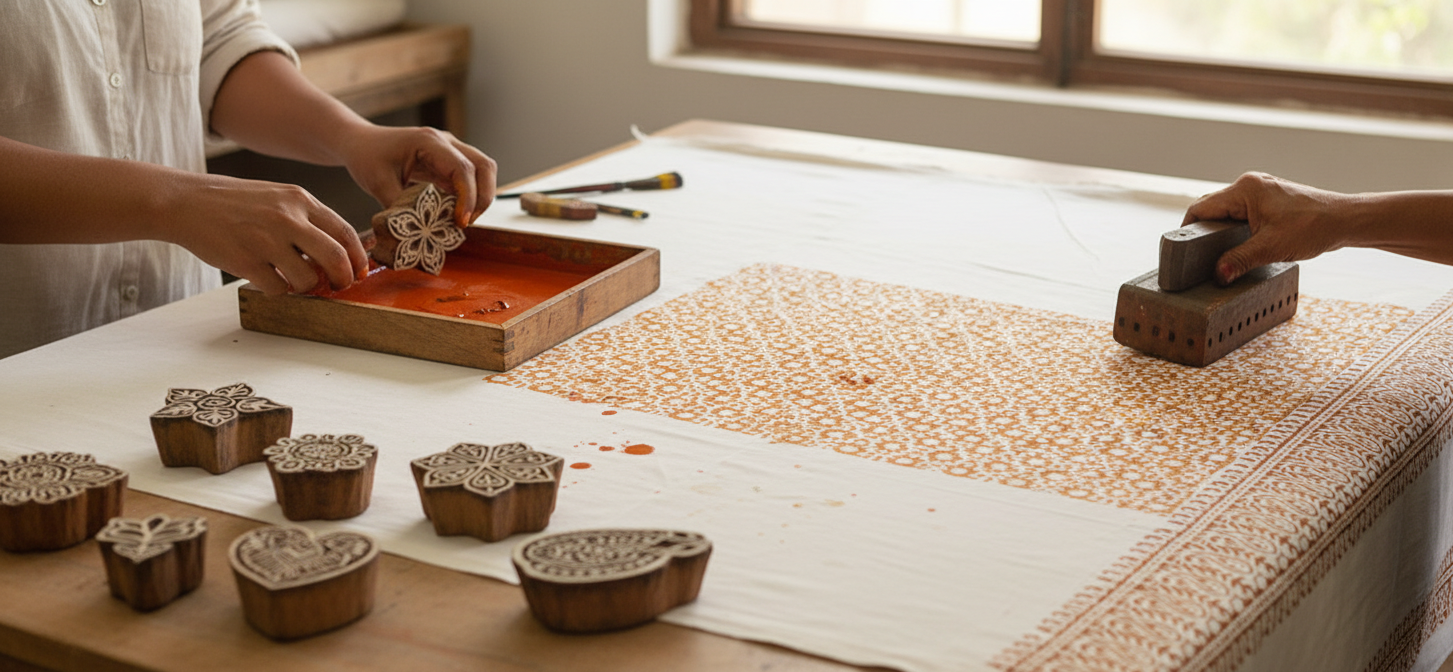
Block Printing
Block printing is one of the oldest and most traditional printing methods. It is a completely manual process where designs are transferred onto fabric using hand-carved blocks. The quality of the print largely depends on the skill and precision of the craftsman.
In this method, each block carries a part of the design and different blocks are used for different colors. The printer dips the block into printing paste and presses it onto the fabric repeatedly, ensuring proper alignment.
Key Characteristics
- Entirely manual process
- Designs are transferred directly onto fabric
- Highly dependent on craftsmanship and skill
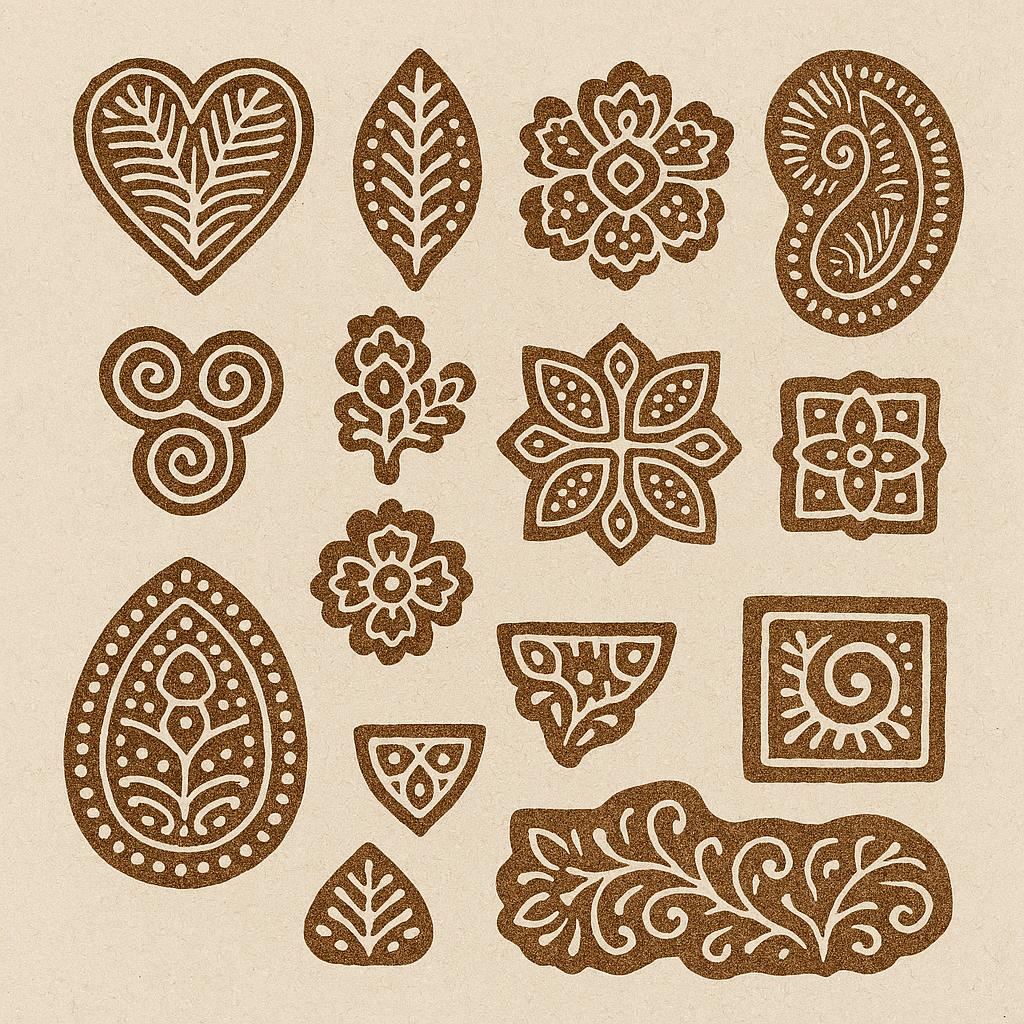
Blocks Used
- Engraved wooden blocks are commonly used
- Each block carries one part of the design
- Number of blocks = number of colors in the design
- Typical block size is 6" × 6", though sizes may vary
Process Description
The printer dips the block into printing paste and presses it onto the fabric with uniform pressure. Each color is printed separately using a different block, requiring precise alignment (registration).
Advantages
- Artistic and traditional appearance
- Ideal for handcrafted and ethnic textiles
- Low setup cost
Limitations
- Very low production speed
- Higher cost for multi‑color designs
- Not suitable for mass production
Common Applications
- Handcrafted garments
- Sarees, scarves, dupattas
- Home décor fabrics
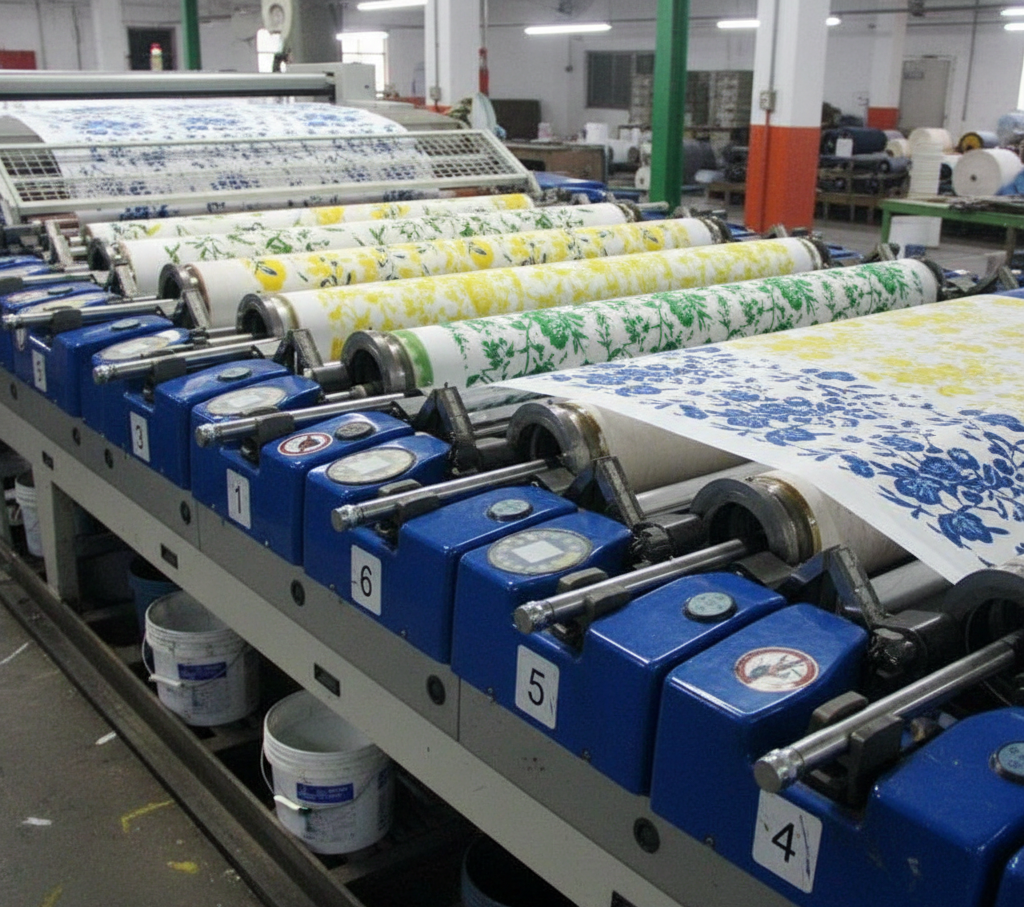
Roller Printing
Roller printing is a mechanical and industrial method used for high-speed fabric printing. In this technique, engraved copper rollers are used to transfer designs onto fabric. Each roller is engraved with a specific pattern and prints one color at a time.
As the fabric passes through the rollers, the design is continuously printed with each rotation, making it highly efficient for bulk production.

Technical Features
- Copper rollers are engraved with the design
- Design area is cut out during engraving
- Standard roller diameter: 12.5 cm (5 inches)
- Each roller prints one color only
- Maximum of 16 rollers can be used
Working Principle
Production Performance
- Extremely fast process
- Can print up to 250 meters per minute
- Suitable for long production runs
Advantages
- High productivity
- Low cost per meter in bulk production
- Consistent print quality
Limitations
- High initial investment
- Design changes are expensive and time‑consuming
- Less flexible for small orders
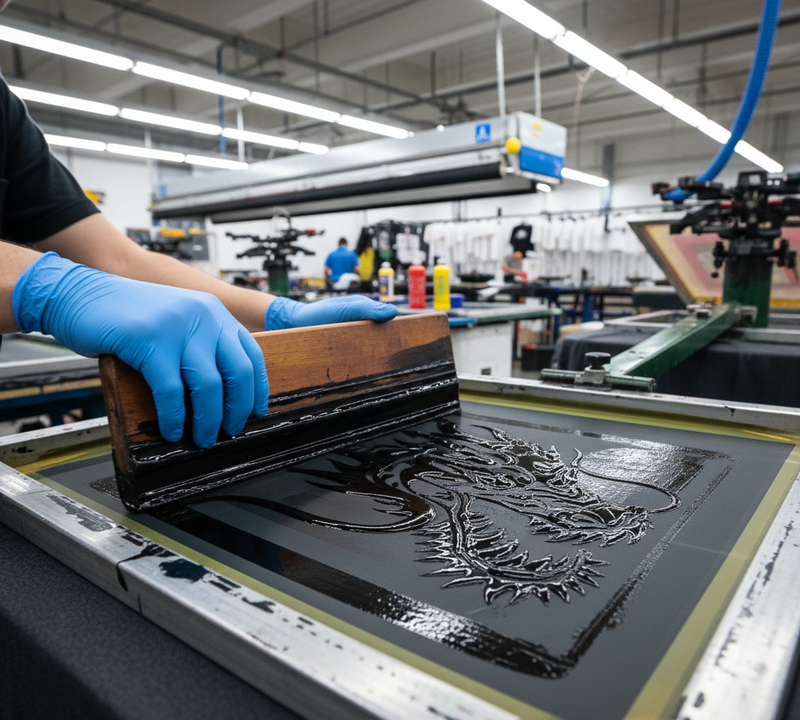
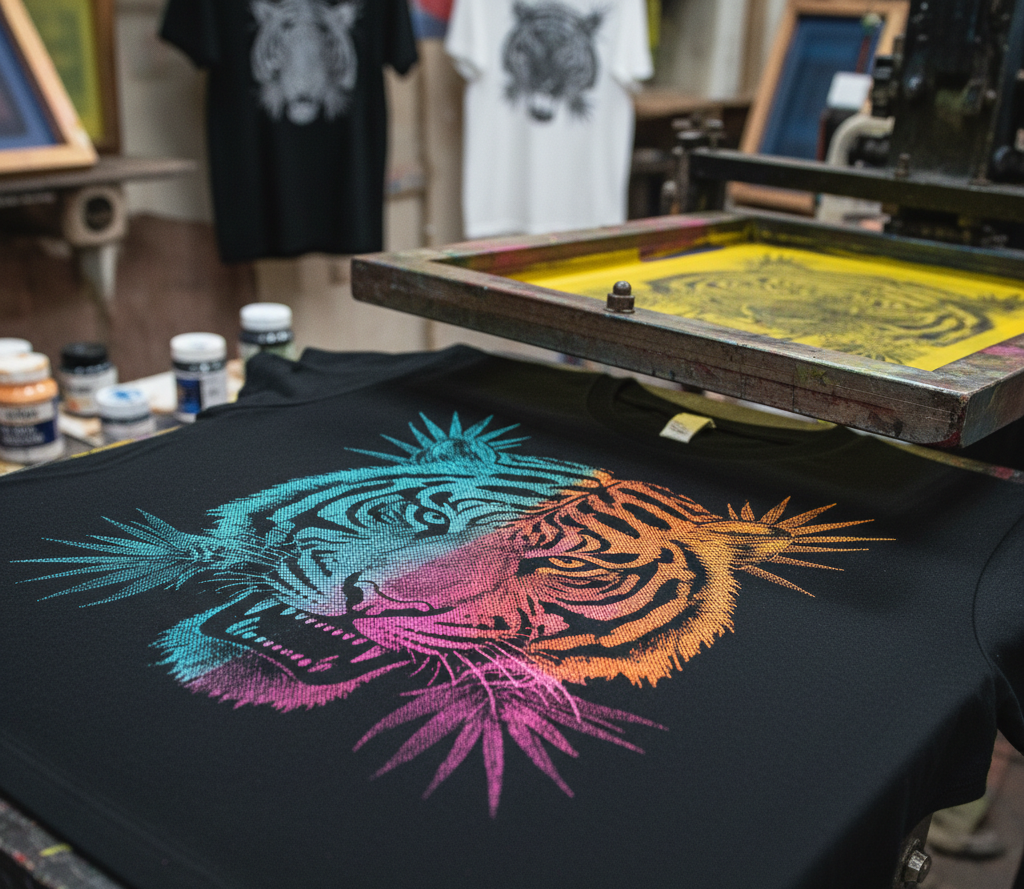
Screen Printing
Screen printing is the most widely used textile printing method, known for its versatility and ability to produce high-quality prints on various fabrics. It can be used for both small-scale and large-scale production.
In this method, a mesh screen is used to transfer printing paste onto the fabric. Areas that should not print are blocked with an emulsion, while open areas allow the paste to pass through when pressure is applied using a squeegee.
Each color in the design requires a separate screen, making alignment (registration) an important aspect of the process.
Screen Construction
- Screens made of silk or nylon mesh
- Mesh stretched over a wooden or metal frame
- Non‑design areas are blocked using chemical emulsion
Printing Process
Color Application
- Number of screens = number of colors in the design
Speed Comparison
- Faster than block printing
- Slower than roller printing
Types of Screen Printing
- Manual flat screen printing
- Mechanical flat screen printing
- Rotary screen printing
Advantages
- Excellent color brightness
- Suitable for a wide range of fabrics
- Flexible for design changes
Limitations
- High water and chemical usage
- Requires precise registration Screen Printing Process
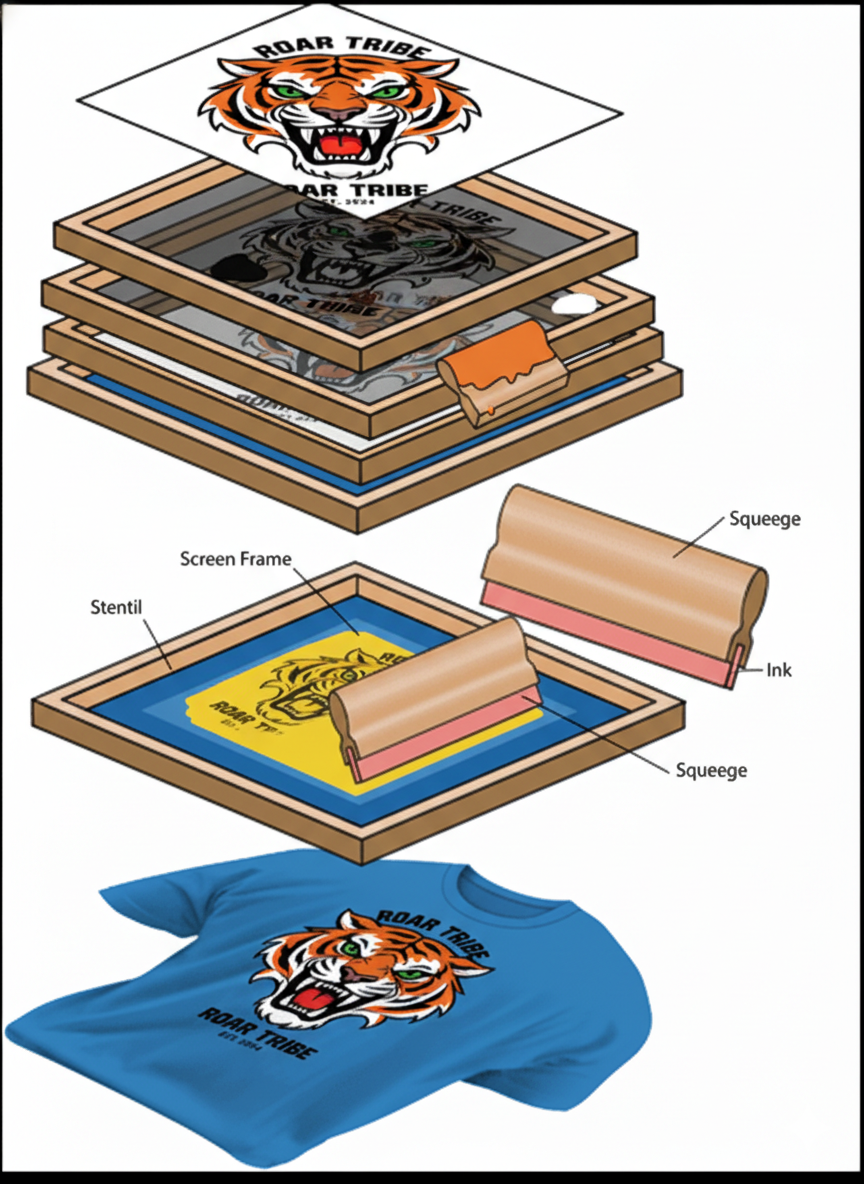
Screen Printing Process (Step-by-Step)
The screen printing process follows a controlled workflow to achieve accurate and durable prints.
1. Artwork & Film Positive Preparation
The design is printed onto a transparent sheet known as a film positive. The black areas represent the final image and block light during exposure.
2. Screen & Emulsion Coating
A fine mesh screen is stretched tightly over a wooden or aluminum frame. The screen is evenly coated with a light‑sensitive emulsion and dried in a dark environment.
3. Exposure Process
The film positive is placed on the emulsion‑coated screen and exposed to UV light. Areas exposed to light harden, while the covered design areas remain soft.
4. Developing (Wash‑Out)
The screen is washed with water, removing the unhardened emulsion and opening the mesh where ink will pass through. This creates a stencil of the design.
5. Printing with Squeegee
The prepared screen is placed on the garment. Rubber ink is poured onto the screen and pushed through the open mesh using a squeegee, transferring the design onto the fabric.
6. Curing & Fixation
The printed garment is heat‑cured (typically 150–170°C) using a tunnel dryer or heat press. Proper curing ensures durability, wash fastness and color stability.
This same base process is used for high‑density rubber, puff print, glitter print, foil adhesive print and flock print — with changes only in ink type or added steps.
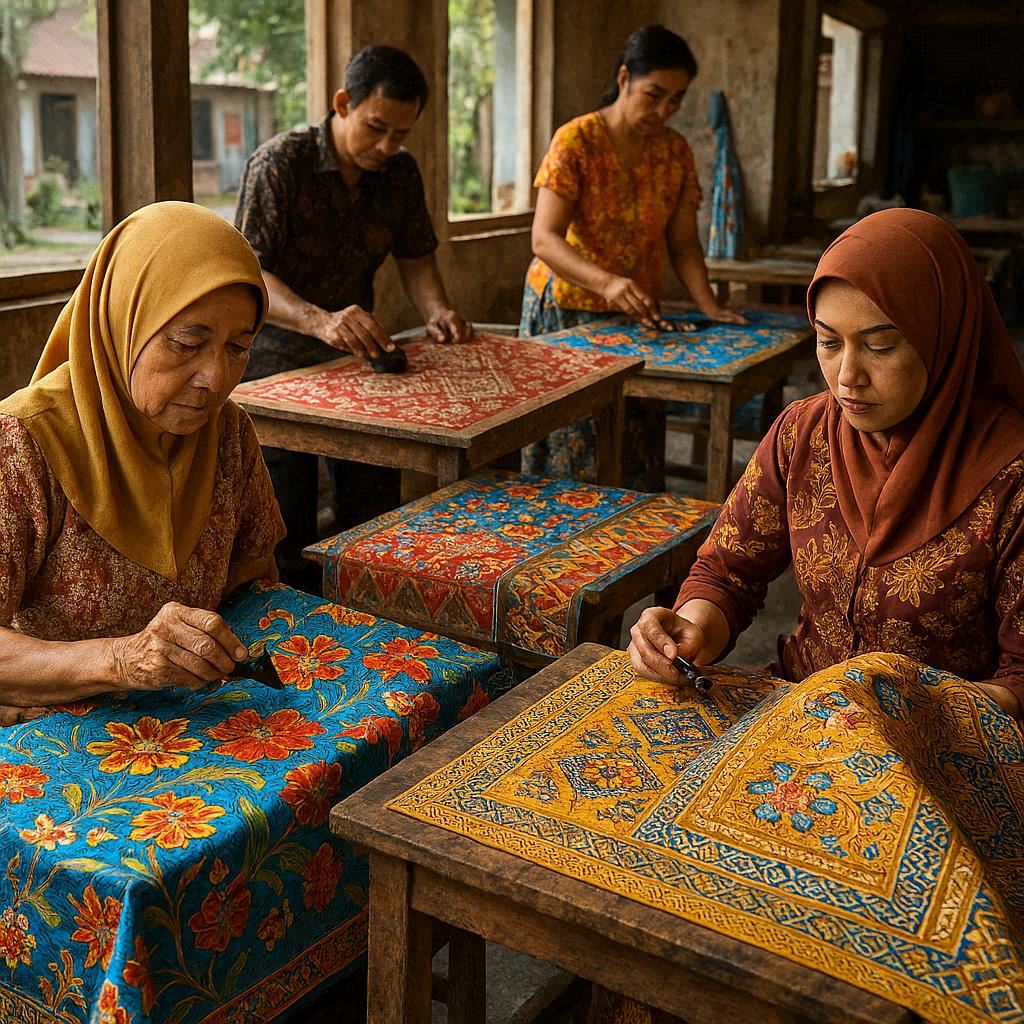
Batik Printing
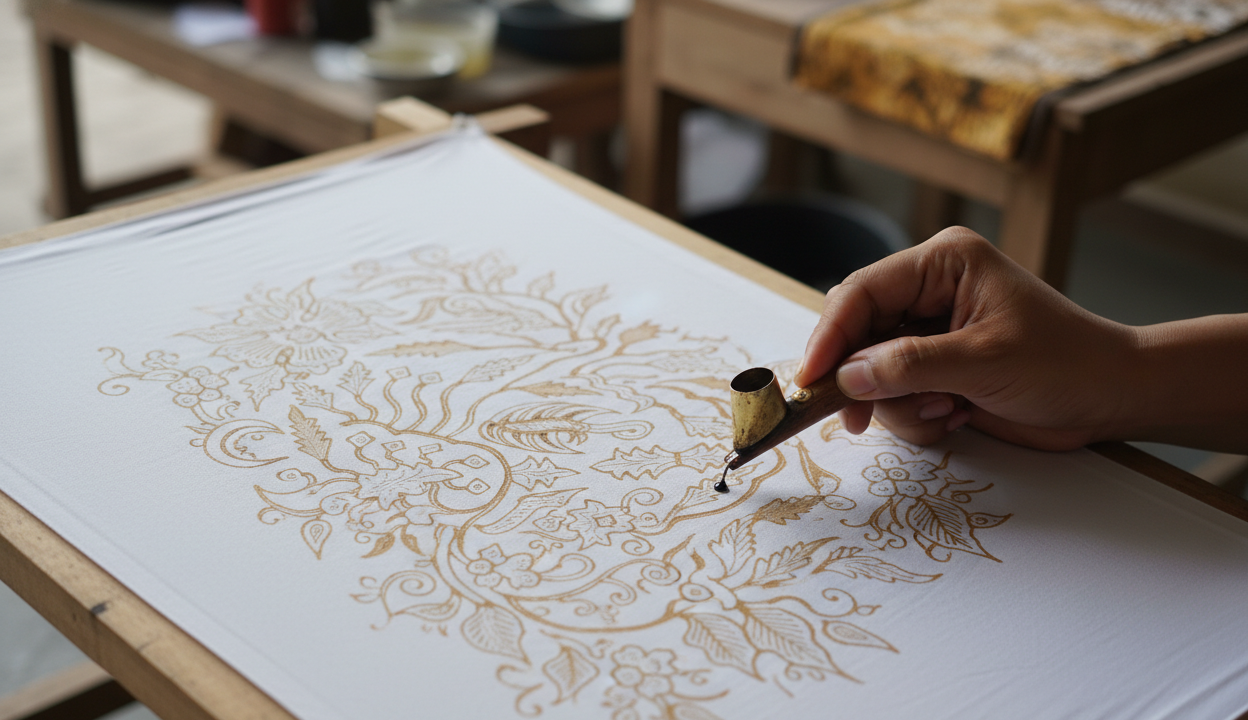
Batik is a traditional resist printing technique where wax is used to block certain areas of the fabric, preventing the dye from penetrating those parts. This creates beautiful patterns as the dyed and undyed areas form a unique design. The method is widely appreciated for its artistic and handcrafted appeal, often associated with cultural and heritage textiles.
In batik printing, a mixture of beeswax and paraffin wax is used as the resist material. The wax is carefully applied to the fabric using tools such as brushes or special pens, depending on the design. Once applied, the fabric is dyed, usually in cold dye baths, while the waxed areas remain untouched.
The process follows a layered approach, where multiple colors can be built up gradually from light to dark shades. At the end, the fabric is washed in hot water to remove the wax, revealing the final pattern.
Key steps in batik printing include:
- Applying wax to selected areas of the fabric
- Dyeing the fabric (wax prevents dye penetration)
- Repeating the process for multiple colors if required
- Removing wax through hot washing
One of the most distinctive features of batik is the “vein effect”, which occurs when the wax cracks slightly during handling. These cracks allow small amounts of dye to seep in, creating fine, irregular lines that add to the artistic character of the design.
Applications
- Decorative fabrics
- Traditional garments
- Artistic textile products
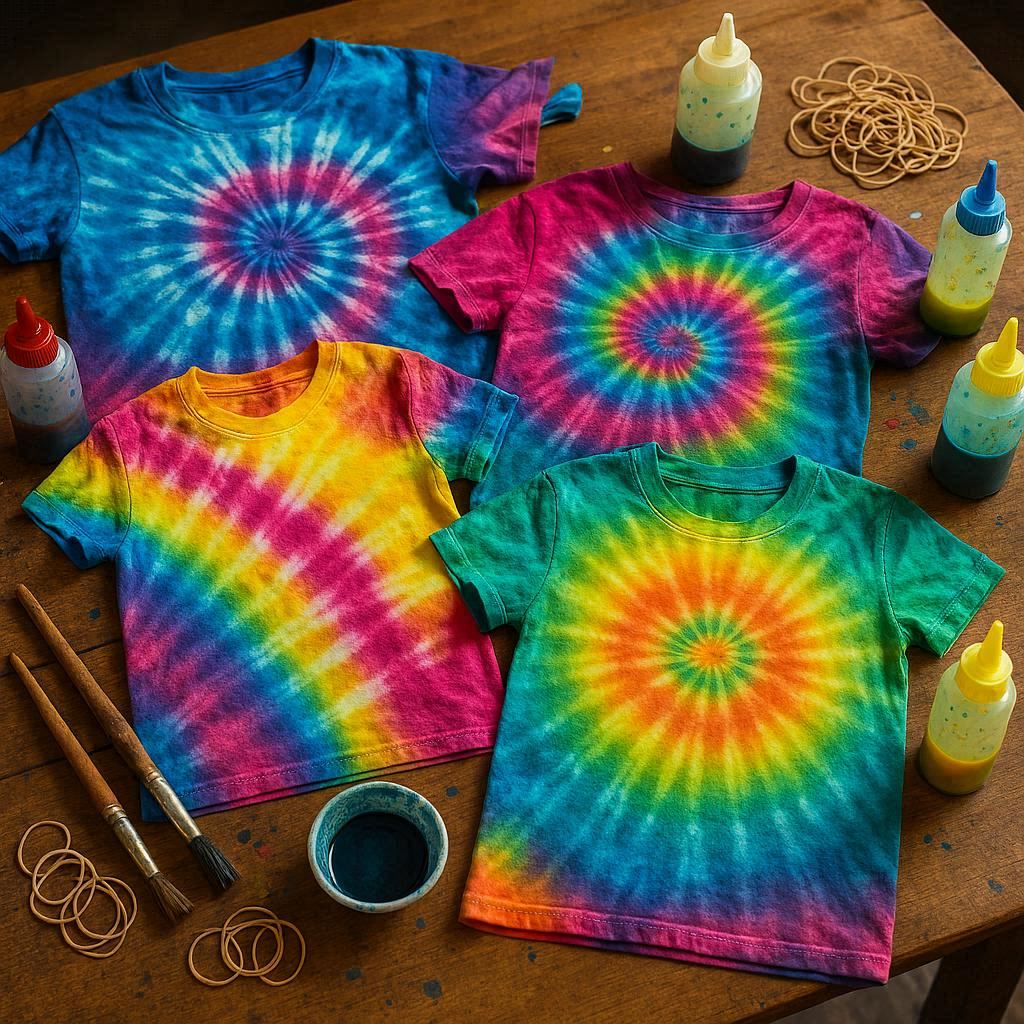
Tie and Dye Printing
Tie and dye is another popular resist dyeing technique, where parts of the fabric are physically tied, folded, or knotted to prevent dye absorption. This creates irregular, organic patterns that are highly valued in casual and fashion wear.
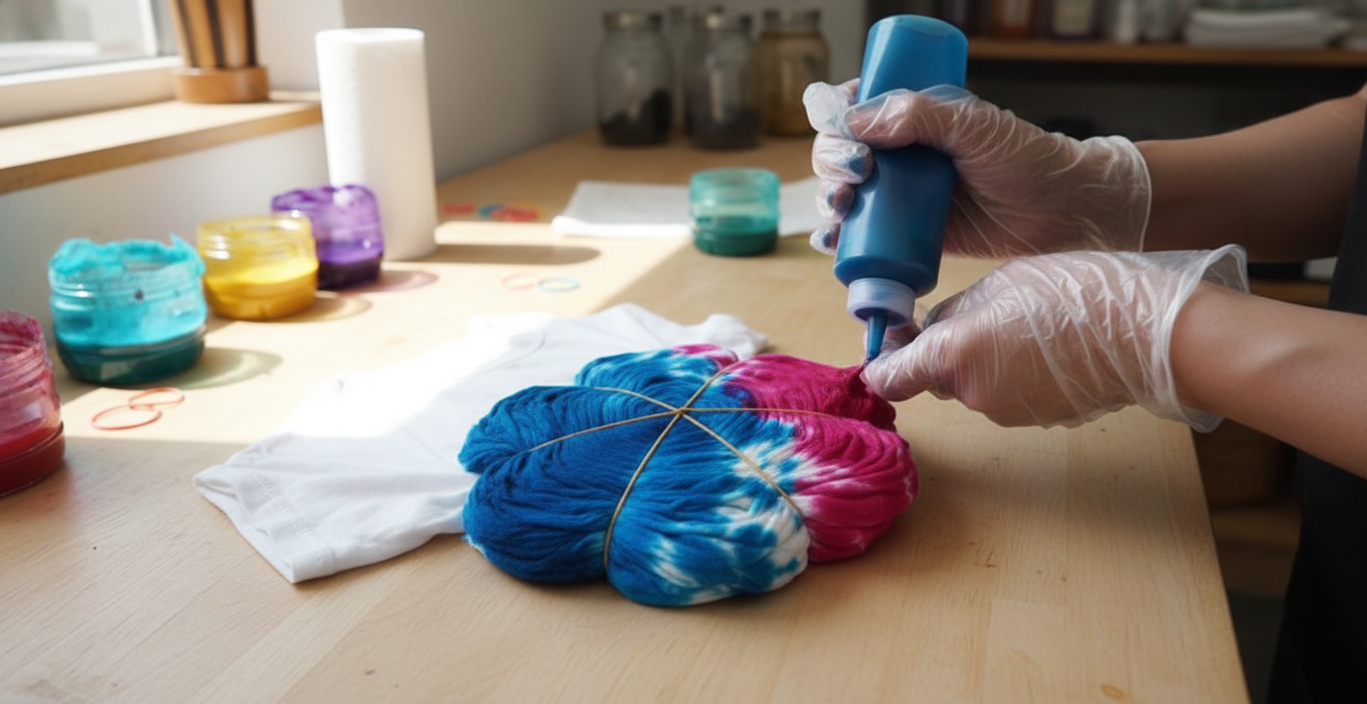
In this method, sections of the fabric are pinched and tightly tied using threads or cords before dyeing. When the fabric is immersed in dye, only the exposed areas absorb color, while the tied portions remain undyed or lightly colored.
The result is a unique pattern every time, as the tying process is rarely identical. Designers can create both simple single-color effects or complex multi-colored patterns depending on the dyeing sequence.
Resist Technique
- Fabric areas are pinched and tightly tied with threads or knots
Design Characteristics
- Produces random and organic patterns
- Each piece is unique
- Mono‑color or multi‑color effects possible
Advantages
- Simple and low‑cost method
- High aesthetic appeal
Common Uses
- Casual wear
- Fashion garments
- Scarves and summer clothing