Rubber printing
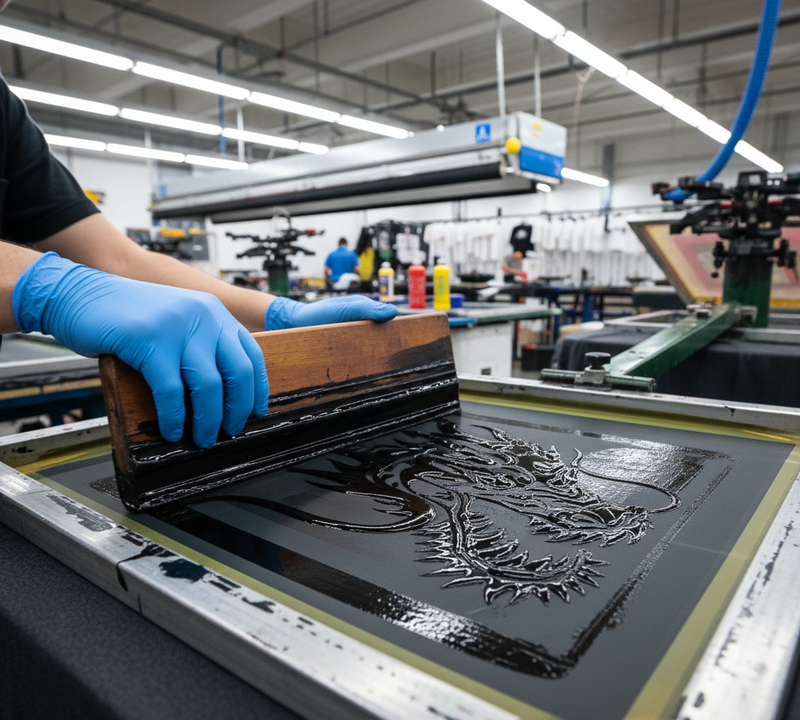
Rubber printing is a process by which thick, pigment-rich ink is transferred to fabric to produce designs with a strong, flexible, “rubbery” hand feel. The ink sits on top of the fabric and forms a slightly raised layer which results in vibrant colors and great visibility even over dark clothing. The industry commonly uses screen printing for rubber printing, with inks such as:
- Plastisol Rubber Inks (Industry Work Horse, Cures by Heat Fusion, High Opacity + Colour Consistency on Dark Garments)
- High solids water-based rubber inks (softer hand, breathable feel, less VOC, but need airflow and longer dwell to dry/cure.)
- Silicone rubber inks (exceptional stretch (performance wear), low temperature curing and PVC/phthalate free by design.
All three create a similar rubberized finish, though each has its own advantages depending on the fabric and application.
Key Features & Benefits of Rubber Printing
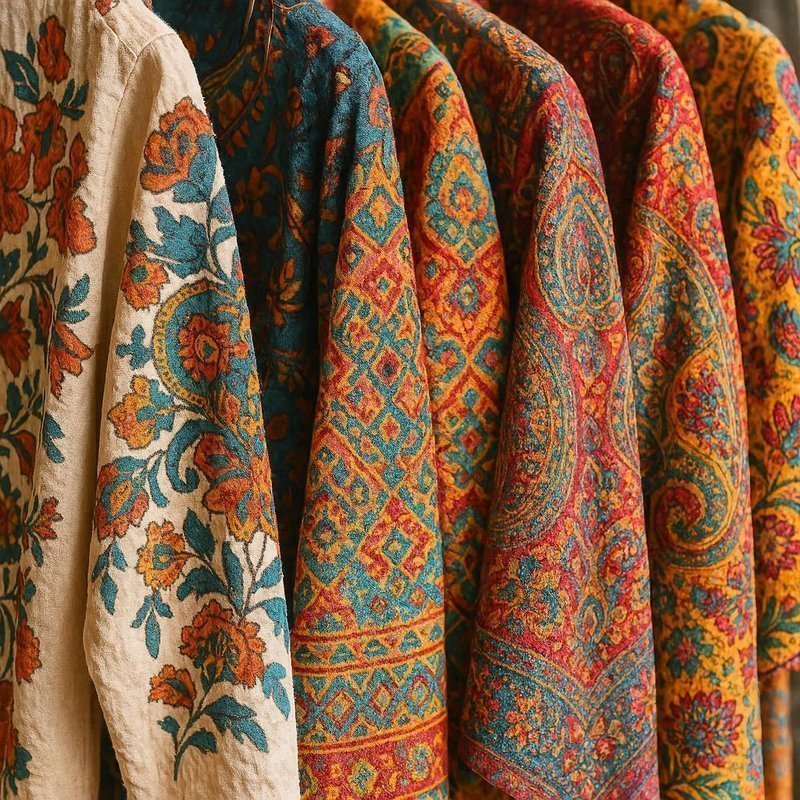
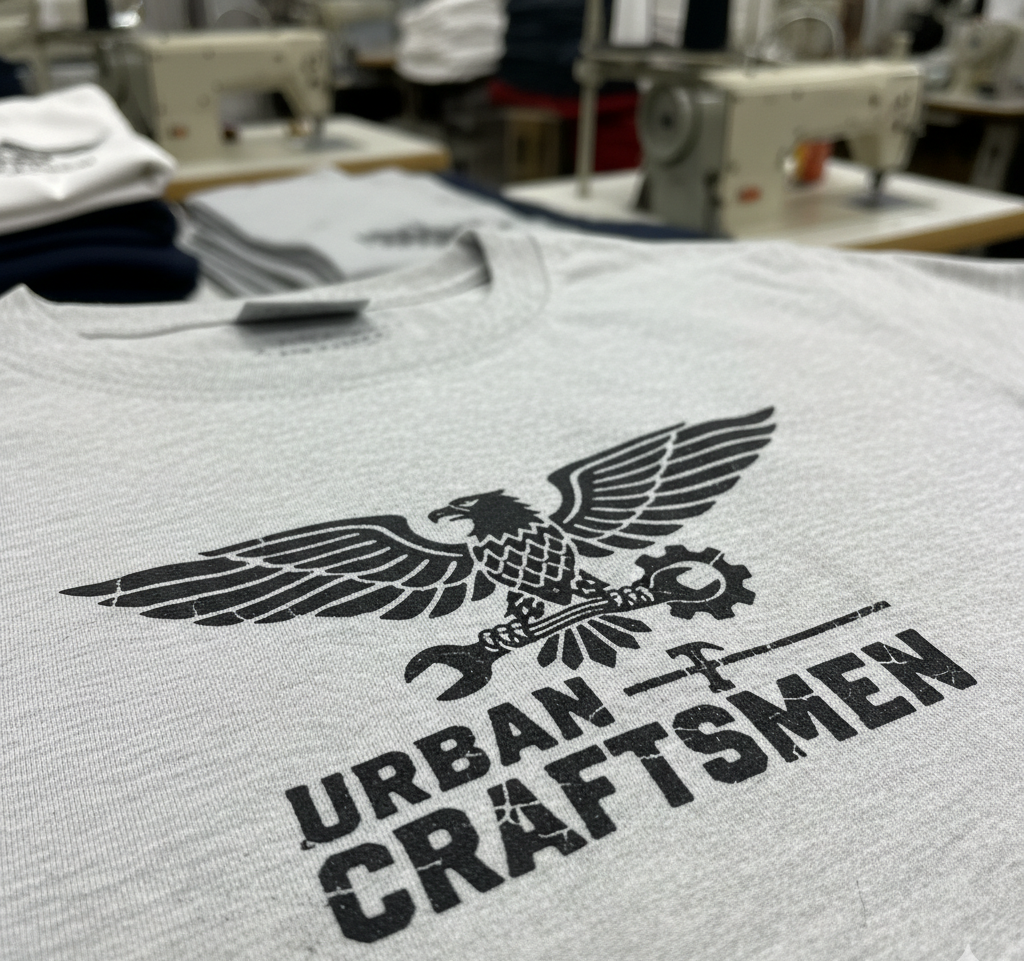
Rubber printing is popular in the garment industry as it offers a good combination of visual appeal, durability and versatility. One of the features that make it stand out is its excellent opacity, so colours look bright and vivid even on dark fabrics such as black, navy or maroon. This is particularly useful for designs that are bold and high-contrast, where visibility is key.
Another big benefit of rubber printing is its durability. Once the ink is properly cured, the print will withstand normal washing, stretching and daily use without cracking, peeling or fading. That’s what makes it reliable for both fashion and functional clothing.
Rubber Printing also gives good colour definition. Logos, typography and graphic elements look crisp and well defined with good edge clarity and deep colour intensity. This accuracy helps to preserve the integrity of the artwork and improve the overall quality of the garment.
Rubber prints have a slightly raised, textured surface, which adds a premium tactile feel and visual benefits. This subtle elevation enhances the aesthetics of the design and provides a more engaging and high-quality experience for the wearer, which is why it is popular in branded and fashion-forward apparel.
It is also good with different kinds of fabric. Rubber printing is a versatile printing method that works well on a variety of substrates and fabrics including 100% cotton, cotton blends, polyester, fleece and performance fabrics. The system can be modified for use on stretch fabrics such as lycra and spandex by combining with silicone systems, enhancing its versatility across product categories.
All these advantages make rubber printing prevalent in fashion as well as commercial uses. It is often found in streetwear, sportswear, promotional apparel, uniforms, kidswear and hoodies & sweatshirts. This makes it an option for various segments of the apparel industry given its uniform quality, durability and visual impact.
Types of Rubber Printing Inks
1. Plastisol Rubber Ink
The most popular rubber printing ink in the garment industry is plastisol. It is known for its consistency, ease of use and ability to deliver repeatable results over large production runs. The ink is thick and viscous, staying on the fabric, rather than soaking in. As a result, it produces bold, opaque prints with great coverage, even on dark garments. One of its great advantages is its on-press stability, meaning it does not dry out quickly while printing, making it perfect for long production runs.
Key characteristics:
- Thick and highly opaque, even on dark fabrics
- Excellent elasticity and flexibility after curing
- Very stable during printing (no premature drying)
- Requires heat curing to bond properly to the fabric
Best for: High-volume production environments where consistency, speed and durability are critical.
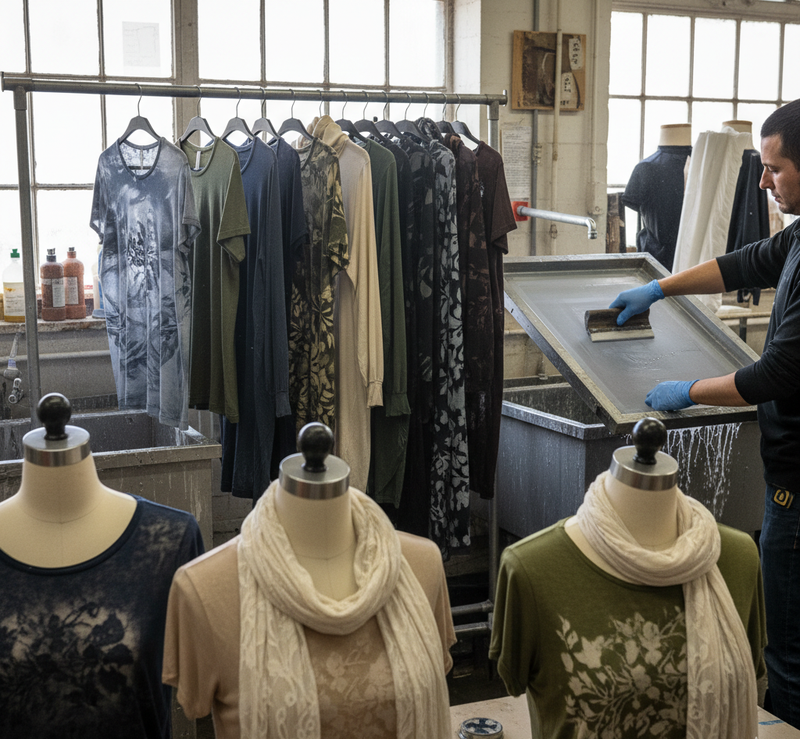
2. Water‑Based Rubber Ink
Water-based rubber inks are a more environmentally friendly option to plastisol. Penetrates slightly into the fabric for a softer, more natural feel than plastisol.
These inks are very popular in high end fashion and retail applications where comfort and breathability are important. But they need more attention in production as they can dry in the screen if not handled properly and usually need longer drying and curing times.
Key characteristics:
- Soft hand feel with a more natural finish
- Breathable and comfortable for the wearer
- Flexible and suitable for fashion-driven designs
- Requires controlled drying conditions and longer curing time
Best for: Premium garments, fashion brands and applications where softness and comfort are important selling points.
3. Silicone Rubber Ink
Silicone inks are a high-performance solution for modern technical textiles. These inks are engineered for extreme flexibility and durability, particularly on stretchable fabrics.
Plastisol and water-based inks lose their elasticity when subjected to heavy stretching and repeated wear, while silicone inks retain their elasticity. They also cure at relatively low temperatures, so they are good for fabrics which are sensitive to heat.
Key characteristics:
- Outstanding stretch and recovery properties
- Strong adhesion to synthetic fabrics
- Lower curing temperature compared to plastisol
- Resistant to cracking, peeling and environmental stress
Best for: Activewear, sportswear, compression wear,
yoga wear, swimwear and other performance textiles.
| Ink Type | Main Chemical Components | Common Chemical Formula / Symbol |
|---|---|---|
| Plastisol Rubber Ink | Polyvinyl Chloride (PVC) resin + plasticizers | PVC = (C₂H₃Cl)ₙ |
| Phthalate or non-phthalate plasticizers | Example: DINP = C₂₆H₄₂O₄ | |
| Titanium Dioxide (white pigment) | TiO₂ | |
| Calcium Carbonate (filler) | CaCO₃ | |
| Water-Based Rubber Ink | Acrylic polymer emulsion | Typically (C₃H₄O₂)ₙ (acrylic-based) |
| Water | H₂O | |
| Titanium Dioxide (white pigment) | TiO₂ | |
| Ammonia (pH control) | NH₃ | |
| Silicone Rubber Ink | Silicone polymer (Polydimethylsiloxane - PDMS) | (C₂H₆OSi)ₙ |
| Silicone catalyst / crosslinker | Usually platinum (Pt) or peroxide based | |
| Titanium Dioxide (white pigment) | TiO₂ | |
| Silica (filler) | SiO₂ |
Key Polymers Used
- PVC (Polyvinyl Chloride) → (C₂H₃Cl)ₙ
- Acrylic Polymer → (C₃H₄O₂)ₙ (varies by resin type)
- Silicone (PDMS) → (C₂H₆OSi)ₙ
Rubber Printing Process (Step‑by‑Step)
Rubber printing is a precise and controlled process. Each step—from design to curing—directly impacts the final print quality, durability and appearance.
1. Design & Color Separation
The foundation of a successful rubber print lies in proper artwork preparation. Since rubber inks create a raised and dimensional effect, the design must be optimized accordingly.
Design considerations:
- Use spot colors rather than gradients for better separation
- Apply bold strokes and adequate spacing for puff or raised effects
- Avoid extremely thin lines, as they may collapse during curing
- Ensure clean and accurate separations to maintain edge sharpness
Well-prepared artwork ensures consistent print height, elasticity and overall clarity in the final result.
2. Screens & Stencils
Screen preparation plays a crucial role in controlling ink thickness and texture. The mesh count determines how much ink is deposited onto the fabric.
Mesh Selection:
- 80–110 mesh → Ideal for heavy ink deposits like puff and rubber prints
- 120–230+ mesh → Suitable for finer details and top color layers
Stencil Preparation:
- Proper emulsion thickness improves durability
- Correct exposure time ensures stencil strength
- Weak or underexposed stencils can break under pressure
A strong stencil is essential when working with thick inks and high squeegee pressure.
3. Press Setup
Accurate press settings are essential to achieve consistency across prints. Even small adjustments can affect ink transfer, sharpness and texture.
Important settings:
Off-contact: Must allow clean separation between screen and fabric
Squeegee hardness (durometer):
- 60 shore → Higher ink deposit
- 70 shore → General printing
- 70/90/70 → Better control for automatic presses
Additionally:
- Adjust flood stroke to maintain proper ink coverage
- Adjust print stroke pressure to balance detail and thickness
4. Printing Sequence
The order in which layers are printed is critical to maintaining the structure and quality of the rubber effect.
Typical sequence:
- Print underbase (if required for dark fabrics)
- Flash cure lightly (gel stage, not full cure)
- Print color layers
- Apply rubber or puff layer at the end
Printing the rubber layer last ensures it retains its thickness and dimensional feel without being compressed by additional layers.
5. Curing (Most Critical Stage)
Curing is the step that determines whether the print will survive washing, stretching and daily wear. Improper curing can lead to cracking, peeling or color fading.
Important principle: Always measure the actual ink film temperature—not just the dryer setting.
Plastisol Ink
- Standard curing: ~160°C (320°F)
- Low-cure inks: 127–132°C
- Typical dwell time: ~60 seconds
Water-Based Ink (HSWB)
- Requires both drying and curing stages
- Forced air helps remove moisture
- Typical curing: ~160°C for ~3 minutes
Silicone Ink
- Cure range: 120–150°C
- Time: 2–5 minutes
- Accurate catalyst mixing is essential
Puff Ink
- Expansion occurs around 160°C
- Requires even heat distribution
- Uneven heat leads to inconsistent puff height
6. Quality Checks
Before moving into bulk production, proper testing ensures that the print meets durability and quality standards.
Key checks:
- Allow the print to cool completely before testing
- Perform stretch test (no cracking or peeling)
- Conduct wash test for durability
- Inspect puff height and edge sharpness
Early-stage testing helps prevent costly mistakes and rework during bulk production.
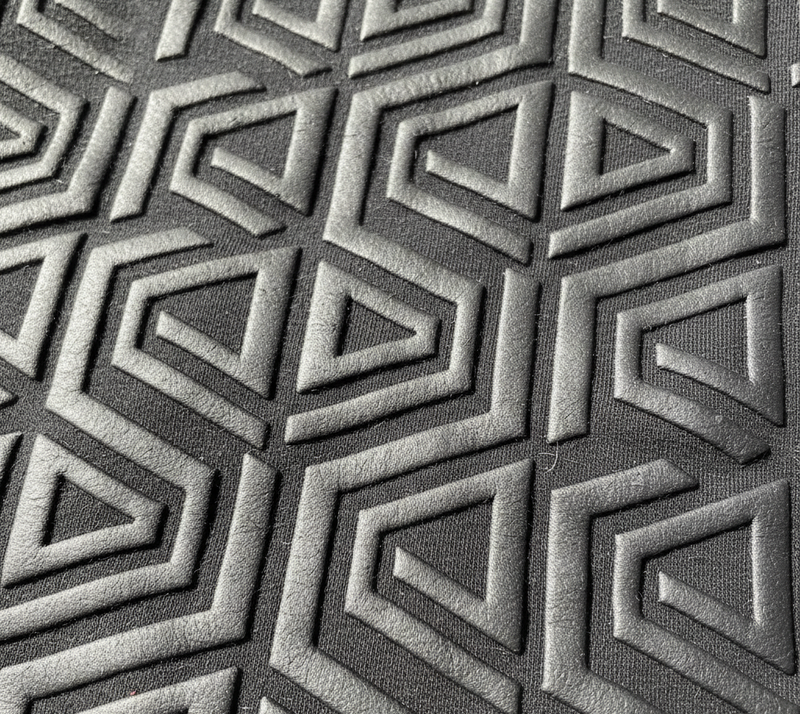
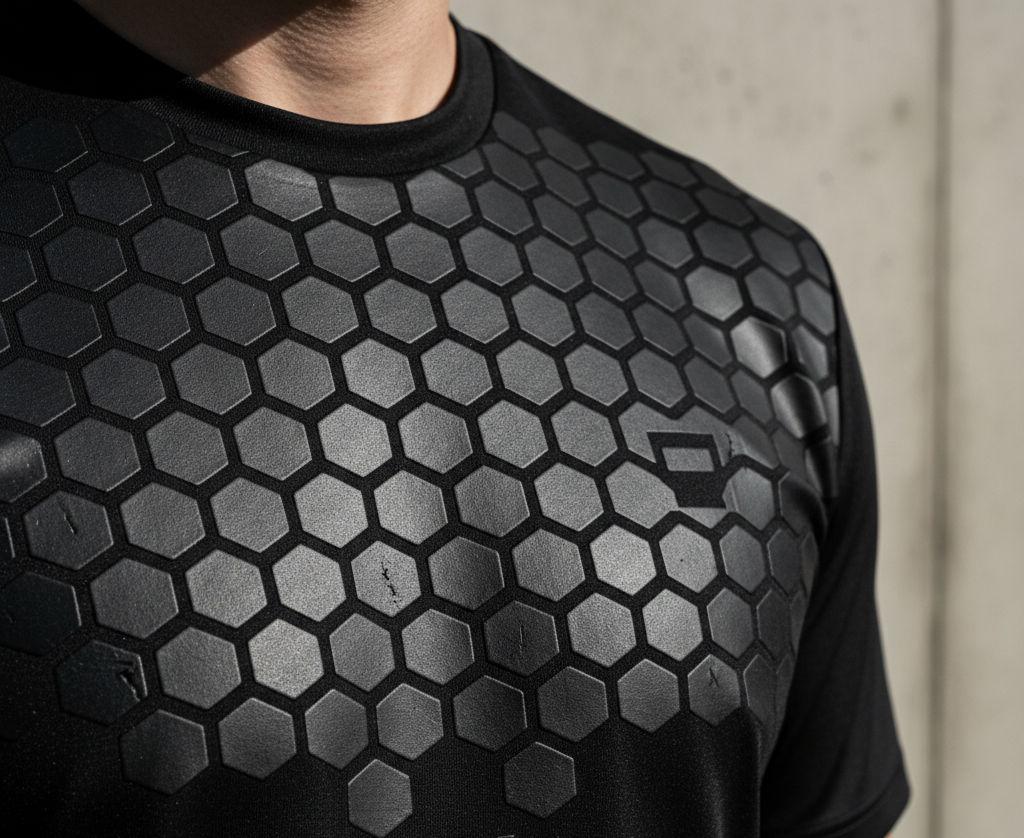
High Density Rubber Print (HD Print)
High-density rubber printing is widely chosen when a brand wants to produce bold, premium and highly durable graphics. Unlike regular prints, this technique builds up ink thickness to create a noticeable 3D surface, so the design stands out visually and physically.
One big plus of high-density printing is its powerful visual impact. The high structure directly catches the attention and gives special character to the garments, especially for fashion and branding.
At the same time it produces sharp and well defined edges. The final design with its thick stencils and controlled ink deposits can create clean outlines and structured shapes, even with bold or geometric designs.
From a tactile point of view high density prints feel premium. The surface is like embossed or rubber patch-like textures, which give the wearer a sense of quality and durability.
This technique is famous for its lasting durability performance wise. The thick layer of ink resists washing, rubbing and everyday wear far better than regular flat prints.
Another big advantage is its versatility to fabrics. High-density rubber printing works well on: Cotton, Fleece, Terry, Cotton blends, Knitted mid-weight fabrics.
Applications of High-Density Rubber Printing
Due to its bold appearance and durability, high-density printing is used across multiple product segments.
Fashion & Streetwear
In fashion, especially streetwear, this technique is used to create signature looks.
- Bold chest logos
- Brand monograms
- Raised graphics for identity
It helps brands stand out with a premium and modern aesthetic.
Sports & Teamwear
High-density prints are ideal for applications requiring both visibility and durability.
- Jersey numbers
- Team logos and crests
- Badges and emblems
These prints maintain their structure even under frequent washing and physical activity.
Kidswear
For kidswear, the tactile nature of the print adds an extra level of interaction.
- Raised textures feel playful and engaging
- Durable enough for repeated use and washing
Accessories
High-density rubber printing offers a great alternative to stitched patches.
- Caps
- Bags
- Sleeves
- Branding patches
It provides a patch-like appearance without added weight or stitching cost.

High Density Rubber Printing Process (Step by step)
The process requires careful layering and control to build the desired 3D effect.
Step 1: Artwork Preparation
The process begins with the artwork preparation which needs to be optimised for high density printing. Some designs don’t work well with the technique and often need to be adjusted. Designs with bold shapes, solid fills and thick lines do much better because they can hold the structure and height during the printing and curing. Very fine or thin detail may not hold its shape unless the stencil is carefully crafted. When artwork is prepared correctly, it will have clean edges, the proper height build-up and will appear balanced in the final print.
Step 2: Stencil making
Once the design is created, the next step is to construct a solid stencil which can cope with heavy ink loads. High density printing is done with thicker stencils, usually several layers of emulsion or capillary films, as opposed to standard printing. The extra thickness allows more ink to be transferred, creating the raised effect. At the same time the stencil must be strong enough to survive many passes through the printer without falling apart. The accuracy of this step has a direct impact on the final height, sharpness and precision of the print.
Step 3: Multi-Pass Ink Application
High density printing is printing with multiple layers of ink, not just one. This is where the 3D effect comes in. The first pass is thick and gives the base layer, the basis for the design. Then a second layer is added. This is usually done after a partial cure to build up more height. Additional layers may be added to increase the elevation for more premium or dramatic effects. Each layer adds depth and dimension and careful control is needed to ensure the structure builds evenly without spreading out or losing its shape.
- Layer
1: Base Deposit
A thick foundation layer forms the initial structure - Layer
2: Elevation Layer
Adds additional height after partial curing - Layer
3 (Optional): Build-Up Layer
Used for deeper 3D effects and stronger visual impact
Each layer increases the dimensional effect of the print.
Step 4: Controlled Flashing
Controlled flashing is performed between each ink layer to stabilise the print. In this stage the ink is partially cured into a gel-like state. This is important because it allows the layer to keep its shape and still be able to bond to the next layer. If you properly flash the ink, it will not spread or collapse when passes are made. Proper flashing will help maintain clean edges and consistent height. If flashing control is not done properly the print can lose its structure and look uneven.
Step 5: Final Curing
When all the layers are printed the print is cured one last time, which solidifies the whole structure. This step allows the ink to completely bond with the fabric and set the 3D form. Proper curing encourages durability, flexibility and long term performance. Incorrect curing can lead to problems such as deformation, weak adhesion or lower wash resistance. This step ultimately influences the print’s performance in use.
Step 6: Quality Inspection
The last step is a thorough quality inspection to ensure visual and performance standards are met. The print is examined for uniform height in all areas, sharp and well-defined edges and a smooth, even surface. Tests are also conducted to verify proper adhesion, stretchability and wash durability. This step is important to catch any problems early and to ensure that only high quality products move forward to bulk production or delivery.
Types of High Density Rubber Effects
Standard High Density
- Single-level raised surface
- Clean, uniform and bold appearance
Multi-Level High Density
Two-stage elevation:
- Creates a layered, structured look
Three-stage elevation:
- Used for more complex, premium designs
- Adds depth and dimension
High-Density Block Letters
- Ideal for logos, varsity fonts and sports numbers
- Strong visibility and readability
HD Micro-Detail
- Allows fine elevated patterns
- Suitable for intricate shapes and smaller design elements
Hybrid High-Density Effects
- Combines high-density with flat prints or special finishes
- Can include gradients, metallics or gloss effects
- Creates modern, fashion-forward visuals
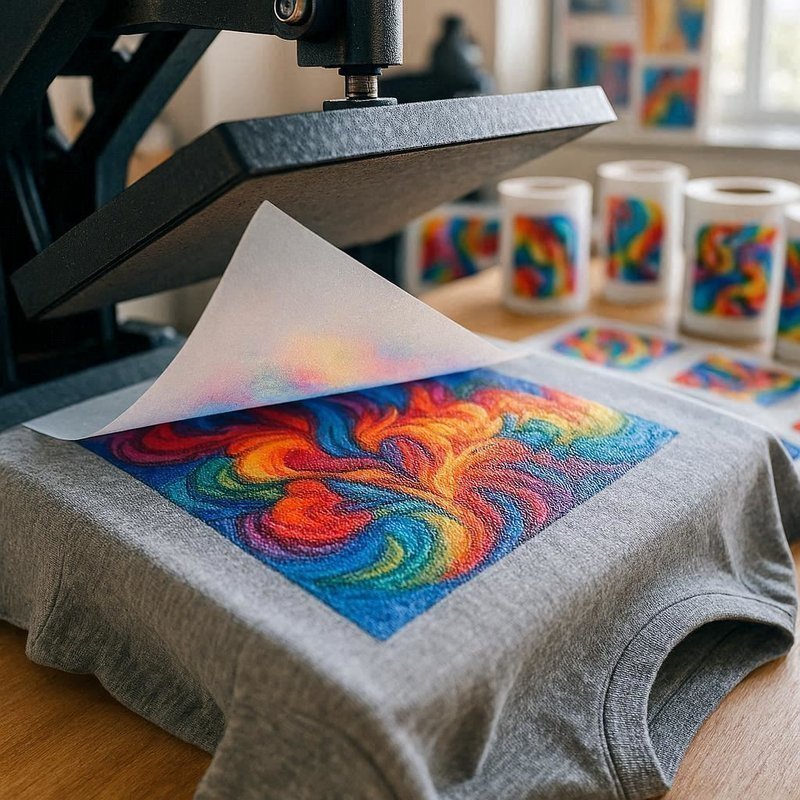
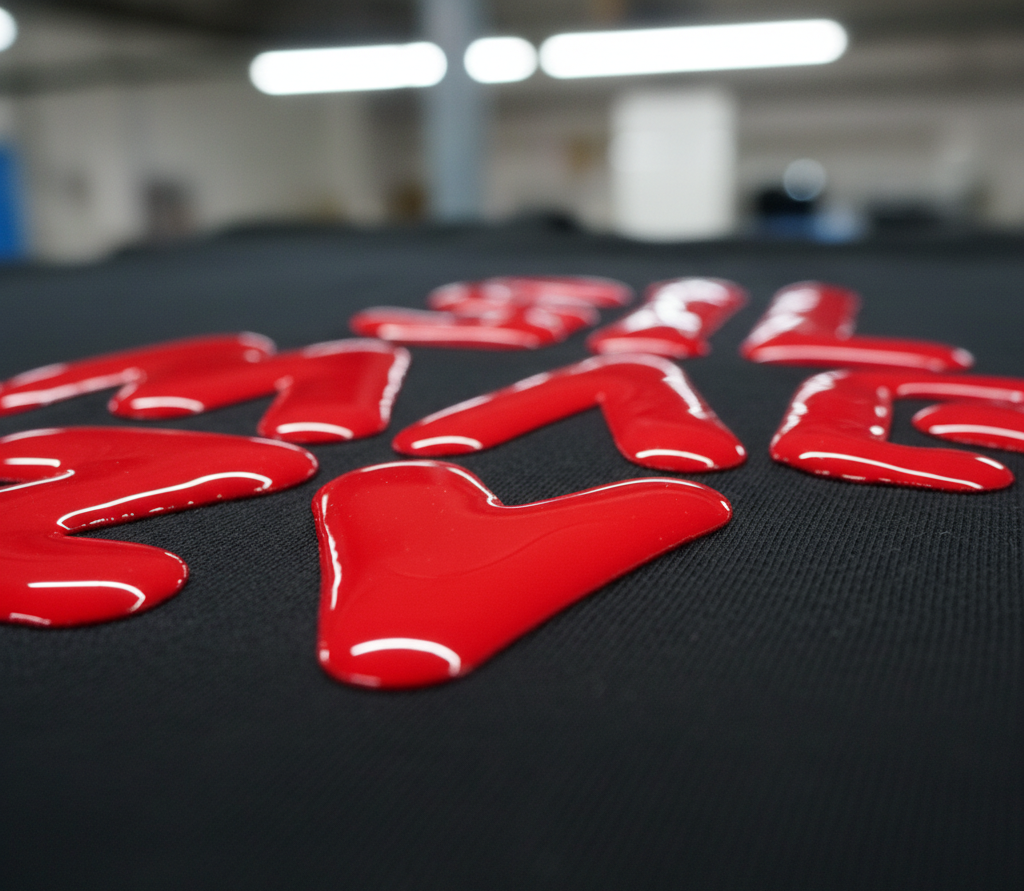
Puff / 3D Rubber Printing (High‑Density Effects)
Puff printing, also called 3D rubber printing, is a widely used method for producing raised, tactile designs on apparel. It uses specially formulated rubber-based inks, containing heat-activated expanding agents. When the printed garment goes through the curing process, these agents react to heat and cause the ink to expand, creating a soft, elevated structure.
The effect can be as subtle as a rounded puff of ink or as bold as a thick 3D elevation or structured high-density finishes used in high-end fashion, depending on the application and curing process. The final texture is smooth, but very noticeable, giving the design both visual impact and tactile ease.

Why Brands Love Puff / 3D Rubber Printing
One of the top reasons brands choose puff printing is its ability to make a strong visual impact. The raised surface naturally draws the eye to create a bold look for logos, lettering and graphics that appears more dynamic. It also provides a premium tactile experience, imparting a soft yet elevated feel to garments that is often linked with high-end streetwear and designer collections.
Another advantage is brand exposure Puff prints are excellent for garments where the logo or design needs to be more prominent, such as hoodies, sweatshirts and fashion t-shirts. The technique works well on a variety of fabrics including cotton, cotton blends, fleece and mid-weight jerseys and can even be adapted to polyester blends with the right ink selection.
Puff printing is not only aesthetically pleasing but also durable. When properly cured, the print will withstand repeated washings and still retain its height, flexibility and color, being both functional and long-lasting.
Puff / 3D Rubber Printing Process– Step by Step
Puff printing is a controlled process where design, ink application and heat all work together to create the final 3D effect. Each step must be carefully examined to make the results consistent.
1. Artwork Selection
The first step involves selecting or preparing the work of art. Designs with bold shapes, block graphics and thick outlines are best as they can maintain their structure after expansion. Fine lines and very small details are not so good because they can get softened or lose clarity in the process of puffing. Choosing the right artwork means better height, cleaner edges and a better defined final look.
2. Screen Preparation
After the artwork is completed, screens are made with a lower mesh count. This makes it possible for a thicker layer of ink to go through when printing, which is necessary for a strong puff effect. The stencil has to be properly coated and must be durable enough to withstand the heavier ink deposit without breakdown.
3. Ink Application
At this point, through the screen, a rubber ink with a controlled amount of puff additive is applied to the fabric. The more puff additive, the more the design will expand. You need the right formulation. Too little and the effect is reduced; too much and print stability and control can be affected.
4. Heat Curing
The garment is then run through a conveyor dryer at a certain temperature after printing. Heat activates the expanding agent in the ink, which causes the ink to rise and create the signature 3D puff effect. Proper temperature and uniform heat distribution is critical, as uneven curing can lead to inconsistent height or patchy expansion.
5. Cooling & QC Check
Once cured the print is allowed to cool and stabilize. Once cooled, each garment is checked carefully to ensure that the quality standards are met. Checks include consistent height in the design, uniform and even expansion, clean edges and an even surface texture. This ensures that the final product looks good and works well when it’s put to use.
Types of Puff / 3D Effects You Can Choose From
Depending on design and production techniques, puff printing can be customized to achieve different visual styles.
1. Standard Puff
A soft, evenly raised finish suitable for simple designs and branding.
2. High‑Density Puff
A thicker deposit that creates a chiseled, structured look—popular in premium streetwear.
3. Multi‑Layer 3D
Multiple passes of ink create stepped levels for a sculpted, advanced design.
4. Hybrid Puff
Puff combined with flat print or metallic effects for creative, layered visuals.
Technical Advantages of Puff Printing
Puff printing has a variety of practical benefits that make it an attractive option for production. It gives a strong 3D effect without the need for embroidery or stitched patches which helps to reduce weight and improve comfort. Smooth and flexible surface for comfortable wear, while still maintaining a raised effect.
It also allows for a uniform elevation throughout the design and works well with multiple colour combinations. Puff printing is often faster and more efficient than more complex techniques such as silicone high-density printing or patch applications and therefore provides a good balance between appearance, performance and production efficiency.
Silicone Print
Silicone printing is a high-end textile printing process that uses silicone-based inks to create smooth, flexible and highly durable designs. Silicone has great stretch and recovery unlike plastisol or rubber inks so the print can stretch with the garment and not crack or lose shape. It is widely used in clothing that is subjected to constant movement, stretching or heat because of these properties.
One of the most distinct features of silicone printing is the soft, premium surface feel. The print is nice and clean on the fabric and yet flexible which makes it comfortable to wear. At the same time, it also has great resistance to cracking, peeling and fading colors, even after repeated use and washes. This makes silicone very suitable for synthetic and technical fabrics like polyester and nylon.
Where Silicone Printing Is Used
Silicone printing is commonly used in performance-driven apparel categories that require durability and flexibility. It is commonly found in sportswear and activewear where the fabric is frequently stretched and moved. Silicone printing is also great for athleisure and yoga wear, especially on fabrics such as spandex and blended knits that require a lot of stretch.
Plus, silicone is well suited for swimwear and beachwear due to its resistance to moisture and UV exposure. It is also used in compression garments and high-performance uniforms made of nylon or polyester. More recently, premium streetwear brands have embraced silicone prints for tonal logos and minimal designs, resulting in a more contemporary and sophisticated visual aesthetic.
Why Use Silicone Printing
One of the biggest benefits to printing with silicone is its superior stretch and flexibility. The ink stretches with the fabric and returns to its original state without cracking. This makes it perfect for tight fitting garments.
Another benefit is that it cures at low temperatures. Silicone inks cure at lower temperatures than plastisol, helping to reduce common production risks like dye migration, fabric scorching and color bleeding – especially on polyester fabrics.
The silicone prints also offer a premium soft touch feel, enhancing the overall quality perception of the garment. This makes it a good choice for retail brands looking for a high-end finish. The print will stay bright, elastic and smooth for years to come and ensure reliable long-term performance, even after repeated washing.
Silicone Printing Process (step By Step)
The process of silicone printing is a controlled one that involves ink preparation, application and curing to obtain the desired result.
Step 1: Artwork & Design Review
The process starts with reviewing and optimizing the artwork. Silicone printing is best suited to bold shapes, clean lines and simple, well-defined designs. Simple logos and organized layouts work best because they look sharp when printed. The fine details can be done but they need a good screen to hold their shape properly.
Step 2: Screen Preparation
Once the design is ready, screens are made to the specifications of silicone ink, which is thicker and behaves differently than regular inks. Specialised mesh counts and emulsions are used to control the viscosity of the ink and provide smooth transfer onto the fabric. For clean edges and even coverage, proper screen preparation is a must.
Step 3: Ink Preparation
The silicone ink has to be mixed thoroughly before printing. This is usually done by adding a catalyst to start the curing process and may include additives to achieve certain finishes such as matte, gloss or textured. Getting the mix right is very important or the product may not cure correctly or perform as well as they should.
Silicone ink is mixed with:
- Catalyst (to activate curing)
- Additives (matte, gloss or textured effects)
Step 4: Printing Process
The silicone ink is then pulled through the screen onto the garment. Depending upon the design and the thickness required this may be done in one or more passes. Each layer has to be carefully controlled so that it is evenly spread and bonds properly with the fabric.
Step 5: Low‑Temperature Curing
After printing the garment is cured in a controlled manner at relatively low temperatures. This step ensures the silicone ink is securely bonded to the fabric and doesn't harm delicate materials like polyester or nylon. Proper curing enables the print to develop its maximum elasticity, durability and resistance properties.
Step 6: Cooling & Quality Check
After curing is complete, the garment is cooled and inspected. The completed print is reviewed for smoothness, stretch performance, color consistency and overall appearance. It is also tested for proper adhesion to and compatibility with the fabric. This final step ensures the product meets visual and functional standards.
Design Guidelines for Best Silicone Results
There are some design practices to follow to get the best outcome of silicone printing. If you use medium-thick strokes, elasticity is maintained and the print will stretch well. “Good spacing between elements makes it easier to read and helps to keep them from running together when printed.” And it is also important to work with properly prepared technical fabrics to achieve strong adhesion.
At the same time, unless the setup is highly controlled, extremely fine micro-details should be avoided as they may not hold shape consistently. And test large solid areas carefully on highly stretchable sections to avoid distortion.
Silicone printing can be customized to have a matte, high-gloss or textured surface for more creativity. Another popular way to achieve subtle but premium branding is through tonal effects, where the ink matches the fabric color.
Best Practices
- Use medium‑thick strokes for optimal elasticity
- Keep spacing clean to maintain detail clarity
- Apply over technical fabrics with proper prep
Avoid
- Extremely fine micro‑details that may not hold shape
- Oversized blocks on highly stretchy regions without testing
Enhancement Options
- Matte silicone
- High‑gloss silicone
- Textured silicone (grip or raised feel)
- Tonal branding (same‑color ink on fabric)