Ironing and pressing are among the most critical finishing operations in sweater manufacturing. While many people associate ironing primarily with wrinkle removal, in industrial knitwear production it serves a much broader and more technical purpose. Ironing is the process through which a sweater achieves its final shape, dimensions, appearance and presentation before undergoing final quality control and packing. A properly pressed garment not only looks visually appealing but also meets measurement specifications, maintains dimensional stability, preserves fabric texture and enhances customer satisfaction.
Unlike woven garments, sweaters and knitted products possess inherent elasticity and flexibility because they are constructed from interconnected loops. During various production stages such as knitting, linking, washing, hydro-extraction, tumble drying, garment handling, embellishment and inspection, these loops may expand, shrink, distort or become uneven. Therefore, pressing is required to restore the garment to its intended dimensions while ensuring a smooth and attractive appearance.
Modern sweater factories invest heavily in steam ironing systems, vacuum pressing tables, form boards and specialized finishing equipment because ironing directly impacts product quality, retail presentation and buyer acceptance. A poorly pressed sweater may appear defective even if its knitting and sewing quality are excellent. Conversely, effective pressing can significantly improve appearance, shape retention, hand feel and perceived product value.
Ironing acts as the final transformation stage where a washed and assembled sweater is converted into a polished, market-ready garment. For this reason, pressing is often referred to as the bridge between washing and final quality control. It plays a crucial role in ensuring that sweaters meet customer expectations and international quality standards.
Purpose of Ironing / Pressing
Sweater ironing serves several technical and aesthetic objectives beyond simple wrinkle removal.
Removal of Wrinkles and Surface Unevenness
Throughout manufacturing, garments undergo numerous handling operations including washing, drying, transportation, folding and inspection. These processes often create wrinkles, creases, fold marks and uneven fabric surfaces.
Ironing helps to:
- Remove unwanted wrinkles
- Eliminate fold lines
- Improve fabric smoothness
- Restore a clean appearance
- Create a professional finish
A wrinkle-free sweater immediately conveys higher quality to customers and retailers.
Setting Final Garment Measurements
After washing and drying, knitted garments naturally relax due to the flexible nature of loop structures.
During pressing, operators adjust:
- Chest width
- Body length
- Sleeve length
- Shoulder width
- Neck opening
- Bottom hem dimensions
This shaping process ensures the sweater conforms to measurement specifications outlined in the technical package.
Stabilizing Stitch Structure and Garment Shape
Steam application helps relax yarn loops and stabilize knitted structures.
Particular attention is given to:
- Neck ribs
- Cuffs
- Waistbands
- Armholes
- Shoulder seams
Proper stabilization improves garment consistency and dimensional control.
Surface Smoothing and Appearance Enhancement
Pressing significantly improves garment aesthetics.
Benefits include:
- Better drape
- Improved hand feel
- Enhanced visual appeal
- More uniform texture
- Premium appearance
Many luxury brands consider finishing quality a key factor influencing customer perception.
Preparation for Final Quality Control
Before garments proceed to final inspection, they must be presented in their finished state.
Ironing ensures:
- Accurate measurement verification
- Proper visual evaluation
- Easier defect identification
- Buyer-approved presentation
Wrinkled garments can mask defects and complicate quality assessment.
Activation of Finishing Chemicals
Many sweaters receive softeners, conditioners or specialty finishing treatments after washing.
Heat and steam assist by:
- Activating finishing agents
- Distributing chemicals uniformly
- Enhancing hand feel
- Improving fabric smoothness
This contributes to overall product performance and comfort.
Types of Ironing / Pressing Used in Sweaters
Different fibres and constructions require specific ironing techniques.
Steam Ironing
Used for:
- ✓ Acrylic
- ✓ Cotton blends
- ✓ Wool blends
Steam relaxes knit loops and restores shape.
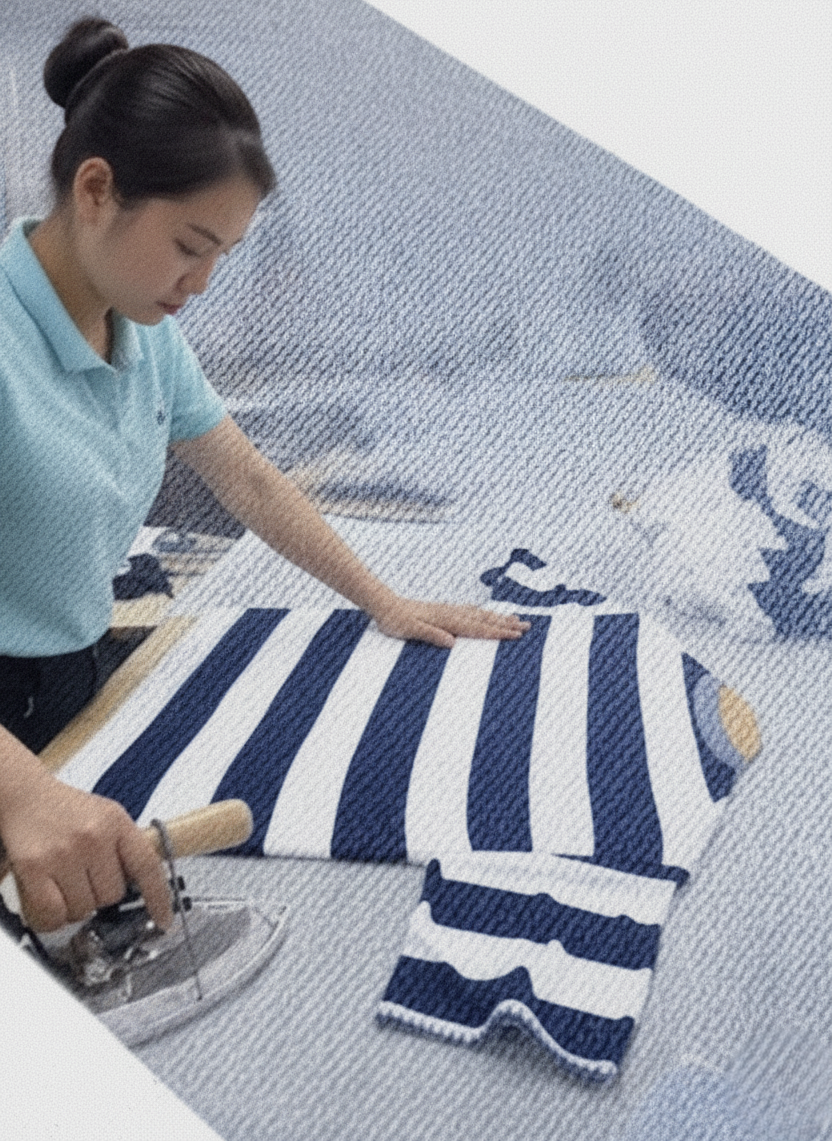
Hand Flat Ironing (Manual Pressing)
Using a steam iron on:
- ✓ Fine gauge sweaters
- ✓ Rib areas
- ✓ Delicate constructions
- ✓ Collars & cuffs
Requires very skilled operators.
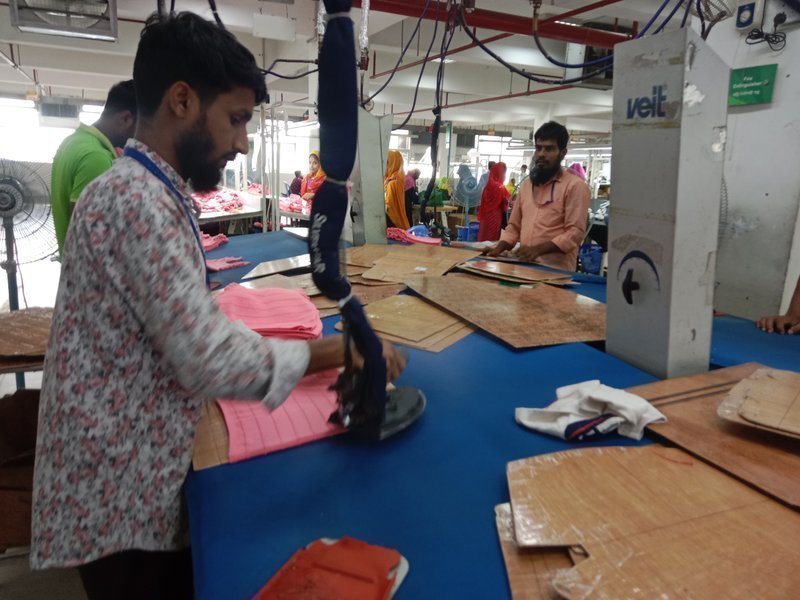
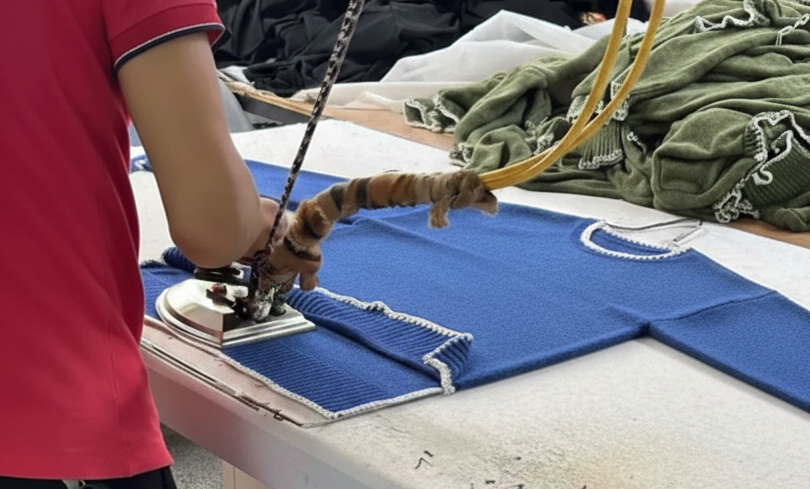
Steam Table Pressing
A steam table is a flat work surface equipped with industrial steam irons connected through insulated hoses. In the images, sweaters are spread out on the table and pressed using a continuous supply of steam. The steam penetrates the knit fibers, relaxing them and allowing the operator to shape the garment precisely—especially at areas such as:
- Shoulder lines
- Armholes
- Side seams
- Neckline
- Cuffs and bottom rib
Using steam softens the yarn and helps set the garment to its required dimensions. The wide table surface allows large pieces such as full‑body sweaters to be laid flat without stretching.
Vacuum Table Pressing
A vacuum table works in combination with steam. After steam is applied, the table uses suction to:
- Remove excess moisture
- Lock the garment into shape
- Prevent distortion or stretching
- Provide a crisp and flat surface finish
The vacuum effect ensures that the sweater stays in position and cools quickly, which is crucial for dimensional accuracy.
In production settings, vacuum tables often have a wire‑frame structure supporting a padded pressing surface. This provides stability while keeping the structure lightweight. The table can handle multiple sweaters at once, making it suitable for high‑volume finishing operations.
Form Board (Ironing Board Pressing)
Typical applications:
- Setting shoulder slopes
- Ensuring straight side seams
- Smoothing sleeve caps
- Controlling hem and neckline shape
- Achieving consistent panel dimensions
Form boards are especially important for knitwear because knits are flexible and can change shape easily. The rigid board surface helps maintain accurate measurements during pressing.
Ironing Process Flow
A typical sweater ironing workflow includes the following stages:
Moisture Preparation
Sweaters iron best when slightly moist.
Methods:
- ✓ Light steaming
- ✓ Spray mist
- ✓ Humidity-controlled room
Proper moisture ensures:
- ✓ Loop relaxation
- ✓ Smooth surface
- ✓ Easy shape control
Ironing / Pressing Operation
Step 1: Lay garment flat
On a steam table or ironing board.
Step 2: Apply steam
Relax stitches and soften fibres.
Step 3: Shape garment manually
Adjust:
- ✓ Chest width
- ✓ Body length
- ✓ Armhole shape
- ✓ Sleeve length
- ✓ Collar alignment
- ✓ Bottom hem straightness
Step 4: Apply vacuum
Locks shape, removes excess heat.
Step 5: Press special areas
- ✓ Collar
- ✓ Placket
- ✓ Cuffs
- ✓ Ribs
Step 6: Final shaping
Ensures garment matches spec sheet.
Post-Ironing Cooling
Garment must cool completely before folding.
Why?
- ✓ Prevents shape distortion
- ✓ Prevents moisture re-absorption
- ✓ Locks the finish
Temperature & Pressure Guidelines (By Fibre Type)
Correct temperature prevents yellowing, melting or shrinkage.
| Fibre Type | Iron Temp | Steam Use | Notes |
|---|---|---|---|
| Acrylic | 120–140°C | Light steam | High heat can melt fibres |
| Cotton/Cotton Blends | 160–180°C | Medium steam | Holds shape well |
| Wool | 110–130°C | Heavy steam | Avoid direct pressure to prevent shine |
| Cashmere | 100–120°C | Light steam | Handle very gently |
| Viscose Blends | 120–150°C | Medium steam | Avoid stretching |
| Polyester Blends | 110–130°C | Medium steam | Overheating may cause glazing |
Key Areas Requiring Special Attention
Collar
- ✓ Must lie flat
- ✓ No buckling
- ✓ Correct shape
Ribs (hem, cuffs, neck rib)
- ✓ Should retain elasticity
- ✓ No overstretching
- ✓ Straight alignment
Shoulder & Armhole
- ✓ Smooth curve
- ✓ No iron marks
Plackets & Button Areas
- ✓ Sharp but not stiff
- ✓ No shine from heat
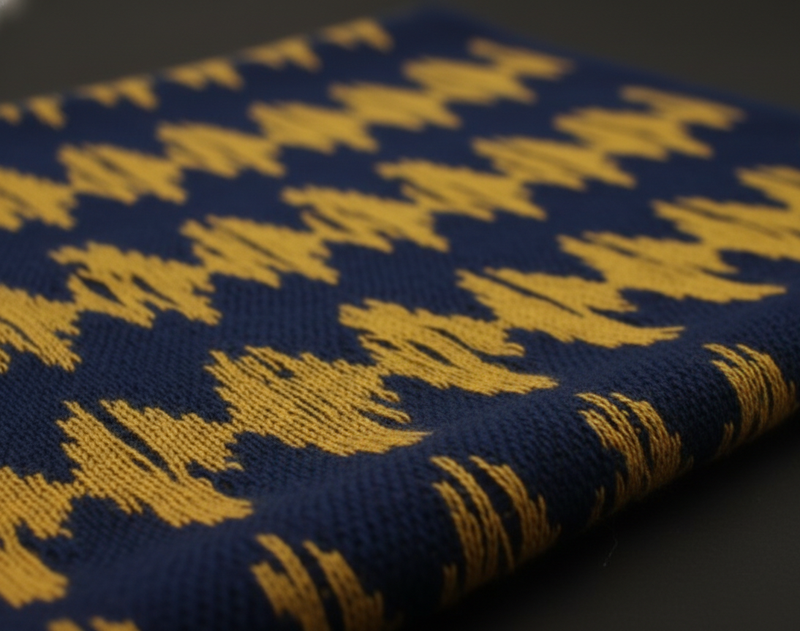
Jacquard / Fancy Knit
- ✓ Minimal pressure
- ✓ Avoid flattening texture
Ironing Defects & Their Causes
Shine Marks
Cause: excessive pressure on acrylic/wool.
Solution: use steam only or cloth overlay.
Over-stretching
Cause: pulling panels during ironing.
Solution: maintain flat, relaxed handling.
Distorted Measurements
Cause: uneven steam or manual mishandling.
Yellowing / Heat Damage
Cause: high temperature on synthetics.
Water Marks
Cause: dirty or hard water in steam system.
Rib Expansion
Cause: over-steaming or pulling ribs.
Quality Standards for Ironing
Following pressing, every sweater should meet established finishing requirements.
Visual Standards
The garment must display:
- Clean appearance
- Smooth surface
- No wrinkles
- No fold marks
- Attractive presentation
Measurement Standards
The garment must remain within approved tolerance limits for:
- Chest width
- Body length
- Sleeve length
- Shoulder width
- Neck opening
Structural Standards
Requirements include:
- Aligned seams
- Straight plackets
- Balanced sleeves
- Flat collar
Fabric Standards
The garment must show:
- No scorch marks
- No shine marks
- No yellowing
- No texture damage
Texture Preservation Standards
Special knit structures must remain intact, including:
- Cable knits
- Jacquard designs
- Pointelle patterns
- Fancy stitches
- Textured surfaces
Re-Pressing and Corrective Actions
Garments failing ironing inspection are sent for corrective action.
Common reasons include:
- Measurement deviation
- Wrinkles
- Misalignment
- Collar distortion
- Rib deformation
After correction, garments undergo re-inspection before approval.
Importance of Ironing in Overall Sweater Manufacturing
Ironing is the final manufacturing process that transforms a technically completed sweater into a commercially presentable product. It plays a critical role in determining first impressions, retail appearance, dimensional accuracy and buyer acceptance. Poor ironing can diminish the appearance of an otherwise well-manufactured garment, while excellent pressing can enhance its perceived quality and value.
The effectiveness of ironing directly influences:
- Customer satisfaction
- Product presentation
- Measurement consistency
- Brand image
- Retail appeal
- Quality audit results
- Shipment acceptance rates
For these reasons, world-class sweater manufacturers treat ironing and pressing as a specialized technical operation requiring trained personnel, advanced equipment, strict process control and continuous quality monitoring.
Final Thoughts
Ironing and pressing are far more than simple finishing activities in sweater manufacturing. They are essential technical processes that restore garment shape, stabilize knitted structures, achieve precise measurements, improve visual appeal and prepare products for inspection and packing. Through the controlled application of steam, heat, pressure and vacuum technology, manufacturers can transform garments from washed and relaxed knit structures into refined, retail-ready products that meet buyer requirements and international quality standards.
Whether using steam tables, vacuum systems, form boards or manual pressing techniques, the primary objective remains the same: to ensure every sweater exhibits excellent appearance, dimensional stability, comfort and performance. Proper control of temperature, moisture, pressure and handling methods is necessary to avoid defects such as shine marks, stretching, yellowing, rib distortion and measurement inconsistencies.
Ultimately, ironing serves as the final quality-enhancement stage before inspection and packing. It acts as the crucial link between garment washing and final quality control, ensuring that each sweater reflects the craftsmanship, attention to detail and professionalism expected by global apparel brands and consumers. In a competitive fashion industry where presentation significantly influences purchasing decisions, effective ironing and pressing remain indispensable components of successful sweater manufacturing.