Sweater Design and Development: From Yarn Selection to Knitting and Fashion Innovation
10 min read
Sweater design and development is a careful blend of creativity, technical engineering and strategic planning. From the first trend research to the final production approval, each stage of the process is dedicated to the design of garments which deliver outstanding comfort, quality and commercial value. Below is a comprehensive discussion on the professional process involved in the design and development of sweaters (knitwear) in the apparel industry.
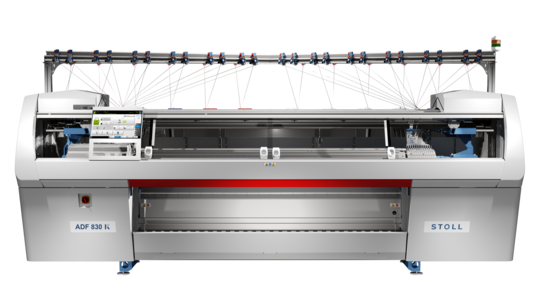
STOLL M1 PLUS PROGRAM
Sweater design and development isn’t just about sketching something nice and sending it to production. There’s a lot layered into it—creative ideas, technical thinking, and a fair bit of planning that happens behind the scenes.
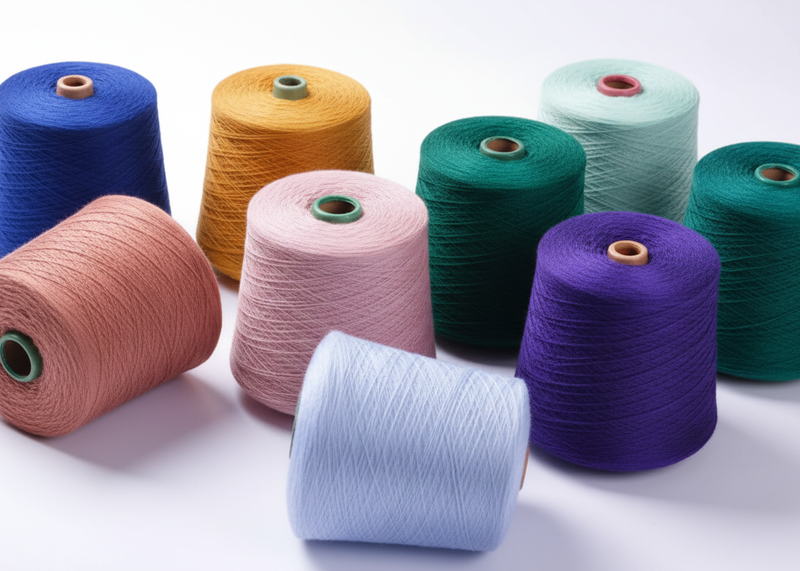
It usually starts with inspiration… trends, seasons, what people are actually wearing. But that’s just the starting point. From there, things get more detailed. Yarn choices come in. Gauge decisions. Construction methods. Small things that quietly decide how the final product will feel and look.
And honestly, it’s not always a straight line.
Designers, technicians, merchandisers—they all get involved at different stages. One team pushes for aesthetics, another looks at feasibility, someone else is thinking cost or production limits. It’s a bit of a back-and-forth process. Adjust, test, tweak… repeat.
By the time a sweater reaches final approval, it’s already been through multiple rounds—sampling, corrections, fit checks, maybe even redesign.
So yeah, sweater (knitwear) design and development is part creativity, part engineering… and part problem-solving.
And when it all comes together properly, you get something that not only looks good—but works in real production and actually sells.
Trend Analysis & Concept Development (How It Really Starts)
Every sweater collection kind of begins the same way—but never really feels the same.
It starts with trends. Not just one source, though. Designers pull from everywhere—WGSN forecasts, runway shows, trade fairs, even just walking retail floors and noticing what’s actually selling.
Colors shift. Textures change. Silhouettes come and go.
At the same time, there’s a more practical side running in parallel—customer behavior. What buyers are asking for. What competitors are pushing. What sold well last season (and what didn’t).
Somewhere between inspiration and reality, the concept starts taking shape.
Mood boards come in. Color stories. Yarn ideas. Stitch directions. Maybe a rough shape of what the collection should feel like.
Not perfect yet. Just direction.
From Idea to Something Usable
Before anything goes to production, things get… structured.
Design isn’t enough on its own. It has to translate into something factories can actually make.
This is where creativity starts turning into instructions.
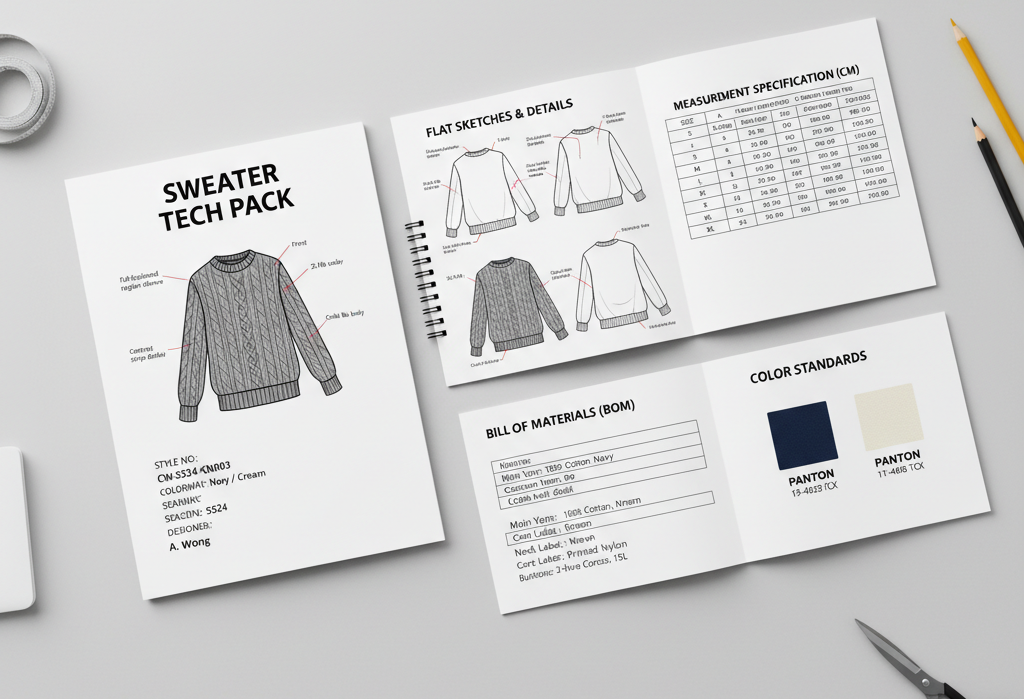
Tech packs-Sweater
Prepare design chart
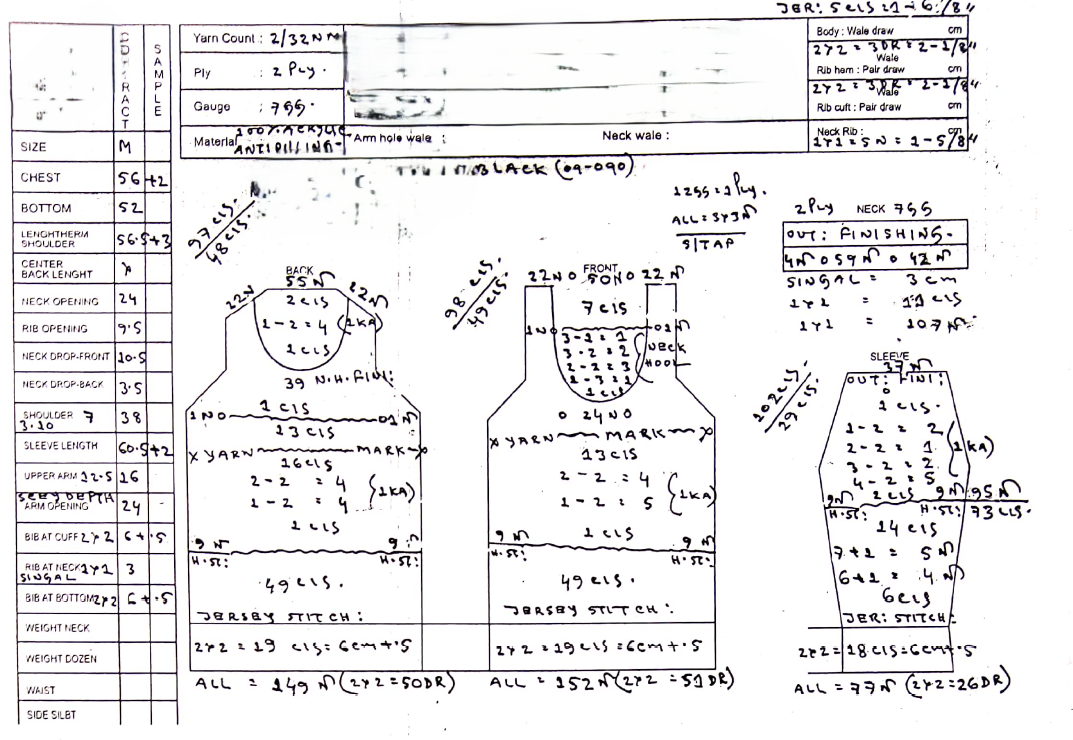
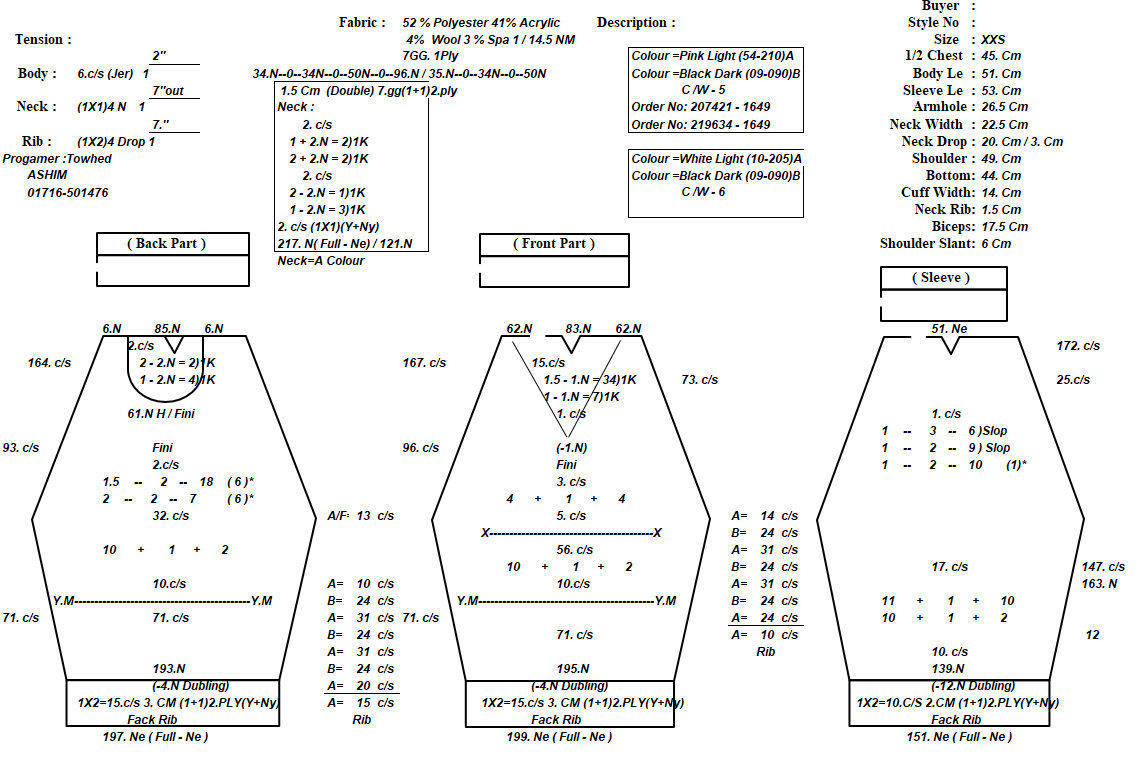
The Design Chart is one of the most essential technical documents in sweater knitting. It includes detailed guidance on stitch structures, panel measurements, shaping, machine settings and yarn use. The chart is the blueprint for hand and computerized flat knitting.
Preparing an accurate design chart ensures consistent production, correct panel dimensions and quality knitted pieces that match buyer specifications.
Design Chart
What a Design Chart Actually Helps With
Getting panel shapes right (front, back, sleeves, collar)
APEXFiz feels different. More automated. More visual.
Less manual tweaking… but still needs understanding.
1. Digital Twin Setup
You build a virtual version of the garment:
Import panel shape
Select yarn from library
Pick base structure
Everything starts to look more “real” early on.
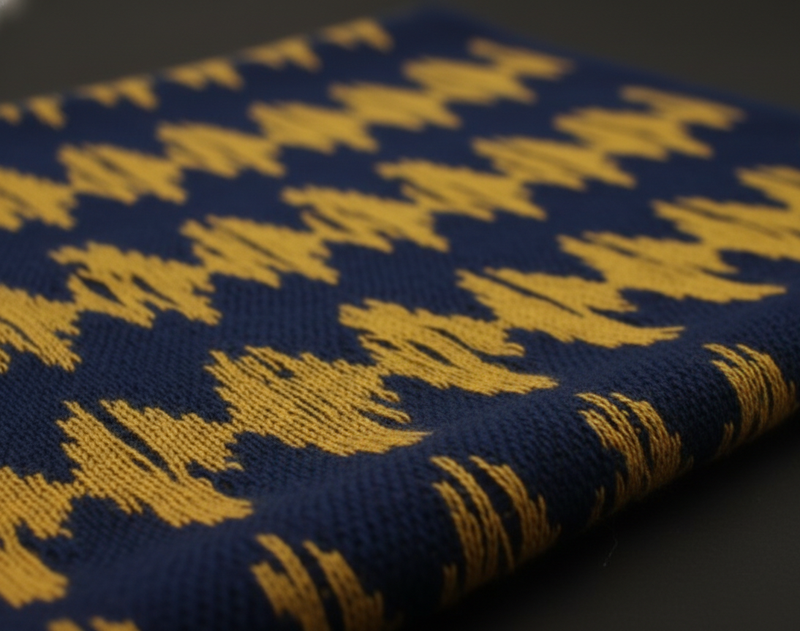
2. Jacquard Integration
This part feels smoother compared to older systems:
Import pattern
Auto color separation
Stitch-level mapping
Auto float control
Assign feeders
It reduces manual errors—but not completely foolproof.
3. Machine Programming
Here’s where APEXFiz helps a lot:
Suggests knitting paths
Auto-shaping based on panel
Auto feeder assignment
Even tension suggestions
Not perfect. But saves time.
4. Virtual Knit Simulation
This is the strong point.
You actually see the panel:
3D visualization
Pattern distortion check
Shrinkage prediction
Texture preview
It gives confidence before actual knitting.
5. Export
Once satisfied:
Export machine file
Send directly to Shima machines
Ready to run.
Preparing Program Using HQPDS (Cixing / Other Chinese Jacquard Machines)
HQPDS is widely used in Chinese flat knitting machines for jacquard panels.
Source:https://www.hqcnc.com/download.html
HQPDS is more straightforward. Less visual polish, but effective.
1. Panel Outline
Input stitch and row counts
Draw panel shape
Define armhole, neck, hem
Very design-chart dependent here.
2. Structure Setup
Select base structure
Add ribs, jacquard, cables
Nothing fancy—but gets the job done.
3. Jacquard Setup
Import bitmap/PNG
Convert into needle actions
Assign feeders
Set color layers
Auto separation works for basic jacquards.
4. Shaping
You define:
Increases / decreases
Transfers
Racking
Short rows
More manual thinking involved compared to APEXFiz.
5. Machine Settings
Cam settings
Speed
Tension
Feeder paths
Again—accuracy matters here.
6. Preview & Error Check
Before exporting:
Run preview
Check yarn flow
Look for carriage conflicts
Verify transitions
Skipping this step = risky.
7. Export
Save as PAT / BIN / PDS
Upload to machine
Ready for knitting.
Quality Checks After Programming
Before anything goes into production, a quick reality check.
Technical Side
Stitch & row counts accurate
No missing instructions
Feeders consistent
Pattern Side
Clean jacquard edges
No long floats
Correct color placement
Shape & Fit
Matches design chart
Proper increases/decreases
Symmetry maintained
If something feels off here—fix it now. Not later.
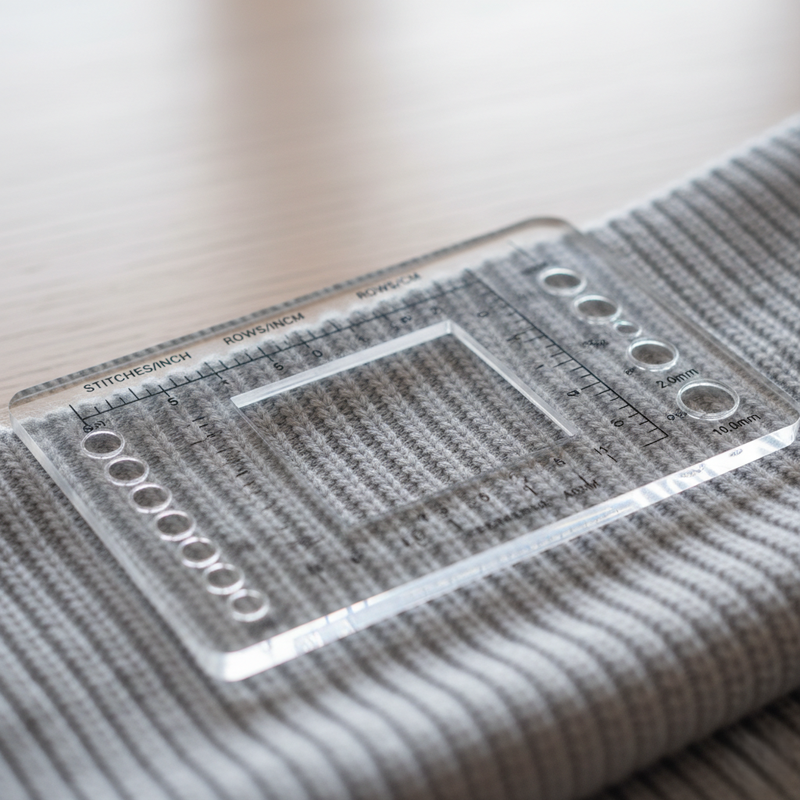
Trial Knitting (The Real Test)
This is where theory meets reality.
You knit a pilot panel and check:
Gauge after washing
Measurements
Pattern clarity
Fabric stability
Yarn consumption
Sometimes everything works first try.
Most times… small adjustments are needed.
And that’s normal.
Final Thought
When you look at the whole sweater design and development journey… it’s not really a straight process. It’s more like a loop.
You start with an idea—trends, colors, a rough concept. Then it turns technical. Measurements, gauge, yarn, structures.
Then even more detailed—design charts, CAD programs, machine instructions.
And just when you think it’s ready… it goes back again.
Trial knitting. Checks. Adjustments. Sometimes small tweaks, sometimes bigger ones.
It keeps moving like that until things finally click.
Because in knitwear, nothing lives only on paper.
Everything has to pass through the machine—and that’s where the truth comes out.
A clean design means nothing if it can’t knit properly.
And a perfect program means little if the final panel doesn’t feel right.
So yeah… sweater design and development sits somewhere in between creativity and precision.
You need both. And you need them to work together.
And when they finally do—you get a product that not only looks right, but runs smoothly in production, holds its quality, and actually makes sense commercially.
That’s when you know it worked.
References & Sources
W. E. Morton & J. W. S. Hearle – Physical Properties of Textile Fibres.
The Textile Institute (UK) – Knitwear engineering, garment development, gauge calculation, and knitted fabric manufacturing resources.
Disclaimer: The information provided is intended for educational and general industry reference purposes. Design methods, machine settings, programming parameters, gauge calculations, yarn consumption, and production practices may vary depending on machine type, yarn characteristics, gauge, factory standards, software versions, and product requirements. Actual production results should always be verified through sampling, technical evaluation, and factory trials before bulk manufacturing.
Written by
Alam Mohammad Shafiqul
Lead Editor, Contributor
Textile Technology
Over 15 years of experience in textile engineering, Sweater & tech development. Passionate about bridging the gap between factory-floor practice and technical knowledge.