At its core, it’s a wet chemical oxidation process. Garments are treated with a sodium hypochlorite solution—basically bleach—to pull color out of the fabric.
What actually happens?
The hypochlorite attacks the dye molecules, especially indigo, and breaks them down. Once that structure is damaged, the color fades. That’s how you get that washed, lighter look.
But here’s the thing—this reaction doesn’t just stop on its own.
If you leave it unchecked, the chemical keeps working. Keeps damaging.
So a neutralizing wash is not optional. It’s a must. It stops the reaction and removes leftover chlorine before it causes trouble.
Why Bleach Wash Is Used
People don’t just bleach garments for the sake of it. There are some clear goals:
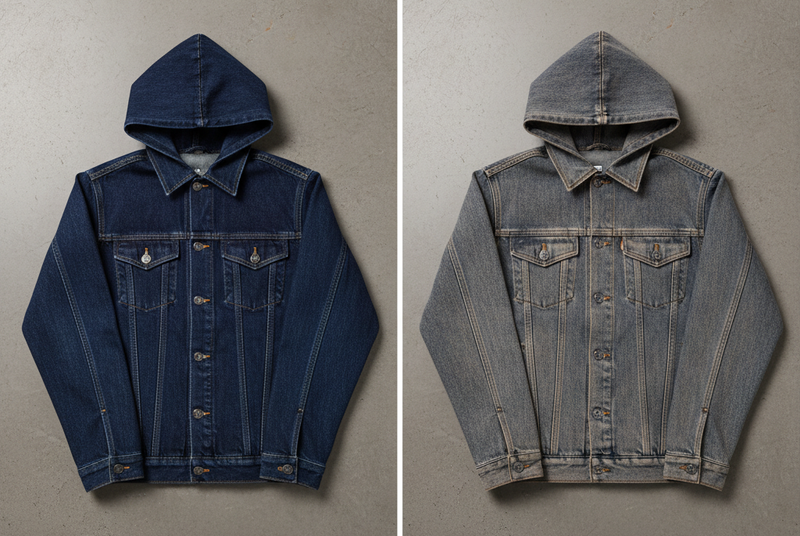
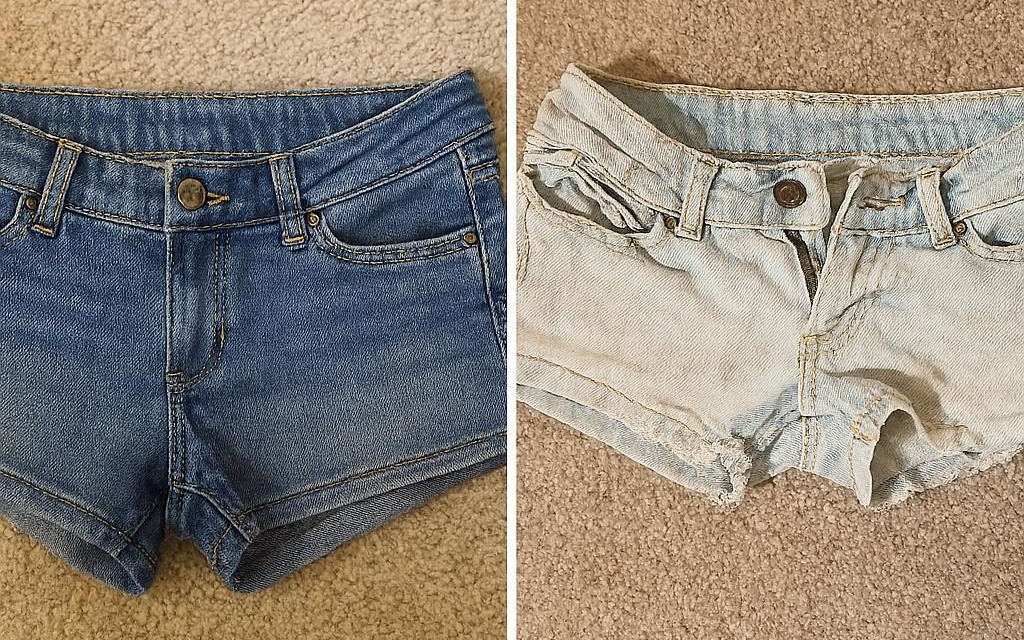
Achieve different levels of fading
From light wash to heavy, almost vintage looks
Correct shade issues
Getting rid of red, green, or that “dirty” cast that sometimes shows up
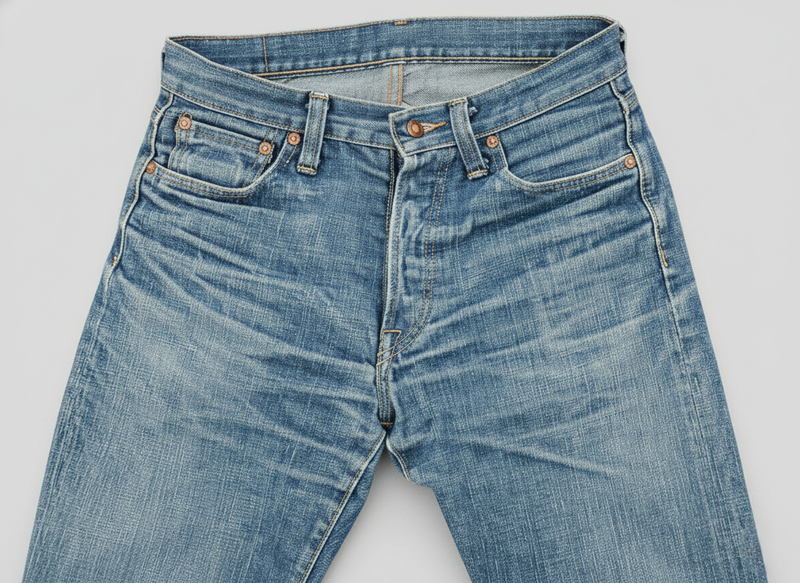
Create a cleaner blue tone
Especially in denim—bright, fresh, more appealing
Prepare for further processing
Like tinting or over-dyeing
Keep costs in check
Compared to enzyme washes or stone washes, this is usually more economical
Simple process, but pretty versatile.
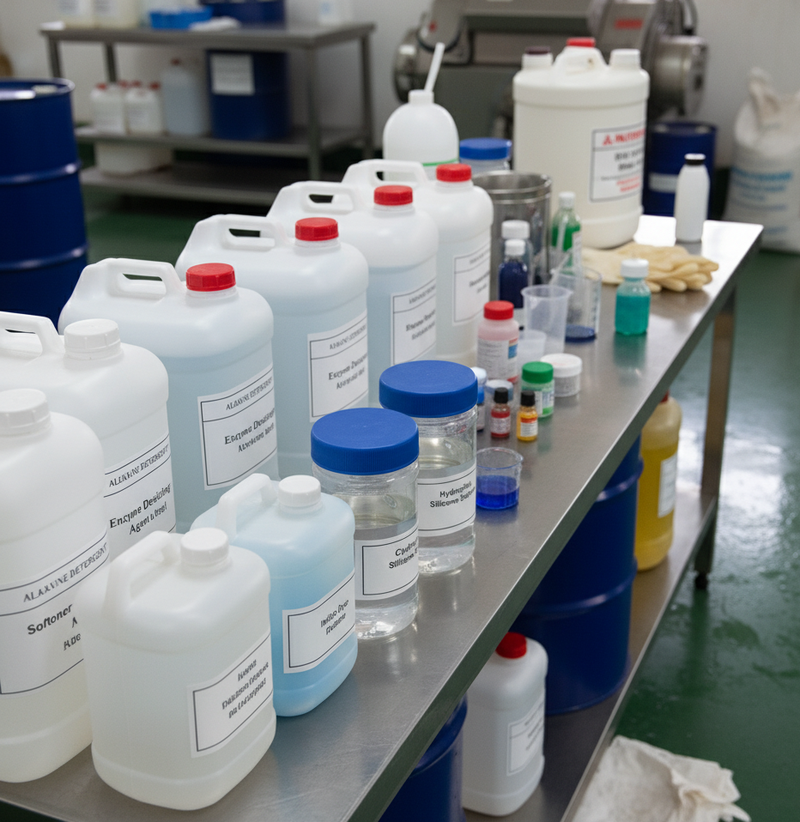
Chemicals Used-Bleach wash
A. Sodium Hypochlorite (NaOCl)
This is the main player.
- The active bleaching agent
- Typically comes with 10–15% available chlorine
It’s strong, effective… and if not controlled properly, a bit aggressive.
B. Soda Ash (Na₂CO₃) – Sometimes Used
Not always required, but useful.
- Helps maintain pH around 10–11
- Keeps the hypochlorite more stable during the process
Think of it as support—not the main chemical, but it helps things run smoother.
C. Anti-Back Staining Agent
This one is easy to overlook.
When dye gets removed, it doesn’t just disappear—it floats around in the bath.
And without control, it can settle back on the fabric.
That’s where this chemical helps:
- Prevents re-deposition of loose dye
- Protects areas like pocketing or weft yarns
Cleaner finish, less unevenness.
D. Neutralizing Agents (Non-Negotiable)
This step is critical. No skipping.
After bleaching, you have to neutralize the fabric to stop the chemical reaction completely.
Common options:
- Sodium Metabisulfite (Na₂S₂O₅)
- Sodium Bisulfite (NaHSO₃)
- Hydrogen Peroxide (H₂O₂) – sometimes used as an alternative
Their job is simple: → kill off residual chlorine→ stop further oxidation
Because if you don’t…
you’ll see strength loss, fabric damage, even yellowing later.
Bleach Wash – Standard Recipe
Basic Recipe (Common Factory Standard)
| Stage | Chemical / Parameter | Dosage | Time | Temp |
|---|---|---|---|---|
| Bleach Bath | Sodium Hypochlorite (10–15% available Cl) | 1–5 mL/L | 10–20 min | 25–35°C |
| Anti-back staining | 0.5–1 g/L | |||
| Soda Ash (optional) | 1–2 g/L | |||
| Rinse 1 | Water | – | 5–10 min | Cold |
| Neutralization | Sodium Metabisulfite | 1–3 g/L | 10–15 min | 25–35°C |
| OR Hydrogen Peroxide | 0.5–1 mL/L | 10–12 min | 35–45°C | |
| Rinse 2 | Water | – | 5–10 min | Cold |
| Softening | Silicone/Cationic Softener | 0.5–1.5% owg | 10–15 min | 30–35°C |
| Drying | – | – | As required | – |
Liquor Ratio: 1:8 to 1:10
(Depending on machine and load size)
Bleach Wash Process Flow
Bleach wash sounds straightforward on paper. In reality, it’s one of those processes where small mistakes show up fast—patchy shades, yellowing, even fabric damage if you’re not careful.
Here’s how it usually flows on the floor.
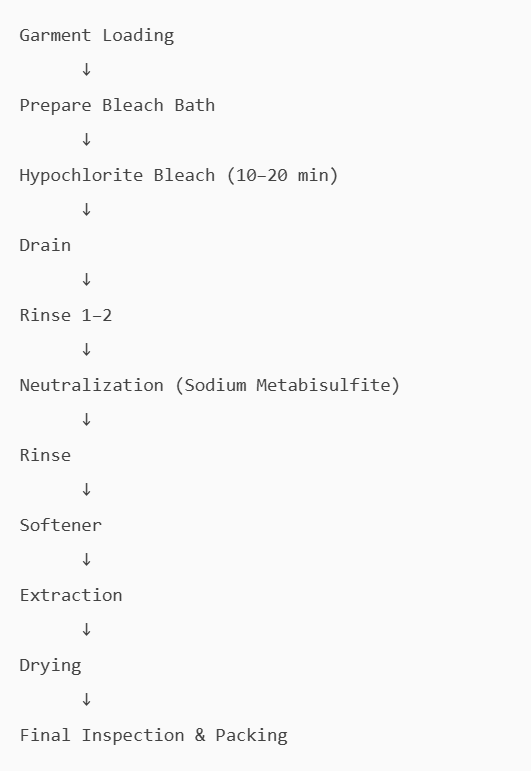
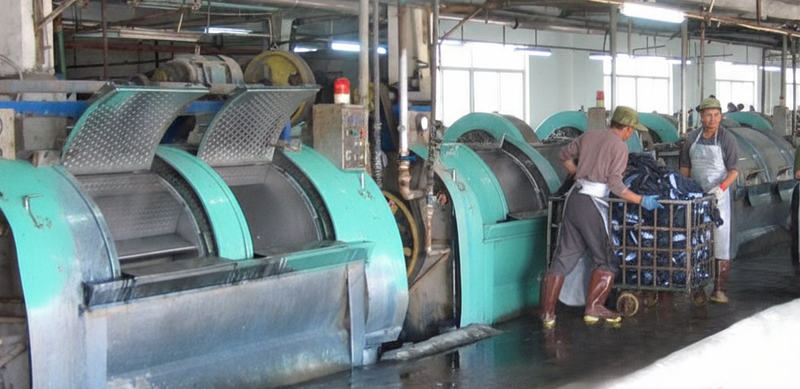
Step 1: Garment Loading
First step. Simple, but don’t rush it.
Load the machine at around 50–60% capacity.
Too full? Garments won’t move properly. Too empty? You waste chemicals and water.
Movement matters here. That rolling action helps the bleach work evenly.
Also—quick check on trims and labels.
Not everything likes bleach.
- Nylon? Might yellow
- Polyester trims? Can behave unpredictably
Better to catch it now than after the wash.
Step 2: Prepare Bleach Bath
Now you build your chemical environment.
- Set liquor ratio (LR) around 1:8 to 1:10
- Adjust pH to 10–11 → this keeps bleach stable
- Add hypochlorite slowly
Don’t dump it in.
Add gradually. Let it mix properly.
Uneven mixing = uneven washing later. And that’s a headache nobody wants.
Step 3: Bleach Application
This is where the actual effect happens.
Run conditions:
- Temperature: 25–35°C
- Time: 10–20 minutes
But honestly, you don’t just follow time blindly. It depends on:
- How light you want the shade
- Fabric weight
- Original denim shade
What’s happening chemically?
Hypochlorite reacts with indigo dye.
Breaks it down. Removes color.
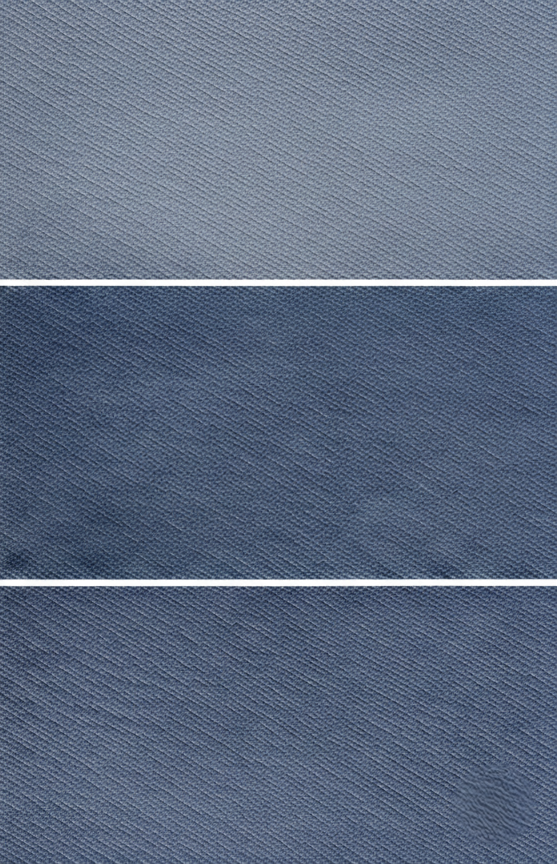
So: Dark → Medium → Light → (too far = damage)
That’s why operators keep checking every 2–3 minutes.
Don’t wait till the end. By then, it might be too late.
Step 4: Drain Bleach Bath
Once you hit the target shade—stop. Immediately.
- Drain the bath completely
- Do NOT reuse it
- Rinse the machine quickly
Leftover chlorine fumes can affect the next batch. And operators too. Not ideal.
Step 5: Rinse Cycle (1–2 times)
Keep it simple here.
- Use cold water
- Run 1–2 rinse cycles
The goal is to remove as much bleach residue as possible before neutralization.
Skip this step or rush it—and neutralization won’t work properly.
Step 6: Neutralization (Critical Step)
This is one of those steps you cannot mess up.
Even after draining, bleach doesn’t just “stop.”
It keeps reacting unless neutralized.
Standard Method (Common in factories)
- Sodium Metabisulfite: 1–3 g/L
- Temp: 25–35°C
- Time: 10–15 min
- Target pH: 6–7
Alternative Method (Peroxide Neutralization)
- Hydrogen Peroxide: 0.5–1 mL/L
- Temp: 35–45°C
- Time: 10–12 min
Why this step matters
If neutralization is weak or skipped:
- Yellowing shows up later
- Fabric strength drops
- Shade may keep changing after drying
So yeah—this step saves you from rejections.
Step 7: Final Rinse
After neutralization, rinse again.
Usually 1–2 cycles.
Main purpose:
- Remove chemical smell
- Clean out residues
Nothing fancy. Just don’t skip it.
Step 8: Softening
After all that chemical exposure, fabric loses its feel.
So you bring it back.
- Add softener
- Run at 30–35°C for 10–15 minutes
This is where the garment starts feeling “right” again—less harsh, more wearable.
Step 9: Extraction & Drying
Final stage.
- Extract: 3–5 minutes
- Drying:
- Tumble dry → 60–75°C
- Or line dry (depends on setup)
Watch the temperature. Too high, and fabric or shade can shift slightly.
Benefits of Bleach Wash
Bleach wash is popular for a reason—it gets the job done quickly and gives very visible results.
Fast and cost-effective
When you need quick shade reduction, bleach does it without much delay. Compared to other washes, it’s usually cheaper too.
Easy to achieve bright blue shades
Especially in denim, getting that clean, fresh blue look is much easier with bleach. No complicated process needed.
Good for cast correction
Sometimes fabrics come out with unwanted tones—reddish, greenish, or just dull. Bleach helps clean that up and bring the color back to something more appealing.
Works on different fabrics
Not just denim. It’s also effective on cotton and cotton-based blends, which makes it quite flexible in production.
Disadvantages
That said… it’s not all smooth. Bleach wash has its downsides, and they can be serious if not handled properly.
Risk of yellowing
If neutralization isn’t done right, or if the process runs too long, the fabric can develop a yellow tint. Hard to fix afterward.
Fabric strength loss
Bleach is aggressive. Overexposure weakens the fibers, which can affect durability and even lead to tears later.
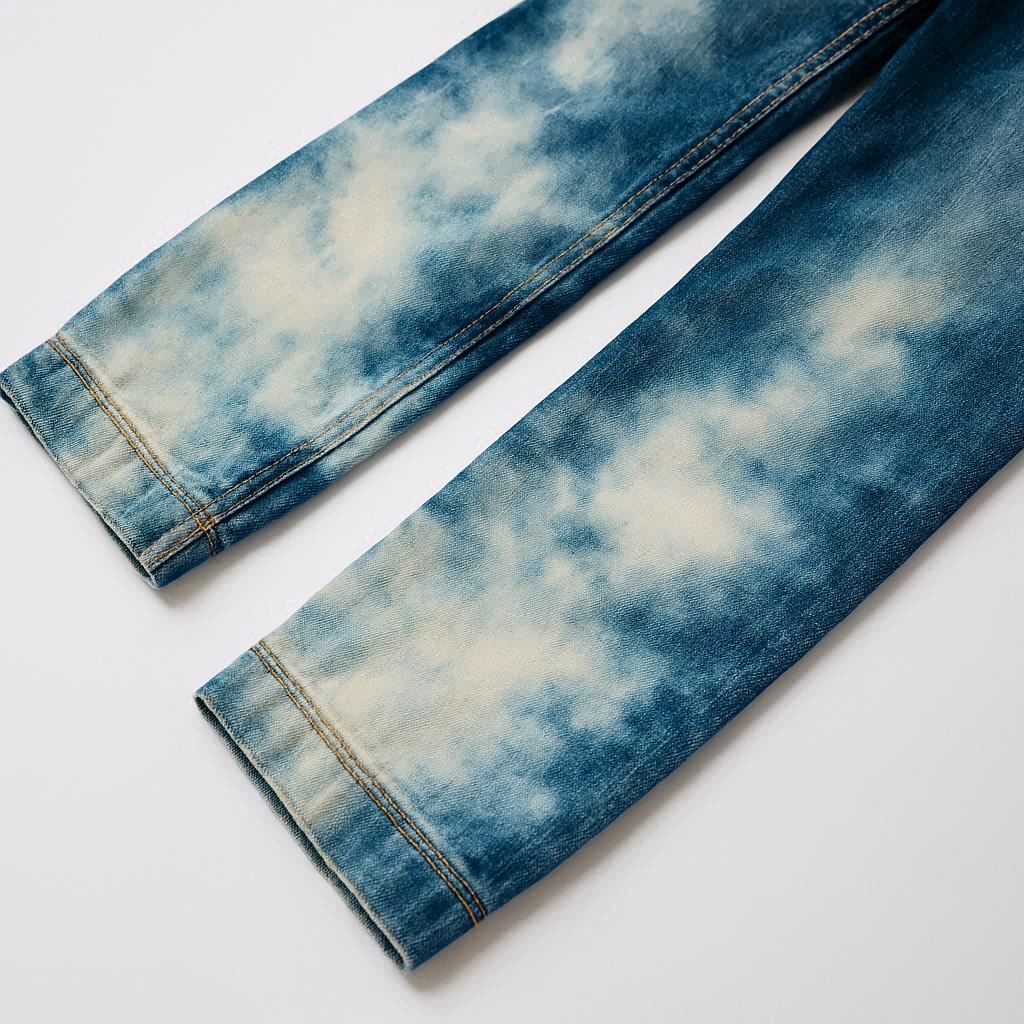
Over-bleaching
Once too much color is stripped, there’s no going back. The garment can end up looking flat or overly washed out.
High chemical load in effluent
Environment-wise, it’s not the cleanest process. The wastewater contains strong chemicals that need proper treatment.
Neutralization is mandatory
This isn’t optional. Skip or rush this step, and the fabric keeps reacting—even after washing. That’s when damage shows up later, sometimes after the garment is already shipped.
Conclusion
At the end of the day, bleach wash is one of those processes that looks simple—but really isn’t.
Yes, it’s just a chemical oxidation using sodium hypochlorite to remove color.
Yes, it gives quick results. Clean fades. Bright blues. Lower cost.
That’s why it’s used so widely.
But the moment you go a little off track—too much time, wrong dosage, poor rinsing, weak neutralization—it shows. Fast.
Yellowing creeps in.
Fabric strength drops.
Shades go uneven.
And fixing those issues later? Not easy.
The real control point isn’t just the bleach step—it’s everything around it.
How you prepare the bath. How you monitor during the run. And most importantly, how well you neutralize at the end.
Skip that or rush it, and the fabric keeps reacting quietly… even after the process is “done.”
So in practice, bleach wash is a bit of a balance:
- Strong, effective, economical
- But also aggressive and unforgiving
Handled right, it delivers exactly what you want.
Handled casually… it can damage both the garment and the quality reputation behind it.