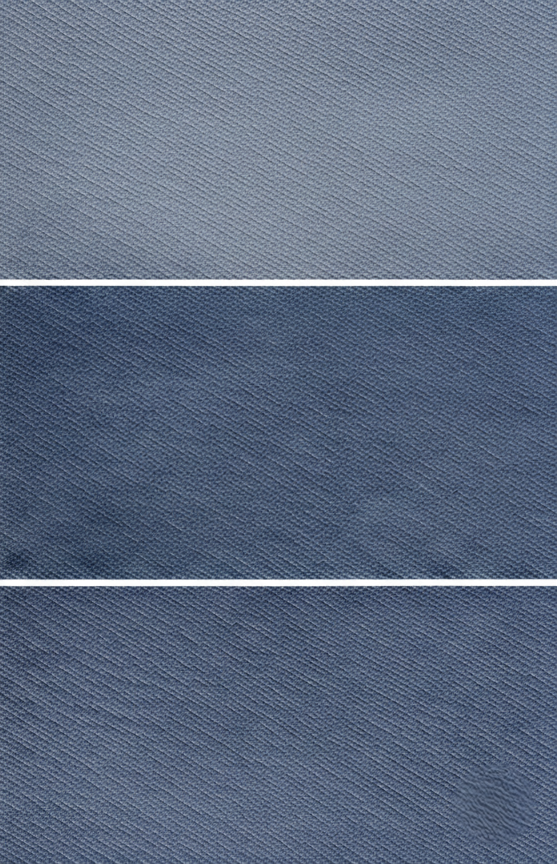
Acid washing is one of those denim finishing techniques that really stands out. It’s bold. High contrast. A bit unpredictable, too.
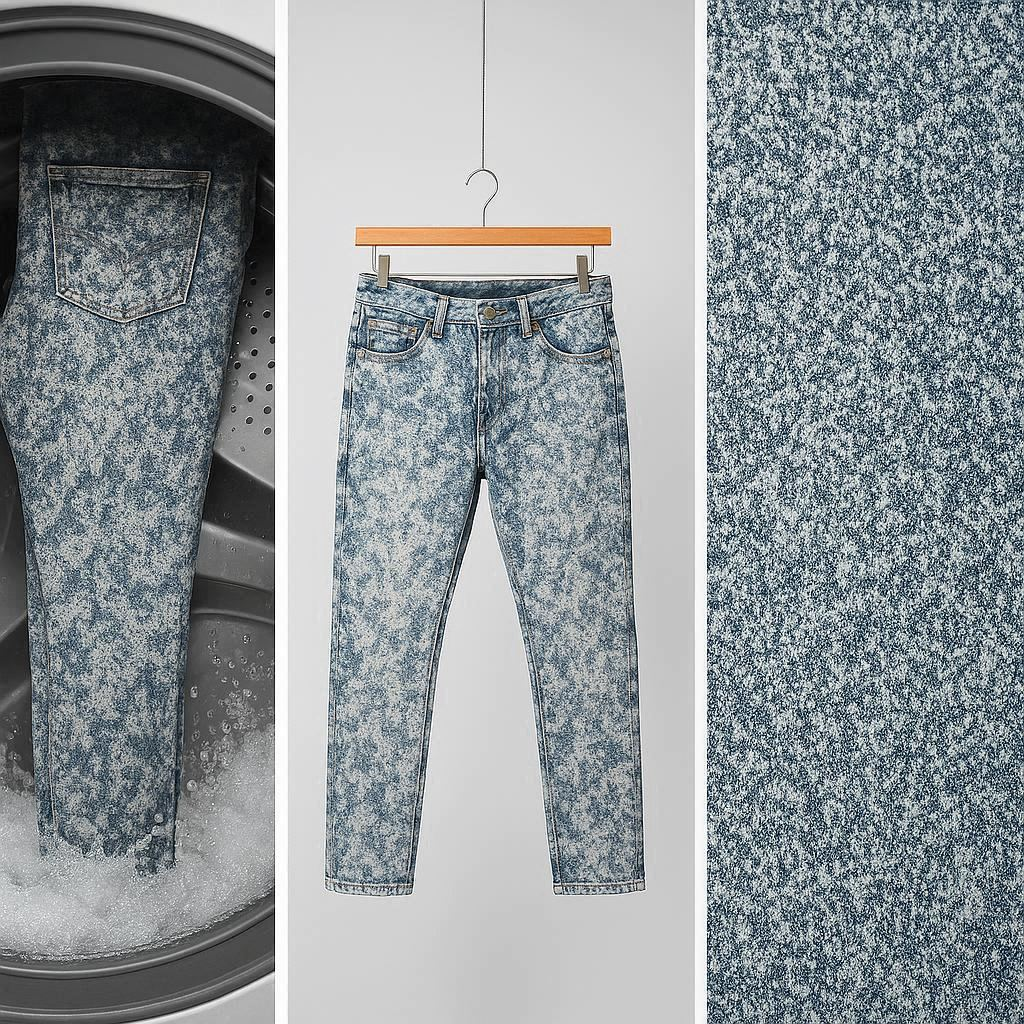
Basically, it’s used to create that faded, cloudy, almost marbled look you see on jeans, jackets, and sometimes shirts. The kind that doesn’t look uniform—and that’s exactly the point.
Working Principle
The idea behind acid wash isn’t too complicated, but the effect can look pretty dramatic.
Pumice stones are soaked in strong oxidizing chemicals first. Then these stones are tumbled together with the garments—usually in a dry or slightly damp condition. As the stones hit different parts of the fabric, they start stripping away the indigo dye. Not evenly, though. It happens randomly.
And that randomness? That’s what creates those light and dark patches. No two pieces come out exactly the same.
The acid wash process is based on a combination of mechanical abrasion and chemical oxidation.
Pumice stones impregnated with bleaching chemicals transfer the oxidizing agent onto the garment during tumbling. The chemicals react with the indigo dye on the denim surface, breaking down its color and creating localized fading.
Process Mechanism
- Pumice stones are soaked in a bleaching solution.
- Stones are partially dried to retain moisture without dripping.
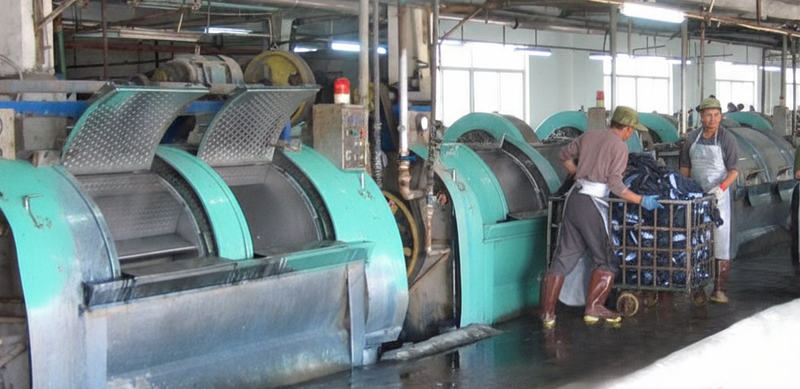
- Dry garments are loaded into the washing machine.
- Treated stones and garments tumble together.
- The bleaching chemical transfers from stones to fabric.
- Indigo dye (C₁₆H₁₀N₂O₂) is oxidized and decolorized.
- Random faded patches appear across the garment.
- The reaction is stopped through neutralization.
- Garments are softened and dried.
Using Sodium Hypochlorite:
Indigo Dye (C₁₆H₁₀N₂O₂)
+
Sodium Hypochlorite (NaOCl)
↓
Oxidized Colorless Products
↓
Acid Wash Effect
Using Potassium Permanganate :
Indigo Dye (C₁₆H₁₀N₂O₂)
+
Potassium Permanganate (KMnO₄)
↓
Oxidized Dye Molecules
↓
High-Contrast Fading
Materials Used
A. Pumice Stones
Composition
| Component | Chemical Symbol |
|---|---|
| Silicon Dioxide | SiO₂ |
| Aluminum Oxide | Al₂O₃ |
| Iron Oxide | Fe₂O₃ |
- Typically medium-sized (around 2–5 cm)
- Act like carriers for the chemicals
- Release bleach gradually onto the fabric surface
They do the physical work. Kind of rough, but effective.
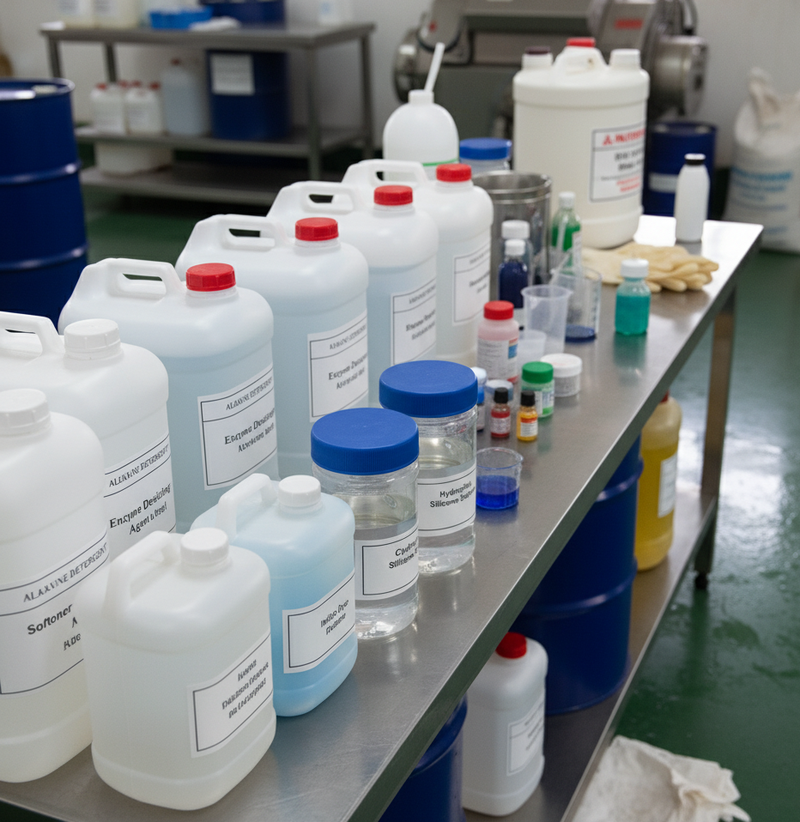
B. Bleaching Agents
1. Sodium Hypochlorite (NaOCl)
- The most commonly used option
- Usually applied in a 5–20% concentration
- Gives that classic acid wash contrast
2. Potassium Permanganate (KMnO₄)
- Stronger, more aggressive
- Creates sharper, more scattered white spots
- Used when a more intense effect is needed
C. Neutralizers
After bleaching, things need to be controlled. Otherwise, the fabric keeps reacting—and that’s not good.
- Sodium Metabisulfite: Na₂S₂O₅ → used to neutralize hypochlorite
- Oxalic Acid H₂C₂O₄ or Hydrogen Peroxide H₂O₂ → used for KMnO₄
This step sort of “stops” the process at the right time.
D. Auxiliaries
A few extra chemicals help improve the final result:
- Anti back-staining agents (Polymeric Dispersants ) → keep removed dye from redepositing
- Detergents → clean the fabric after treatment (Anionic Surfactants: R–SO₃Na), (Nonionic Surfactants : R–O–(CH₂CH₂O)nH)
Small additions, but they make the finish cleaner and more consistent.
Acid Wash Recipe
Below is a practical, factory-level recipe.
A. Stone Pre-Soaking (Very Important)
| Solution | Chemical | Dosage |
|---|---|---|
| Bleach Soak | Sodium Hypochlorite (NaOCl) | 5–10% stock solution |
| OR | Potassium Permanganate (KMnO₄) | 3–6 g/L |
| Wetting Agent ( Surfactant) | 0.5–1 g/L |
- Soak pumice stones for 2–4 hours in the bleaching solution.
- Drain and partially dry stones (stones must be moist, not dripping).
B. Acid Wash Process Recipe
| Stage | Chemical | Dosage/Parameters | Time |
|---|---|---|---|
| Acid Wash Tumbling | Bleach-Soaked Stones | 0.5–1 kg/kg garment | 5–15 min |
| Rinse | Water (H₂O) | Cold | 5–10 min |
| Neutralization | Na₂S₂O₅ or H₂O₂ | 1–3 g/L | 10–15 min |
| Softening | Silicone Softener (PDMS) | 1–2% | 10–15 min |
| Drying | Hot Air | 65–75°C | As Required |
Acid Wash – Detailed Process Flow
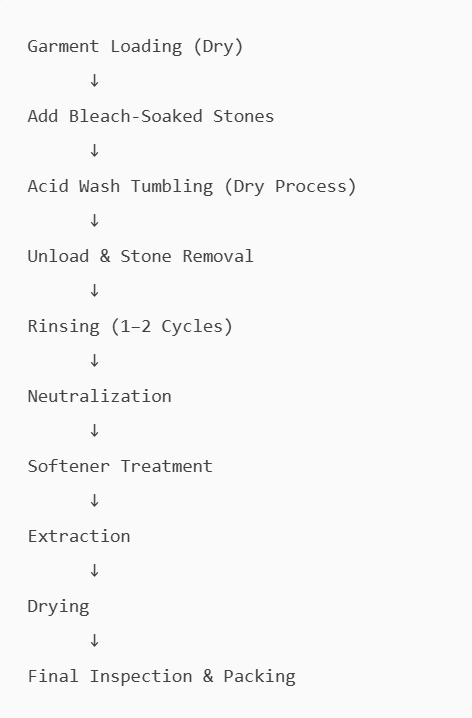
Step 1: Garment Loading
Start simple.
Load the garments into the machine—but don’t overdo it. Around 40–60% of the machine capacity works best. Too full, and the movement gets restricted. Too empty… not efficient.
Also important—keep the garments completely dry before starting. If they’re damp, the bleach won’t behave evenly. You’ll get patchy, uncontrolled results.
Step 2: Add Pre‑Soaked Bleached Stones
Next, bring in the pumice stones.
These aren’t just regular stones—they’re pre-soaked in hypochlorite or KMnO₄ solution. Slightly damp, not dripping.
Once added, they’re ready to transfer the bleach onto the fabric during tumbling. That’s where the magic begins.
Step 3: Acid Wash Tumbling
Now comes the main action.
Add the garments into the drum with the treated stones. Then let it tumble… but not too fast.
- Speed: 10–15 rpm
- Time: typically 5–15 minutes, depending on how strong you want the contrast
Indigo Dye (C₁₆H₁₀N₂O₂)
↓ Oxidation
Color Removal
↓
Acid Wash Effect
What’s happening inside is pretty rough and random.
Stones hit the garment surface → bleach gets transferred → indigo dye starts breaking down.
The result? That uneven, snow-like fading. No pattern, no symmetry. Just controlled randomness.
Step 4: Unload & Remove Stones
Once the effect is achieved—stop.
Unload carefully and separate the stones. This part gets overlooked sometimes, but it matters.
Check pockets, seams, folds… stones (or even small fragments) can get stuck. And if they stay there, they’ll cause trouble later.
Step 5: Rinsing
Now rinse. Usually 1–2 cold washes are enough.
The goal here is simple—flush out any loose bleach and residue sitting on the fabric.
Not glamorous, but necessary.
Step 6: Neutralization
This step is crucial. Skip it or mess it up, and the fabric keeps reacting.
What you use depends on the bleaching agent.
A. For Sodium Hypochlorite
- Neutralizer: Sodium Metabisulfite (Na₂S₂O₅)
- Dosage: 1–3 g/L
- Temperature: 25–40°C
- Time: 10–15 minutes
B. For Potassium Permanganate (KMnO₄)
- Neutralizer: Hydrogen Peroxide or Oxalic Acid
- Dosage: 1–2 g/L
- Temperature: 40–50°C
- Time: 10–15 minutes
Why it matters:
This step does two things:
- Stops further color loss
- Removes that unwanted yellowish tint
Basically, it locks in the look.
Step 7: Softening
After all that rough treatment, the fabric needs some recovery.
Add a silicone or cationic softener.
| Softener | Formula |
|---|---|
| Silicone Softener | (C₂H₆OSi)n |
| Cationic Softener | R₄N⁺ |
- Temperature: 30–35°C
- Time: 10–15 minutes
It won’t completely undo the harshness—but it improves hand feel. Makes the garment wearable again.
Step 8: Extraction
Quick step.
Extract excess water for about 3–5 minutes. Nothing fancy here—just prepping for drying.
Step 9: Drying
Finish it off.
- Tumble dry: 60–75°C
or - Line dry, if needed
Make sure no chemical smell is left behind. If it is, something in the process needs revisiting.
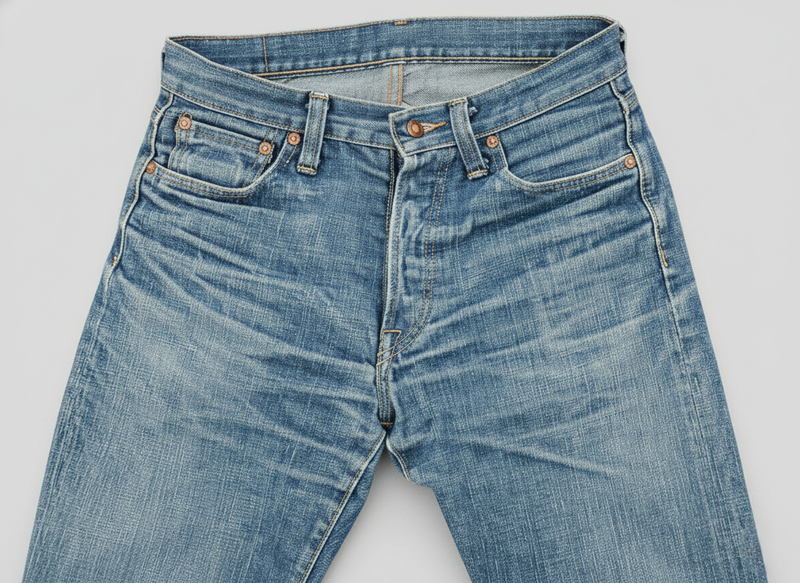
Visual Characteristics
What you get at the end is pretty distinctive:
- Strong, high‑contrast fading
- Random, uneven patterns
- That vintage, worn-out, slightly aggressive look
It’s not subtle. And it’s not meant to be.
Challenges
Acid wash looks great—but it comes with its own set of issues.
- Fabric strength tends to drop
- Machines face higher abrasion (those stones are not gentle)
- Chemical handling needs to be controlled carefully
- Wastewater treatment becomes important—can’t ignore that
So yeah… great results, but not without trade-offs.
Comparison: Enzyme Wash vs Acid Wash
| Aspect | Enzyme Wash | Acid Wash |
|---|---|---|
| Main Chemical | Cellulase Enzyme (EC 3.2.1.4) | NaOCl / KMnO₄ |
| Target | Cellulose (C₆H₁₀O₅)ₙ | Indigo Dye C₁₆H₁₀N₂O₂ |
| Appearance | Natural Fading | High-Contrast Fading |
| Hand Feel | Very Soft | Moderately Soft |
| Fabric Damage | Low | Medium–High |
| Sustainability | Better | Lower |
| Process Control | Easier | Less Predictable |
| Fashion Impact | Classic | Bold & Trend-Driven |
Final Thought
Acid washing isn’t just another denim finish—it’s one of those techniques that leans into imperfection. And honestly, that’s where its charm comes from.
You start with something simple: denim, pumice stones, a strong oxidizing agent. Then the process takes over. The stones hit, roll, scrape… bleach transfers in bits and patches. Indigo fades where it wants to. Not clean. Not even. Never predictable.
That’s the whole idea.
From the acid wash recipe to the full acid wash process flow, everything is set up to guide the result—but not fully control it. You choose your chemicals, adjust your timing, manage the neutralization… and still, each garment comes out a little different. Some sharper, some softer. Some with bold white contrasts, others with more subtle cloudy effects.
And yes, it comes with trade‑offs. Fabric strength drops a bit. Machines take a beating. Chemical handling needs care, no shortcuts. Even wastewater needs attention. It’s not the easiest process out there.
But when it works—it really works.
Those acid wash effects—the high‑contrast fading, the random patterns, that worn, almost rebellious look—they’re hard to replicate with anything else. Enzyme wash might be softer, cleaner, more controlled. But acid wash? It has attitude.
In the end, it’s a balance. A mix of chemistry, mechanics, and just a bit of unpredictability.
Not perfect. Never meant to be.