Color is one of the first things people notice about a garment. A fabric can have excellent quality, the construction can be perfect and the design can be attractive, but if the shade is not right, the buyer may still reject the product.
That is why color development is such an important part of textile manufacturing.
Before a factory starts dyeing thousands of kilograms of fabric, it needs to be reasonably sure that the final shade will match the buyer's approved standard. This is where lab dip development comes in.
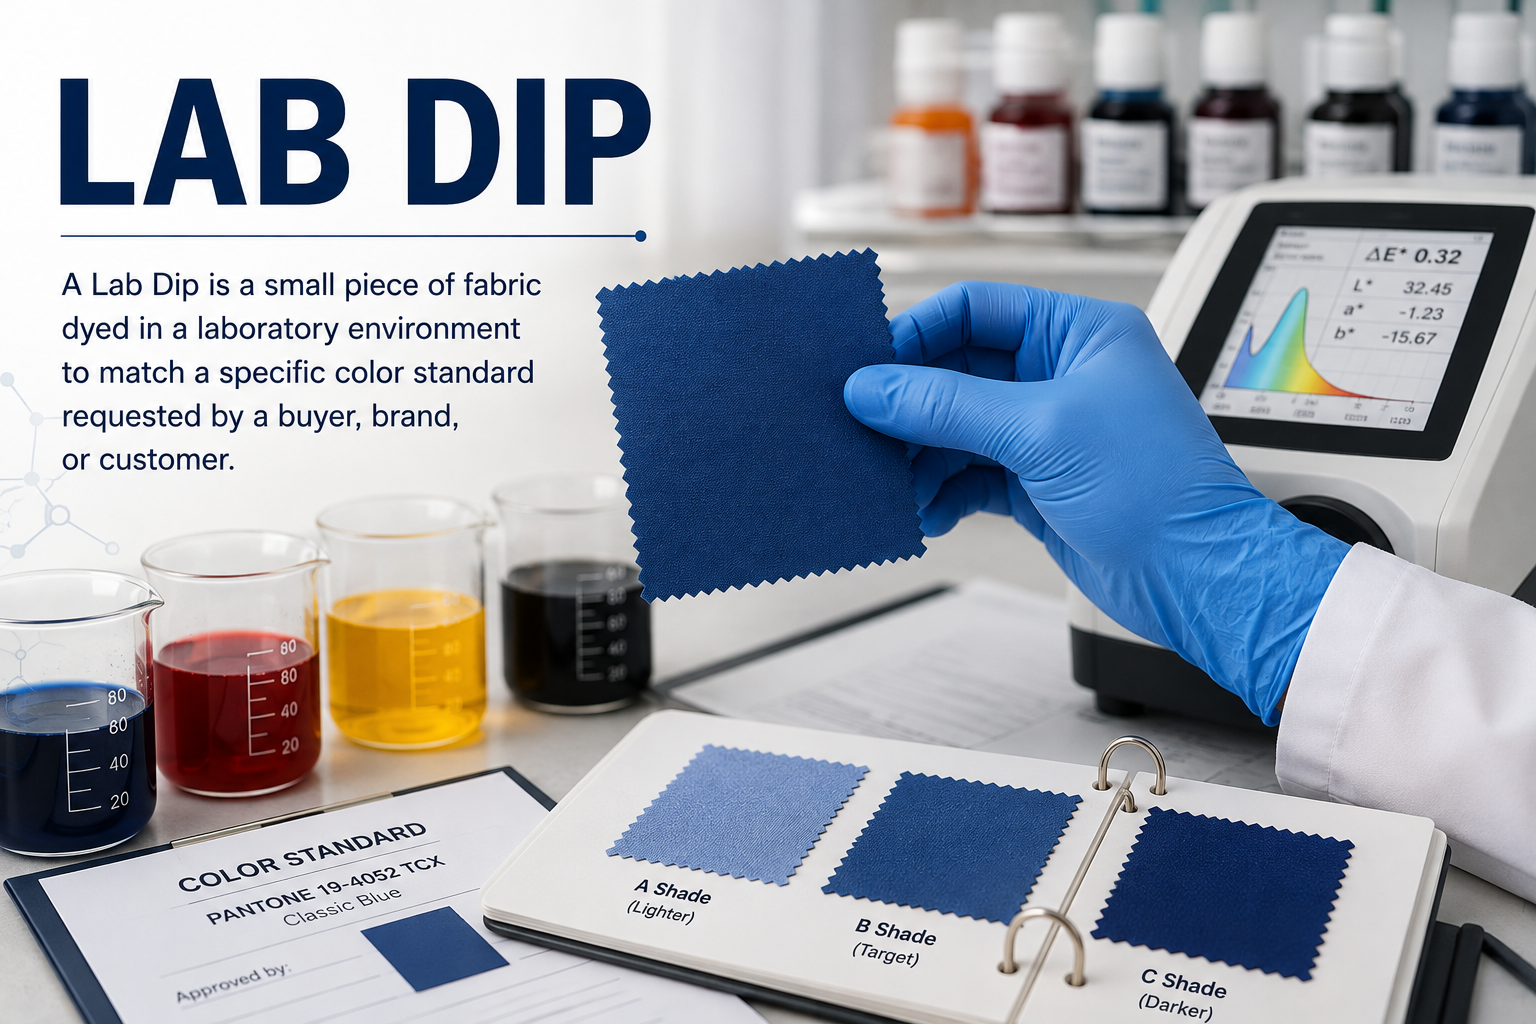
A lab dip is essentially a small-scale trial dyeing. It gives the dyeing team an opportunity to develop and adjust a color under controlled laboratory conditions before the same concept is transferred to bulk production.
It sounds simple, but getting a color right is not always straightforward. The same recipe can behave differently depending on the fabric, dye, water quality, machine conditions and finishing process. A successful lab dip therefore does much more than produce a small piece of colored fabric. It reduces the risk of making an expensive mistake at bulk scale.
What Exactly Is a Lab Dip?
A lab dip is a small fabric sample dyed in a laboratory with the objective of matching a specific color standard provided by a buyer or brand.
The standard may come in several forms. It could be a Pantone reference, a physical fabric swatch, a color card, an existing garment or a brand-specific color standard.
The laboratory's job is to develop a dye recipe that produces the closest possible match to that reference.
Once the lab is satisfied with the result, the sample is normally submitted to the buyer. The buyer compares it with the original standard and either approves it or asks for another submission.
After approval, the lab dip becomes an important reference for the bulk dyeing process.
In simple terms, you can think of a lab dip as a small-scale preview of what the bulk dyeing should look like.
Why Lab Dips Are Important in Textile Manufacturing
It is easy to underestimate the importance of a small fabric swatch. After all, a lab dip might only be a small piece of material.
The financial risk it helps control, however, can be much larger.
Imagine a factory dyes several thousand kilograms of fabric and discovers afterward that the shade is too yellow, too dark or simply outside the buyer's tolerance. Correcting that problem at bulk scale can involve additional chemicals, water, energy, labor and processing time. In some cases, the fabric may even become unusable.
A good lab dip process helps avoid that situation.
It provides:
- A chance to check the shade before bulk production
- Lower risk of expensive bulk reprocessing
- Better communication between the factory and buyer
- A confirmed reference for production
- Better shade consistency between batches
- Less material, chemical and water waste
- Fewer production delays caused by color problems
This is why many dye houses treat lab dip approval as a critical production gate rather than simply another laboratory activity.
How the Lab Dip Process Actually Works
The exact procedure differs from one dye house to another, but the overall process usually follows a similar path.
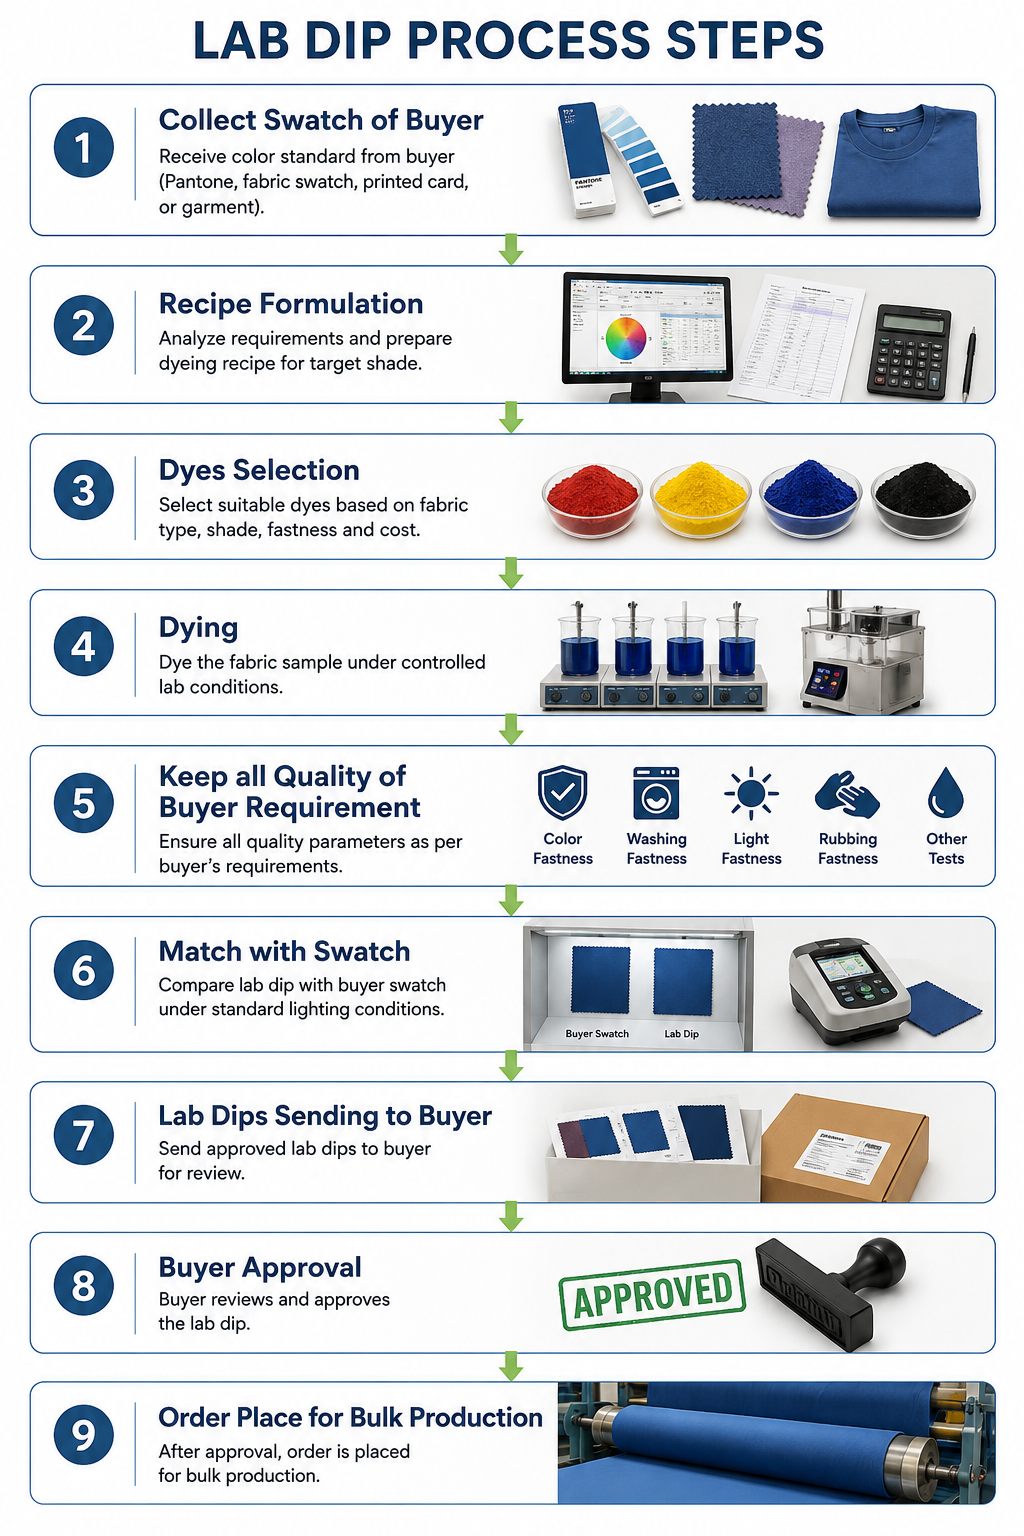
1. Receiving the Buyer's Color Standard
Everything starts with the target color.
The buyer may provide a physical swatch, Pantone reference, color chip, garment sample or another approved standard. Along with the color, the laboratory needs to understand the fabric specification.
For example, technicians may need information about:
- Fiber composition
- Fabric construction
- Fabric weight
- Intended end use
- Dyeing method
- Required colorfastness
- Finishing process
- Buyer's shade tolerance
This information matters because color does not exist independently of the fabric. The same dye recipe will not necessarily produce the same visual result on cotton, polyester and a cotton-polyester blend.
2. Developing the Dye Recipe
Once the target is understood, the laboratory starts developing a recipe.
The technician determines which dyes are required and in what proportions. Dye concentration, fabric weight and the expected depth of shade all have to be considered.
Many modern textile laboratories also use computerized color-matching systems at this stage. These systems can compare measured color data and suggest dye combinations that are likely to move the sample closer to the target.
The software makes the process faster, but experienced colorists still play an important role. A computer can suggest a recipe; someone still needs to understand how that recipe is likely to behave during actual dyeing and finishing.
3. Selecting the Appropriate Dyes
The dye selection depends heavily on the fiber.
Different fibers require different dye classes because their chemical structures and dye affinities are not the same.
| Fiber | Common Dye Type |
|---|---|
| Cotton | Reactive dyes |
| Polyester | Disperse dyes |
| Nylon | Acid dyes |
| Wool | Acid dyes |
| Viscose | Reactive dyes |
| Acrylic | Cationic dyes |
A shade may require a combination of several dyes. Small changes in the ratio can shift the final color noticeably.
This is where the experience of the laboratory team becomes particularly valuable. The objective is not simply to produce a visually similar shade. The selected dyes also need to provide suitable fastness, cost and production performance.
4. Small-Scale Dyeing
The selected recipe is then tested on a small fabric sample.
Laboratories may use beaker dyeing equipment, infrared laboratory dyeing machines, mini-jets or other equipment designed to reproduce important aspects of the production process.
It is common to prepare several versions of a color during development rather than relying on one attempt.
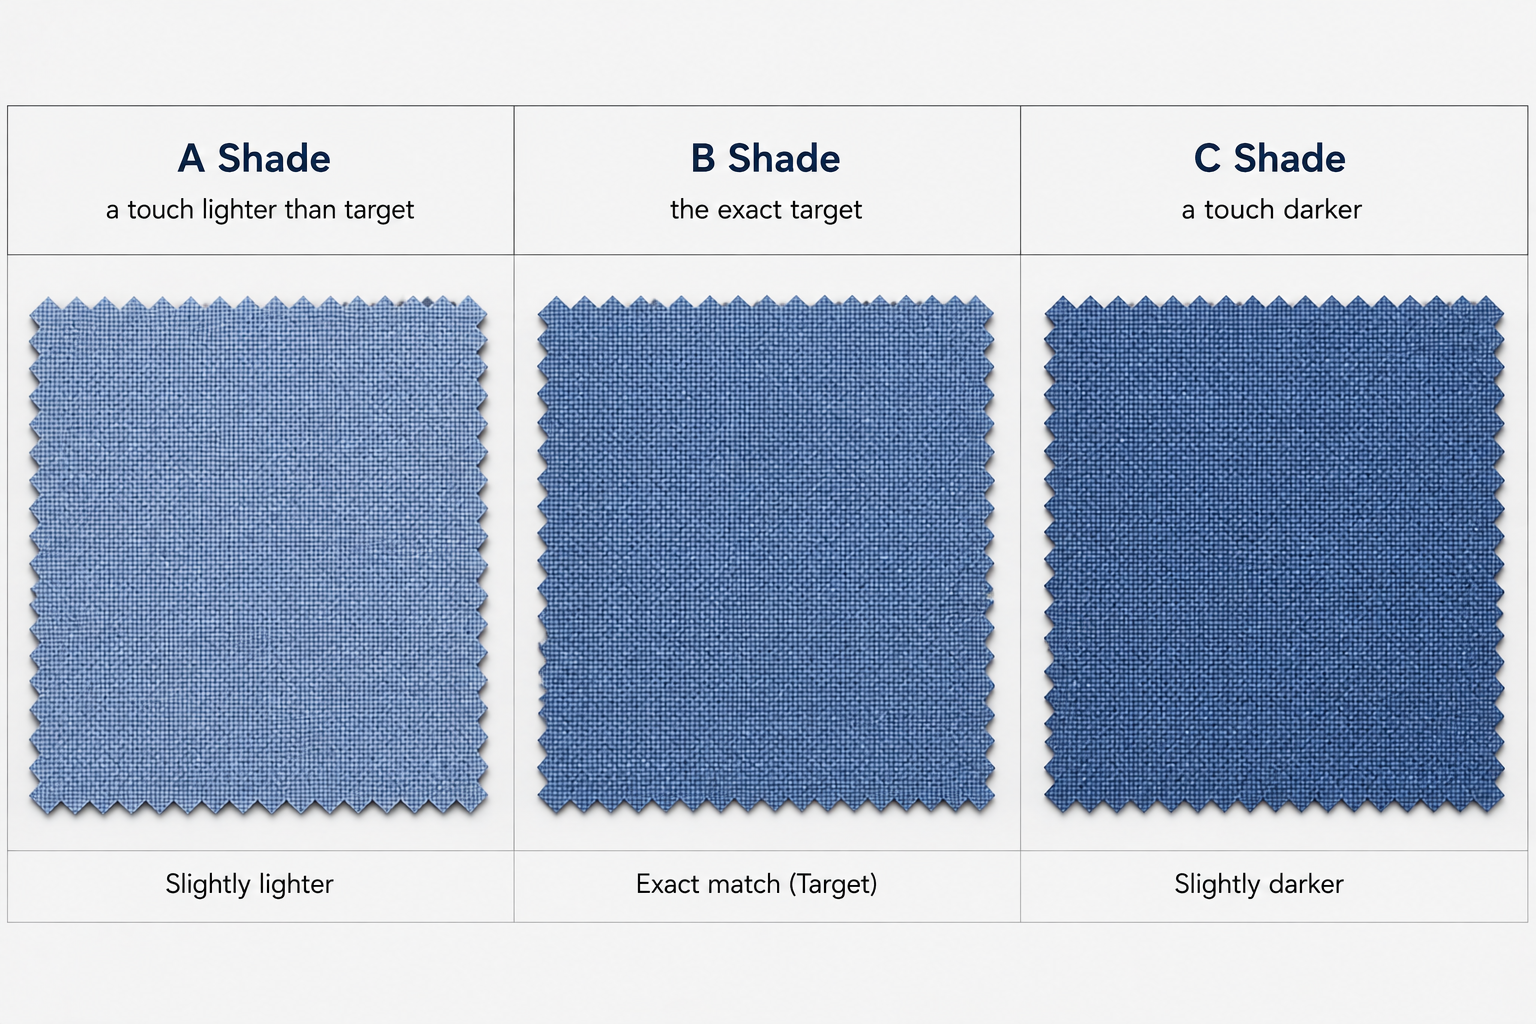
For example:
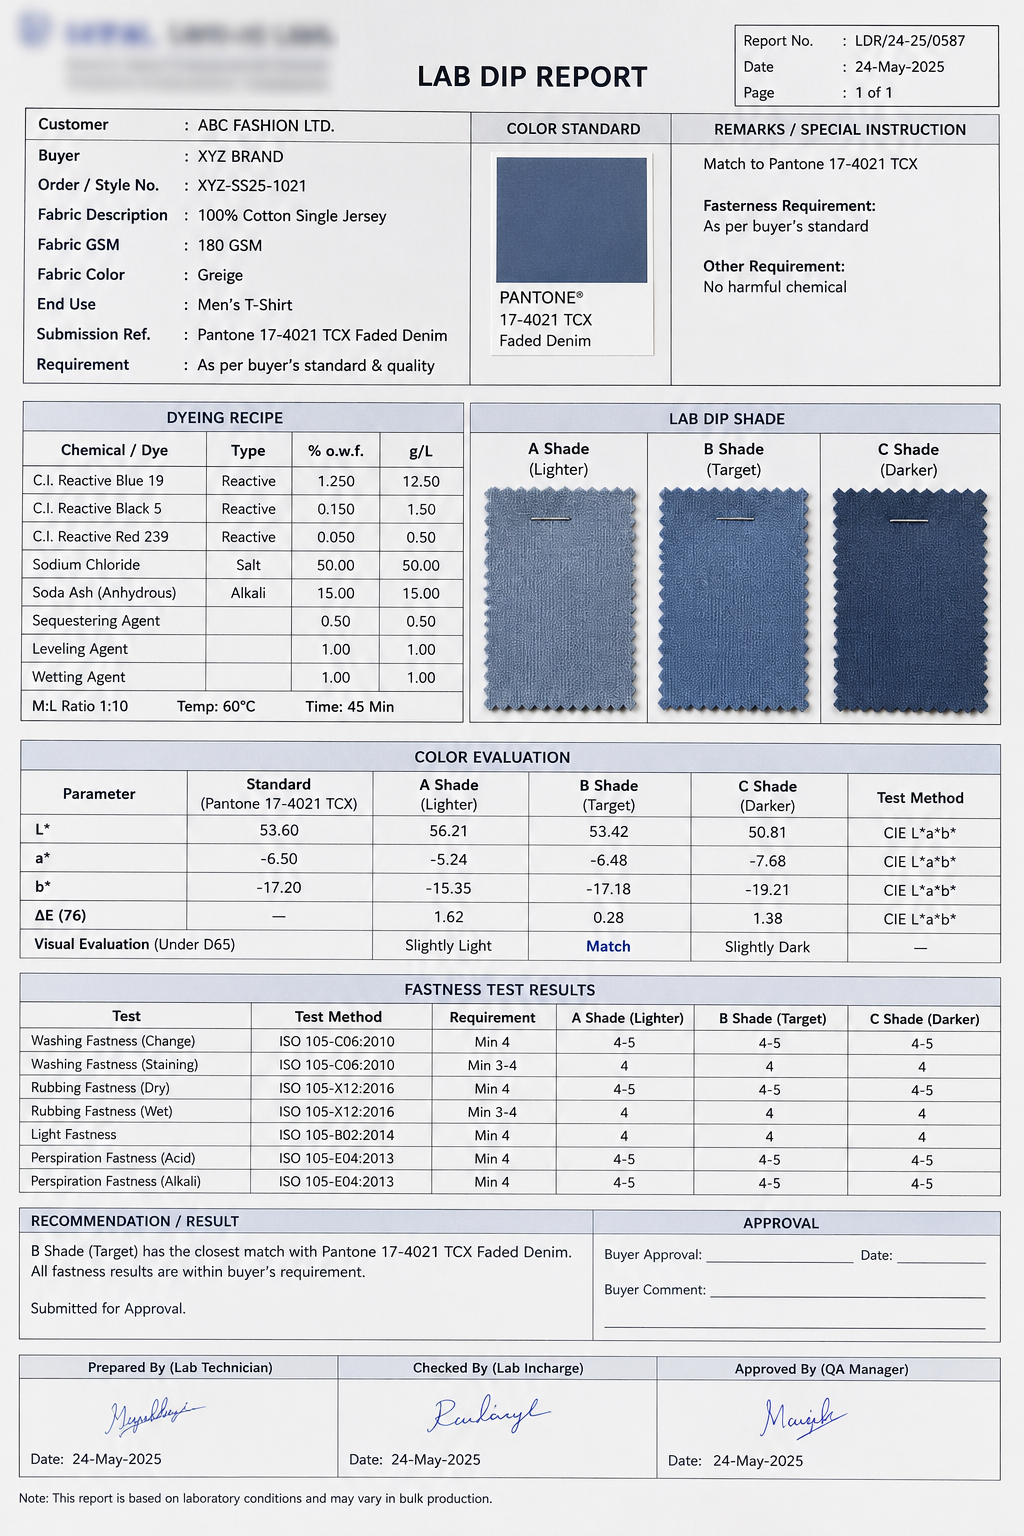
- A shade: slightly lighter than the target
- B shade: closest to the target
- C shade: slightly darker than the target
Providing several options can sometimes reduce the number of submissions required before the buyer is satisfied.
5. Checking the Buyer's Requirements
Matching the color is only part of the job.
The laboratory also needs to check whether the developed sample meets the other requirements specified by the buyer.
Depending on the product, this could include colorfastness, finishing requirements and other quality parameters.
A sample that looks perfect but fails an important fastness requirement cannot be considered a successful lab dip.
6. Evaluating the Color
Once the samples have been dyed, the laboratory evaluates them against the original standard.
This normally involves two approaches.
The first is visual assessment by a trained colorist. Human visual judgment remains important because the final product will ultimately be seen by people.
The second is instrumental measurement using a spectrophotometer.
A spectrophotometer provides numerical color information, including values such as:
- ΔE — overall color difference
- L* — lightness
- a* — red-green direction
- b* — yellow-blue direction
These measurements give the dye house and buyer a common technical language for discussing color differences.
The instrument does not completely replace human judgment, though. Lighting conditions, surrounding colors and visual perception can all influence how a shade appears.
7. Sending the Lab Dip to the Buyer
After the laboratory completes its internal evaluation, the developed samples are submitted to the buyer.
Depending on the company's system, approval may be handled through physical samples, digital approval platforms, quality portals or laboratory reports.
The important point is that the buyer gets an opportunity to compare the developed shade with the original standard before bulk production starts.
8. Buyer Approval
The buyer may respond in several ways.
| Status | Meaning |
| Approved | The shade can move toward bulk production |
| Approved with Comment | The shade is accepted with specific observations |
| Resubmit | The color needs further adjustment |
| Hold | The buyer has not yet made a final decision |
If the sample is rejected or requires adjustment, the laboratory modifies the recipe and develops another submission.
This cycle can sometimes happen several times, particularly when the buyer has a tight color tolerance.
9. Moving to Bulk Production
Once the lab dip receives approval, the approved shade becomes the production reference.
The dyeing team can then use the approved recipe and sample as a guide when preparing the bulk dyeing process.
However, approval does not mean that bulk production will automatically be identical to the lab sample. Scale introduces additional variables, which is why bulk dyeing still requires careful monitoring.
Why Lighting Changes Everything
One of the more interesting parts of textile color matching is that a fabric does not necessarily look the same under every light source.
A shade that looks correct under daylight may appear different under artificial lighting in a retail store.
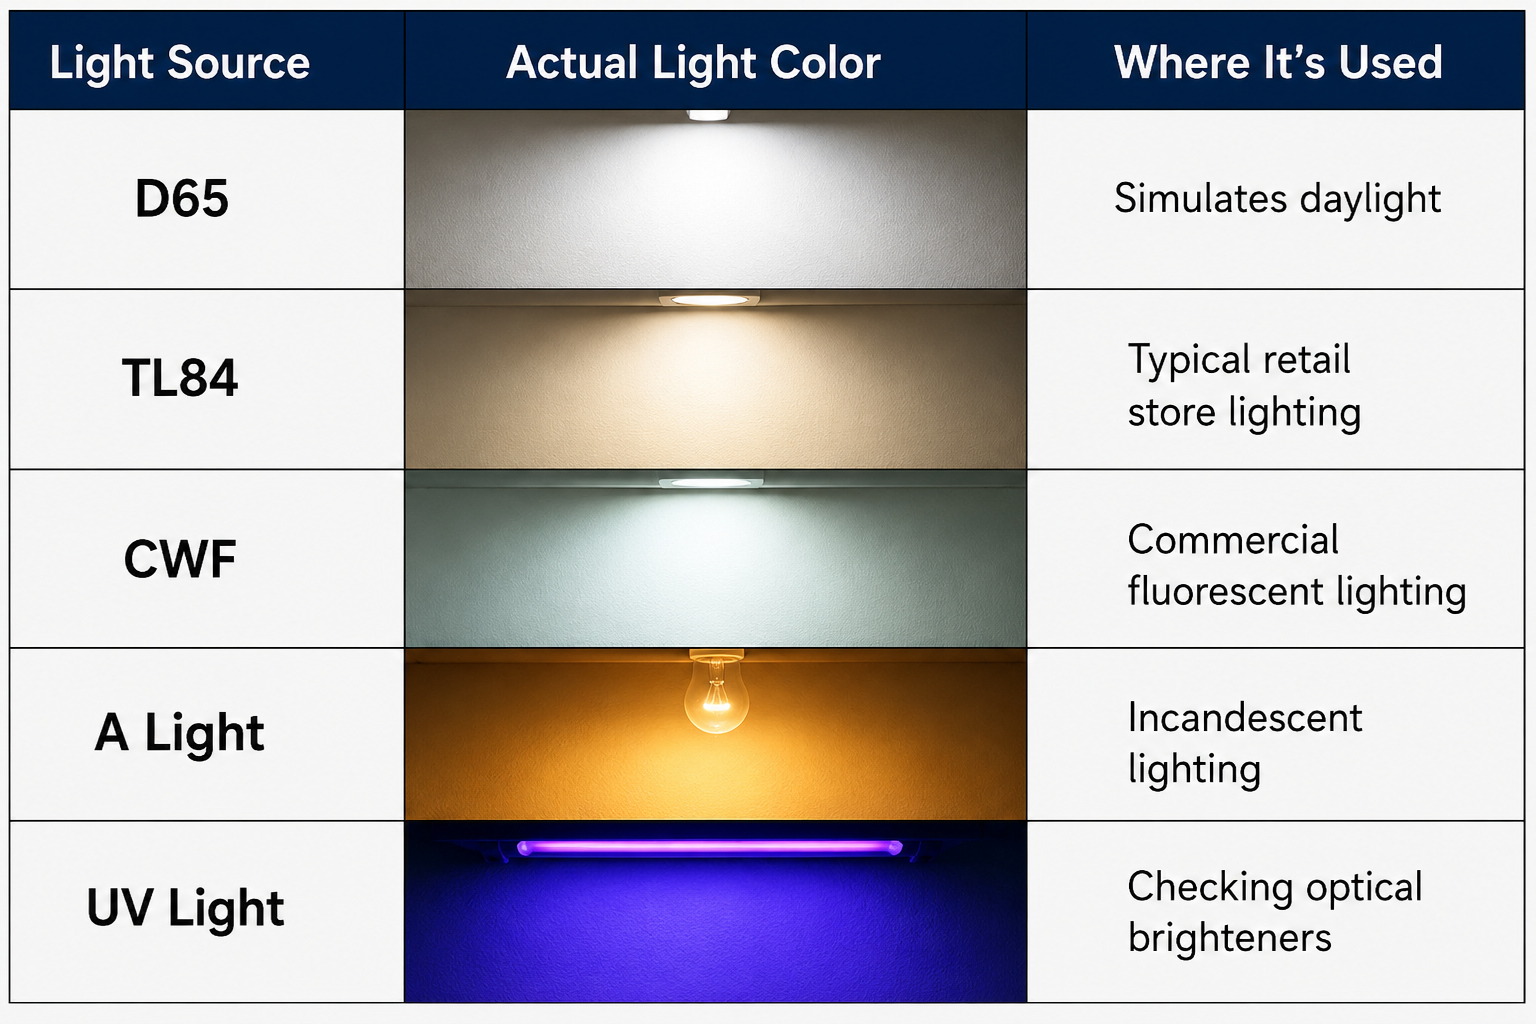
For this reason, textile laboratories commonly evaluate colors under standardized light sources such as:
| Light Source | Typical Purpose |
| D65 | Simulated daylight |
| TL84 | Retail/store lighting |
| CWF | Commercial fluorescent lighting |
| A | Incandescent-type lighting |
| UV | Evaluation of optical brightening effects |
This is particularly important for garments that will be sold in environments with different lighting conditions.
What Is Metamerism?
This brings us to a common problem in color matching: metamerism.
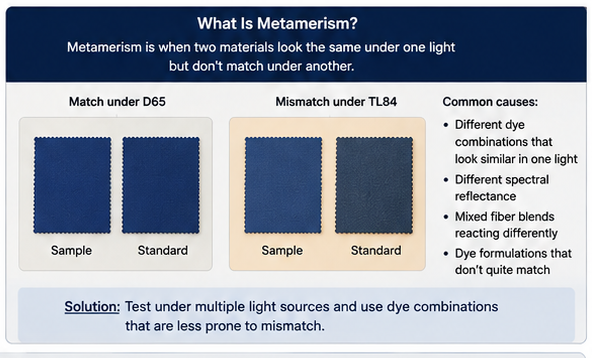
Metamerism occurs when two materials appear to match under one light source but look different under another.
For example, a lab dip and a buyer's standard might look almost identical under daylight. Put them under store lighting, however, and the difference suddenly becomes obvious.
This can happen because the two materials have different spectral reflectance characteristics even though they appear similar under one particular light.
Possible causes include:
- Different dye combinations
- Different spectral reflectance curves
- Fiber blend differences
- Different dye formulations
- Differences in the original color standard
Testing under multiple light sources helps identify these problems before production.
What Can Affect a Lab Dip?
Developing a reliable lab dip involves controlling much more than the dye recipe.
The Fabric
Fiber type has a major influence on the final shade.
Cotton, polyester, nylon and blended fabrics do not absorb or reflect color in the same way. Even two fabrics made from the same fiber can produce slightly different visual results.
Fabric Construction
Fabric construction also matters.
Single jersey, interlock, rib, poplin and twill can reflect light differently. As a result, two fabrics dyed using an identical recipe may not appear exactly the same.
Water Quality
Water is another variable that can easily be overlooked.
Hardness, pH, iron content and other water characteristics can influence dyeing behavior. Poor water quality can contribute to uneven dyeing or inconsistent fixation.
For a dye house, controlling the quality of process water is therefore part of maintaining shade consistency.
Dyeing Conditions
The dye bath itself contains many variables.
Temperature, time, liquor ratio, salt, alkali and chemical dosage can all affect the final shade.
Sometimes a relatively small process change can produce a visible difference in color.
Finishing
Dyeing is not necessarily the last stage affecting appearance.
Processes such as:
- Silicone softening
- Enzyme washing
- Brushing
- Peaching
- Heat setting
- Calendaring
can change the way a fabric reflects light and therefore alter how its color appears.
This is one reason experienced laboratories try to reproduce the relevant finishing conditions when evaluating a lab dip.
Common Problems During Lab Dip Development
Lab dip development rarely goes perfectly every time.
Some of the common problems include:
- The first sample does not match the buyer's standard
- A shade looks correct in the laboratory but behaves differently in bulk
- Several rounds of resubmission are required
- The buyer has a very narrow shade tolerance
- Different yarn or fabric lots absorb dye differently
- Laboratory conditions cannot be reproduced perfectly on the production machine
- Finishing changes the appearance of the approved shade
These problems are not necessarily signs of poor laboratory work. Color development involves several interacting variables, and some differences only become obvious when the process is scaled up.
Lab Dip vs. Bulk Dyeing: Not the Same Thing
A laboratory sample and a bulk dyeing operation are fundamentally different in scale.
| Factor | Lab Dip | Bulk Dyeing |
| Sample size | Small | Large |
| Equipment | Laboratory machine | Industrial machine |
| Process control | Highly controlled | More variables |
| Cost of failure | Relatively low | Potentially very high |
| Production risk | Low | Significant |
This is why an approved lab dip should be treated as a production reference, not as an absolute guarantee that every kilogram of bulk fabric will look identical.
The dyeing team still needs to control production parameters and monitor the shade during bulk processing.
Why Spectrophotometers Matter So Much
Modern textile color laboratories rely heavily on spectrophotometers because they provide objective measurements.
Instead of saying, "This sample looks slightly darker," a colorist can compare measurable values and identify the direction and magnitude of the difference.
The main parameters commonly used include:
| Parameter | What It Indicates |
| ΔE | Overall color difference |
| L* | Lightness or darkness |
| a* | Red-green direction |
| b* | Yellow-blue direction |
This numerical information makes communication easier between the laboratory, production team and buyer.
Still, measurement should support visual evaluation rather than completely replace it. The final garment is a physical product, and human perception remains important.
The Sustainability Side of Lab Dip Development
There is also an environmental benefit to getting the shade right early.
Every unsuccessful trial consumes resources.
If a laboratory can reach the correct shade in fewer attempts, it reduces:
- Water consumption
- Dye and chemical usage
- Energy consumption
- Fabric waste
- Reprocessing requirements
The same principle becomes even more important in bulk production.
A wrong bulk shade can mean the fabric needs to be reprocessed, which may require another round of water, chemicals, energy and labor.
This is one reason the textile industry increasingly focuses on Right First Time (RFT) production.
The idea is straightforward: instead of accepting repeated trial and error as normal, the process should be designed so that the correct result is achieved as early and consistently as possible.
Best Practices for Better Lab Dip Results
Dye houses that consistently achieve good shade approvals generally have a few things in common.
Standardize laboratory procedures
Lab procedures should be documented and followed consistently. Small variations between technicians can otherwise introduce unnecessary differences.
Calibrate color measurement equipment
Spectrophotometers and other measurement equipment should be checked and calibrated regularly.
Evaluate under multiple light sources
Checking only one lighting condition can allow metamerism problems to go unnoticed.
Maintain a good recipe database
Previous recipes can provide valuable information when similar shades are developed in the future.
Train experienced colorists
Color matching is both technical and practical. Experience helps technicians understand how a shade is likely to behave beyond the numbers on a computer screen.
Control laboratory conditions
Temperature, humidity, water quality and other laboratory conditions should be kept as consistent as possible.
Validate recipes at production scale
A recipe that works beautifully in a beaker or laboratory machine still needs to be proven on the production machine.
Final Thoughts
Lab dip development may not be the most visible part of textile manufacturing, but it has a major influence on what eventually reaches the customer.
It is the point where a buyer's color expectation is translated into an actual dyeing recipe.
The process involves much more than mixing dyes and producing a small sample. Fabric type, construction, water quality, dye selection, temperature, time, finishing and lighting can all influence the final result.
That is why successful color matching requires both technology and experience.
Spectrophotometers and computerized color-matching systems have made the process faster and more measurable, but skilled colorists remain important for interpreting results and understanding how laboratory conditions will translate to production.
Most importantly, a well-controlled lab dip process reduces risk. It allows the factory to discover problems when they are still small and inexpensive to correct rather than after thousands of kilograms of fabric have already been dyed.
For textile manufacturers, the principle is simple:
Get the color right in the laboratory before you try to get it right in bulk.
A few grams of dye and a small fabric sample can prevent thousands of dollars in wasted material, chemicals, energy and production time.